How to Properly Bathe Your Horse: A Step-by-Step Guide
Published on: January 13, 2026 | Last Updated: December 8, 2025
Written By: Henry Wellington
Hello fellow equestrians. Does the thought of bathing your horse fill you with dread, picturing a skittish dance, flying suds, and a soaked you? You might worry about missing a spot of dirt before a show or, more importantly, causing your horse stress or a chill.
This guide will walk you through a calm, effective process. We will cover:
- Assembling a simple kit of horse-safe products you likely already have.
- Preparing your horse in the cross-ties to build confidence before the water even flows.
- Wetting and soaping techniques that keep water out of ears and eyes.
- The critical rinse cycle to avoid itchy, irritated skin.
- Safe drying practices that ward off chills, even for your senior horse.
I have managed barns for years, and I have bathed everything from rain-scared Thoroughbreds to mud-rolling ponies, always putting the horse’s comfort first.
Gather Your Gear: The Bathing Toolkit
Essential Supplies List
Scrambling for a sponge while your horse dances sideways is a recipe for a chaotic bath. I keep my kit in a dedicated bucket by the wash rack, a habit formed after Rusty once decided to taste-test a bottle of conditioner. Having everything assembled means you can focus on your horse, not your search.
- Equine-Specific Shampoo: Human shampoo is too harsh for a horse’s skin pH. Using it is a fast track to a dull, itchy coat.
- Equine Conditioner or Detangler: Crucial for manes and tails to prevent breakage. A slick, conditioned tail brushes out without a fight.
- Wash Mitt or Soft Sponges: A mitt covers large areas quickly and feels like a reassuring rub to the horse.
- Rubber Curry Comb: Your primary tool for pre-bath loosening of dirt and mud. The deep, circular motion gets the coat ready.
- Sweat Scraper: A metal or plastic scraper removes the bulk of the water, cutting drying time in half.
- Hose with Adjustable Nozzle: A gentle “shower” setting is ideal. A hard jet will startle your horse and drive dirt deeper.
- Two Buckets: One for your shampoo mix, one for clean rinse water. This avoids contaminating your clean water supply.
- Chamois or Microfiber Towels: Perfect for gently drying the face, ears, and legs where a scraper can’t go.
- Tail Tie or Holder: A simple piece of binder twine to hold the tail up and out of the way until you’re ready to wash it.
Investing in horse-formulated products is a direct act of care. Your horse’s skin barrier is delicate, and the right tools prevent irritation and promote a healthy, gleaming coat after every wash.
Choosing the Right Shampoo and Conditioner
The array of bottles can be overwhelming, but think about your horse’s current needs. For a basic cleanse, a general all-purpose equine shampoo works, but I keep a clarifying formula on hand for Pipin after he’s found a particularly artistic mud wallow.
Horses with dry or sensitive skin, like Luna, do best with a moisturizing or oatmeal-based shampoo. Conditioner is not just for show horses. Applying a light conditioner to the mane and tail after every wash protects the hair shaft, reducing splits and making your next grooming session peaceful. Skip the human products every time; they strip natural oils and can cause flaking.
Set the Scene: Horse and Area Preparation
Securing a Safe Washing Area
Safety is the invisible first step in any good bath. Always choose a level, non-slip surface like rubber mats or textured concrete to prevent the heart-stopping slide of a panicked hoof. If you must tie your horse, use a quick-release knot and a solid tie ring, never a fence board.
I never bathe a green or nervous horse alone; having a calm helper to hold Luna makes all the difference. Check your water temperature before it touches the coat. Lukewarm water is the gold standard-test it on your inner forearm to ensure it’s comfortable, not shocking or scalding. A pleasant temperature keeps your horse relaxed and cooperative.
Pre-Bath Grooming Steps
Bathing over caked-on dirt is just moving mud around. Start with a vigorous session using your rubber curry comb in deep circles to lift every bit of dried sweat and dirt to the surface of the coat. This is also your chance for a hands-on health check.
Run your hands over the body as you brush, feeling for any new lumps, cuts, or sensitive areas. Pay special attention to the girth area and behind the elbows. Finding a hidden scrape now means you can avoid shampooing it and causing a sting, which builds your horse’s trust for next time. For a full bath, loosely tie up the tail to keep it clean and manageable until you’re ready to focus on it.
The Bathing Process: A Step-by-Step Walkthrough
Here is where we get our hands wet and transform your dusty companion into a gleaming showpiece. A good bath is a bit like a dance; you lead, but you must listen and feel your partner’s rhythm. A rushed job leaves soap on the skin and distrust in the heart.
Step 1: Wetting the Coat Thoroughly
Start with the water at a cool, comfortable temperature-never ice cold or piping hot. Begin by wetting the hooves and lower legs. This gets the horse used to the sensation without a sudden shock to their body. Always start low and move upward, following the direction of the hair growth with your spray.
Work your way up each leg, over the barrel, and across the back. Use a gentle, wide spray pattern, not a hard, pinpoint jet that can feel like needles. Save the face, ears, and head for very last, if you wash them at all. Many horses, like my sensitive Luna, find water on the face startling. A damp sponge works better there.
Step 2: Applying and Working in Shampoo
Dilute your shampoo in a bucket of water or apply it to a wet bathing mitt. This helps it spread evenly and prevents you from dumping concentrated soap in one spot. I work in clear sections: left shoulder, left barrel, left hindquarter, then repeat on the right.
Use firm, circular motions to work the suds down to the skin. This massages the muscles and lifts dirt effectively. For extra muddy areas, like Rusty’s perpetually filthy white socks, apply a little extra diluted shampoo directly and use a soft rubber curry in your circular motions. Scrubbing with intention feels good to them and gets the job done right.
Step 3: The Critical Rinse
This step is non-negotiable. Soap residue is a top cause of itchiness, dry skin, and dull coats. Rinse each section you soaped until the water runs completely clear. Use your free hand to squeeze the hair and feel for slickness.
Pay special attention to tricky spots: under the belly, between the front and hind legs, and around the girth area. Run your hand firmly against the grain of the hair to help flush out suds. A well-rinsed coat will “squeak” when you run your fingers over it. If you think you’ve rinsed enough, rinse for two more minutes-your horse’s skin will thank you.
Step 4: Conditioning Mane and Tail
After the body is fully rinsed, apply a quality horse conditioner to the mane and tail. Work it through the full length with your fingers, gently detangling any knots from the bottom up. Let it sit for a few minutes to absorb while you tidy your bathing area.
Rinse the conditioner out thoroughly with cool water. Once the bath is complete and your horse is safely tied, I follow up with a leave-in detangler spray. Spray it on, then use your fingers or a wide-toothed comb to work through the hair, making your next brushing session a breeze instead of a battle. On Pipin’s thick, coarse mane, this step is the difference between a five-minute groom and a twenty-minute wrestling match.
Focus on the Details: Mane, Tail, and Hoof Care
Washing the Mane and Tail Without Stress
The mane and tail are your horse’s signature locks, but washing them can turn into a tug-of-war if you’re not careful. Always approach this task with the same patience you’d use for braiding and pulling; rushing leads to pulled hair and a frustrated horse. I learned this with Luna, my sensitive Thoroughbred, who would toss her head at the first hint of rough handling. Now, I treat every wash like a gentle grooming session.
Start by thoroughly wetting the mane and tail with lukewarm water, using your hand to guide the flow and prevent a shocking cold splash. For the face, bypass the hose entirely and use a soft, water-heavy sponge to wipe down the forehead, cheeks, and muzzle. This keeps water out of the ears and eyes, which many horses find alarming. Rusty, for instance, will gladly take a treat but will pin his ears if water drips near his ear canal.
Apply a equine-safe shampoo diluted in water, working it through with your fingers, not your nails. For tangled tails, follow this simple process:
- Spray a leave-in conditioner or detangler onto the lower third of the tail.
- Using your fingers, gently separate the biggest knots before you even pick up a brush.
- Start brushing from the very bottom tips, working upward in small sections as the tangles release.
A wide-toothed mane comb is gentler on wet hair than a brush and helps prevent breakage. Rinse until the water runs completely clear-any leftover shampoo attracts dirt and can itch. Finally, squeeze excess water from the tail with your hands; avoid wringing, which damages hair fibers.
Incorporating Hoof Care into Bath Time
Hooves are often an afterthought during a bath, but this is a prime opportunity for a health check. Always wash the hooves last with a separate, designated brush or sponge to avoid contaminating the body with dirt from the feet. I keep a cheap, stiff-bristled brush solely for this job-it lives with the hoof pick.
After soaping and rinsing the legs, lift each hoof and scrub the sole, frog, and hoof wall with your dedicated brush and clean water. The clean, wet hoof gives you a perfect picture to spot early signs of thrush, cracks, or bruises you might miss when it’s dry and dirty. Look for a black, sticky discharge in the frog grooves or any unusual splits in the wall.
Make this a standard part of your rinse routine:
- Scrub the hoof thoroughly to remove packed mud or manure.
- Rinse it completely, feeling for any loose pieces of hoof wall.
- Set it down and visually inspect the clean sole before moving to the next foot.
This practice saved Pipin from a budding case of thrush last spring; the wet frog revealed a problem I’d overlooked during dry pickings. Integrating this quick inspection adds only a minute per hoof but significantly boosts your preventative care. Finish by ensuring the legs and hooves are drip-free before you lead your horse to a dry, safe area.
After the Bath: Drying and Cooling Down
The splash party is over, and now you’re left with a very wet horse. How you handle these next minutes directly impacts their comfort and health, so don’t rush the process. I learned this after bathing Luna on a deceptively warm afternoon; a breeze picked up, and her damp skin got goosebumps I could see from the fence line.
Effective Drying Techniques
Your goal is to move water from the horse’s coat to your tools, not just smear it around. Begin every dry-down with a sweat scraper-it’s your most efficient weapon against sopping wet fur. I start at the neck and pull firmly down toward the hooves, listening to the satisfying schluck of water hitting the ground.
- Start with the Scraper: Use long, confident strokes to channel water off the back and barrel. Be gentle over bony spots like the spine and hips. With Rusty, I make a game of it, and he usually leans into the pressure.
- Follow with a Chamois: A soft chamois towel soaks up residual moisture like a sponge. I keep one dedicated for the barn; its plush touch is perfect for Luna’s sensitive grey skin.
- Absorbent Liners are a Stable Hack: Old, clean bath towels or purpose-made equine liners work wonders for a final polish. I rub Pipin down with these until his black coat shines, and he pretends to groom me back.
Resist the urge to turn them out while damp. Turning a wet horse loose, even on a sunny day, risks chills and turns your clean animal into a dirt magnet. I made that mistake once, and Rusty celebrated his freedom with an enthusiastic roll in the only dusty spot in the pasture.
Ensuring Proper Cool-Down
Drying isn’t done until the skin is dry, not just the topcoat. Walk your horse on a dry, shaded path until you can run your hand against the grain and feel no cool dampness. This is especially vital when the air has a nip to it.
A wool or acrylic cooler sheet is your best friend in cooler weather. The right cooler wicks moisture while trapping just enough body heat to speed evaporation without causing a sweat. Drape it loosely over the horse’s back and walk on. This is part of a proper cool-down after exercise, helping muscles relax and heart rate settle. Keep the walk light and steady for several minutes to finish cooling down.
Keep the walk leisurely and let them stretch their neck. This quiet time is a chance to decompress for both of you, turning a chore into a connection. I often use this cool-down stroll to hand-graze Pipin on a patch of clean grass, which keeps his busy mind occupied and rewards his patience.
Bathing in Cool or Cold Weather
Adapting Your Routine for Safety
Your Cold-Weather Game Plan
Bathing when the air has a bite requires a shift in mindset. I think of Luna’s fine coat and how quickly she gets goosebumps. The primary goal is no longer just cleanliness, but preventing a dangerous chill that can stiffen muscles and compromise health.
Your first and most important change is water temperature. I always use warm water, heated from a bucket or with an in-line heater if your barn has one. Lukewarm water is comforting and prevents the shock of cold that makes a horse tense and resistant.
Location is everything. Never bathe in an open, windy field. I always use a sheltered wash stall or the lee side of the barn. A simple barrier from the wind makes the difference between a manageable chore and a risky situation.
Here are the key adaptations to make immediately:
- Switch to warm water and test it on your wrist first.
- Bathe only in a fully sheltered area, out of drafts.
- Reduce frequency; opt for thorough brushing or spot cleaning with a damp towel.
- Have every drying tool ready before you even get the hose wet.
The Art of the Complete Dry
This is where most cold-weather baths fail. Letting a horse “air dry” is not an option. I start with a large, thirsty towel and work in sections, scrubbing against the hair growth to reach the skin. You are not done when the surface hair is damp, but when the skin underneath feels completely dry and warm.
For a horse with a thicker coat like Rusty, I follow the towel work with a wool cooler. It wicks moisture away without trapping heat. A cooler is not a blanket; its breathable weave pulls dampness out while allowing warmth to circulate naturally – so it’s important to understand when to use a blanket versus a cooler.
Finally, I never put a freshly bathed horse away. I walk them, usually on a long lead line, until I’m confident in their dryness. This last walk is your final safety check, ensuring no damp spots are hiding to steal your horse’s warmth later.
Managing Bath-Time Behaviors and Safety
Working with Anxious or Difficult Horses
Bathing a spooky horse isn’t about dominance; it’s about building trust one wet step at a time. The goal is to make the wash rack a place of calm, not conflict, using patience as your main tool. I learned this with Luna, my dapple grey Thoroughbred, who viewed the initial hiss of the hose as a personal threat.
Her first baths were short sessions focused solely on her legs. Starting low and slow prevents the full-body panic that sets training back weeks. We’d stand quietly while I dribbled water on her pasterns, followed immediately by a bit of apple. Now, she walks in willingly, though she still prefers a sponge to a direct spray.
Use these tactics for your own wary partner:
- Pair every new sensation with a high-value treat. Time the reward so it comes after the hose touches them, linking the water to something good.
- Begin by only washing the legs and belly for several sessions. This avoids startling their sensitive head and neck area.
- Keep your voice low and monotonous. Save the excited, high-pitched praise for after the bath is done.
- Always have a second person as a handler. Their job is to focus on the horse’s head and keep them steady, freeing you to focus on the bath.
Remember, a horse that fidgets isn’t being bad. They are communicating discomfort, and it’s our job to listen and adjust our approach. Forcing the issue compromises safety and welfare for both of you.
Core Safety Precautions for Every Bath
Safety isn’t just a checklist; it’s a mindset you maintain from the moment you lead your horse to the wash stall. Good footing is the non-negotiable foundation of any safe bath. A slick concrete pad is an invitation for a dangerous slip. I always hose the area first to check for slick spots and add rubber mats if I can.
Your own movements matter as much as the horse’s. Avoid sudden, jerky motions with the hose or your arms, as these can startle even a calm horse. Move deliberately and smoothly, like you’re working in slow motion. This steady rhythm is reassuring.
Before you ever point the hose at your horse, test the pressure and temperature on your own wrist. A blast of cold water or a jet that’s too strong will shatter any trust you’ve built. The water should feel lukewarm and fall in a gentle stream, not a needle-like spray.
Always read your horse’s body language. Watch for:
- Tension in the muzzle or a tightly clamped tail.
- The whites of the eyes showing or pinned ears.
- Shifting weight away from the water stream.
These are clear signs to pause, lower the pressure, or take a break. Your horse’s body language tells you if they’re happy. Listening to those signals guides your next steps. Bathing a horse is a partnership, not a power struggle, and their comfort is the ultimate indicator of success.
Common Bathing Mistakes to Avoid
Frequent Errors in Technique and Aftercare
Bathing seems straightforward, but a few missteps can lead to a cranky horse or even skin problems. I’ve seen it all in my years of managing a busy barn. Here are the pitfalls to sidestep for a happier, healthier bath day.
The Sins of Rinsing
Incomplete rinsing is the number one offender. Soap residue feels gritty and itchy. It dries on the skin and coat, leading to irritation and a dull, flaky finish. Your goal is water so clear you could drink it.
Run your hand firmly against the grain of the hair. Listen for the squeak of clean skin. A truly soap-free coat will emit a distinct squeaking sound under your palm.
Temperature Troubles
Water that is too hot or too cold is a quick way to lose your horse’s trust. Extreme temperatures are shocking and uncomfortable. A cold hose on a warm day can tense muscles. It’s important to understand what temperature is safe for horses.
Luna, my sensitive Thoroughbred, will literally dance sideways if the water is too chilly. Use lukewarm water, testing it on your own wrist first. Think of a pleasant summer rain, not a winter stream or a hot shower.
- Too Cold: Can cause muscle cramping and makes the horse resistant to bathing.
- Too Hot: Can scald sensitive skin and strip natural oils more aggressively.
The Over-Washed Coat
Bathing too often is a well-intentioned error. It strips the essential oils that keep a coat waterproof, shiny, and healthy. A horse bathed weekly will often have a dry, brittle coat.
For many horses, a thorough curry and brush is all they need. Reserve soaps and shampoos for shows, heavy sweat, or medical needs. Your horse’s skin produces its own perfect conditioner; frequent bathing washes this natural protection right down the drain.
The Dangerous Dry-Down
Leaving a horse wet and stationary in a cross-breeze is an invitation for trouble. A damp horse tied in a shady aisle can quickly become a chilled horse. This is how muscles stiffen.
I always hand-walk or turn out to dry. Movement generates body heat and allows for even drying. If you must use a sweat scraper, follow the lay of the hair and be thorough. A damp back under a saddle pad creates a perfect environment for girth gall and fungus.
- Use a sweat scraper to remove the bulk of the water.
- Walk your horse for at least 15-20 minutes in the sunshine.
- Optionally, use a cooler or wool drying rug if the air is cool.
- Only return to the stall or pen when the coat is mostly dry to the touch.
Frequently Asked Questions About Bathing Your Horse
What are the most important safety precautions to remember when bathing a horse?
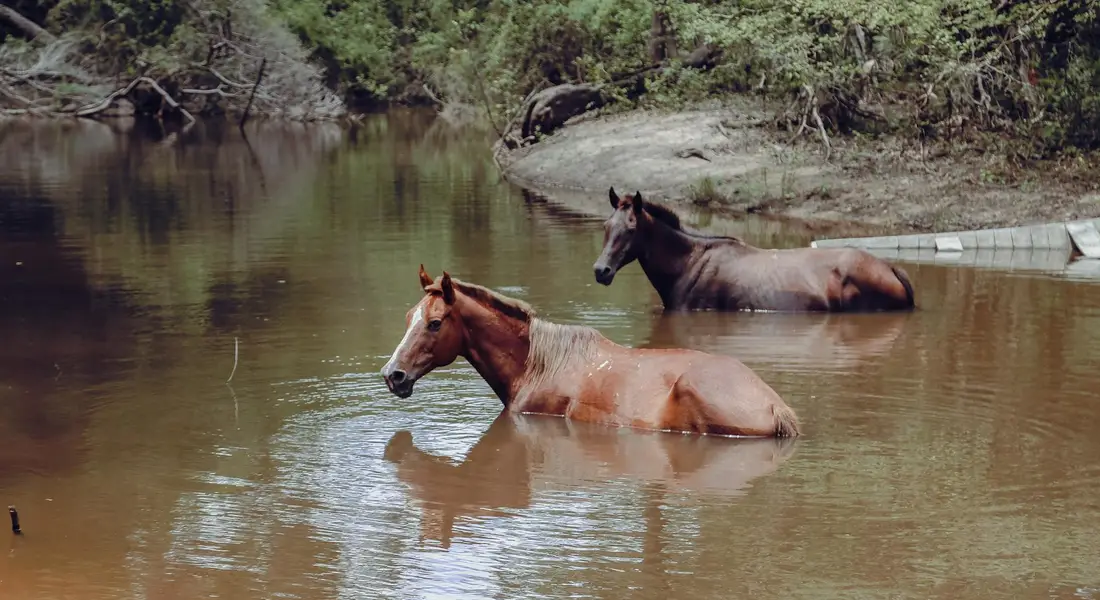
Always ensure you have secure, non-slip footing for both you and your horse to prevent dangerous slips or falls. Test the water pressure and temperature on your own wrist before wetting your horse to avoid startling them with a cold or forceful jet. Continuously read your horse’s body language for signs of stress, such as pinned ears or swishing tail, and be prepared to pause or adjust your approach. If you plan to introduce your horse to water crossings, creeks, or puddles, start gradually and keep exposures brief. Begin with shallow, calm water and reward calm behavior to ease them into the experience.
How often should I give my horse a full bath with shampoo?
You should bathe your horse with shampoo only when necessary, as over-bathing can strip the coat of its natural, protective oils. For routine maintenance, a thorough currying and brushing is often sufficient to remove dirt and distribute oils for a healthy shine. Full baths are best reserved for before shows, after intense work, or to treat specific skin conditions as recommended by your veterinarian.
What are the key considerations for bathing a horse in cold weather?
Use only warm water and bathe in a completely sheltered area out of the wind to prevent your horse from getting chilled. Significantly speed up your process by having all drying tools ready beforehand and focus on efficiently removing water. The most critical step is ensuring the horse is walked until its skin is completely dry to the touch before being returned to its stall or pasture, especially before any blanketing.
Clean, Happy, and Safe
A good bath boils down to preparation, gentle products, and a calm approach-always start with tepid water and a quiet voice. The single most important factor for safety is securing your horse on non-slip footing before you even pick up the hose.
Whether you’re bathing a sensitive Thoroughbred like Luna or a cheeky pony like Pipin, let their reactions guide your pace and pressure. A clean horse is nice, but a horse who trusts you through the process is the real win.
Further Reading & Sources
- Bathe Your Horse Beautiful
- r/Horses on Reddit: Bathing a horse
- How to Bathe a Horse Like a Pro – Equus Magazine
- How to Bathe Your Horse
At Horse and Hay, we are passionate about providing expert guidance on all aspects of horse care, from nutrition to wellness. Our team of equine specialists and veterinarians offer trusted advice on the best foods, supplements, and practices to keep your horse healthy and thriving. Whether you're a seasoned rider or new to equine care, we provide valuable insights into feeding, grooming, and overall well-being to ensure your horse lives its happiest, healthiest life.
Basic Grooming Techniques