The Complete Guide to Desensitization and Habituation Training
Hello from the barn aisle! That sudden spook at a blowing leaf or the stubborn refusal to approach a new object can make any ride feel precarious. Managing a fearful horse is more than an annoyance-it chips away at your confidence and puts both of you at risk of a costly injury.
This guide will walk you through a kinder, smarter way to build bravery. We will cover the science behind fear responses and why slow exposure wins, foundational desensitization techniques that prioritize trust over force, and how to habituate your horse to common stressors like vet gear and loud noises.
I’ve spent years in the saddle and the stable as a barn manager and trainer, using these very steps to help anxious horses like my sensitive Thoroughbred, Luna, find their footing.
Understanding Desensitization and Habituation for Horses
Training a horse to be calm around spooky objects isn’t about dominating their instincts. It’s about guiding their learning. The two primary methods we use are desensitization and habituation. They are related, but understanding their distinction is your first tool for smarter training, especially when dealing with common horse fears and skittish behavior.
Defining the Two Approaches
Desensitization is a proactive, hands-on process. You deliberately introduce a stimulus-like a plastic bag on a stick-in a controlled way. You start with the stimulus at a low intensity (a still bag far away) and gradually increase it (gentle waving, closer proximity) only when the horse remains calm. The horse learns through direct, repeated exposure that the thing is not a threat. You are the conductor of this experience, managing the intensity and rewarding the calm.
Habituation, on the other hand, is more passive. It’s the simple process of a horse getting used to a constant, unchanging part of their environment through repeated exposure without consequence. The tractor parked by the barn is scary on Monday. By Friday, after seeing it sit there, silent and unmoving, they simply stop reacting. The stimulus is just present in their world, and their natural response fades because nothing bad happens. We use this principle when we leave new blankets hung on the fence for a week before trying to put them on.
Key Differences and Common Uses
Think of it like this: desensitization is for the moving, noisy, unpredictable things. Habituation is for the static, everyday things. You use them in tandem.
- Desensitization is for: clippers, spray bottles, tarps, mounting blocks, veterinary procedures, leg handling. Anything you need to actively do to the horse.
- Habituation is for: traffic cones in the arena, new jumps, lawn decorations, stationary tractors. Anything you can safely add to their environment and let them “get over it” on their own time.
The biggest mistake I see is trying to habituation a horse to a moving stimulus. Tossing a tarp at a horse and hoping it gets used to it is chaotic and dangerous. That’s a job for systematic desensitization.
The Core Principles of Effective Training
Knowing the terms is one thing. Applying them successfully requires a framework. These are the pillars I’ve built every training session on, from teaching Luna to accept clippers to convincing Pipin that the farrier’s rasp isn’t a torture device.
The Non-Negotiable: Start Low and Go Slow
Your horse’s fear is real. Dumping a bucket of water over a horse scared of baths will only confirm their worst fears. The single most important rule is to find the threshold where your horse is aware but not afraid, and begin your work there.
This might mean the plastic bag is fifty feet away. The clippers are just turned on in your pocket. The hose is a gentle trickle on the ground near their front hoof. The moment you see tension-a held breath, a stiff neck, a wide eye-you’ve gone too far. Back up. The goal is to spend 99% of the training session below that fear threshold, building a history of neutral or positive experiences.
Building Your Desensitization Hierarchy
This is your roadmap. Before you even enter the round pen, break the scary thing down into its least scary components. Let’s use spray bottles, a common battleground.
- Sight: Show the horse the silent, empty bottle. Let them sniff it.
- Sound: Click the trigger mechanism away from the horse.
- Proximity: Hold the bottle near their shoulder, then neck, then hindquarter.
- Mist: Spray a light mist away from the horse, then toward their feet.
- Contact: Finally, a light mist on their lower leg, building to their body.
Each step is its own training session, sometimes repeated for days. You only move forward when the current step earns a relaxed sigh, a licking of the lips, or a dropped head. Rushing this sequence is the fastest way to create a lasting problem.
The Power of Pairing: Counter-Conditioning
This is the secret sauce that transforms tolerance into genuine calm. Counter-conditioning means pairing the scary stimulus with something the horse actively loves. You’re not just showing them the thing is safe; you’re teaching them it predicts good stuff.
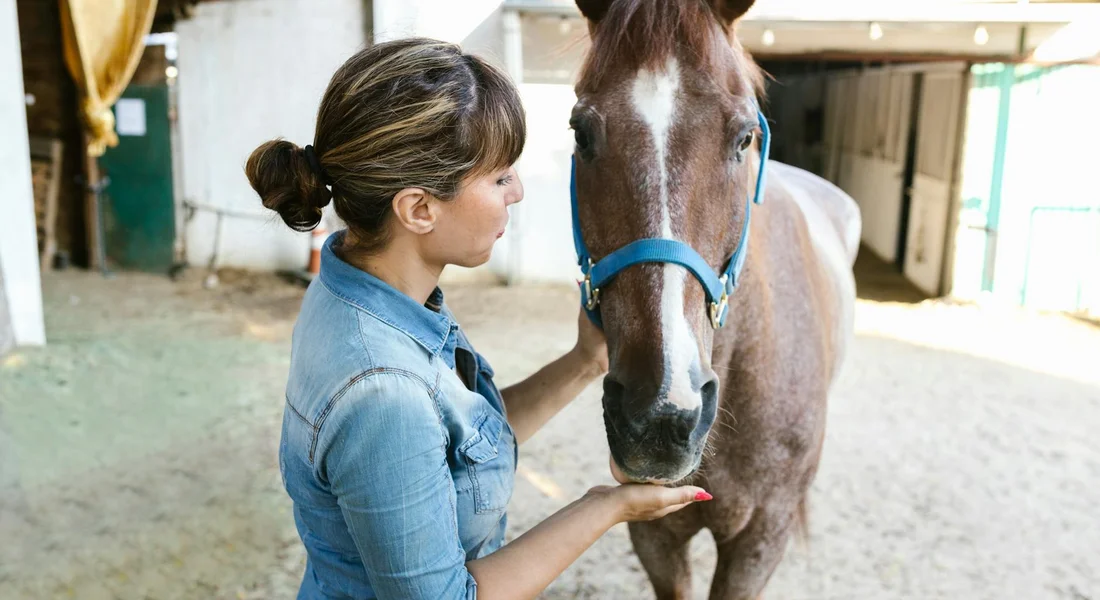
With my sensitive Thoroughbred, Luna, I paired every slow step of clipper training with her favorite oat cookies. The quiet hum of the cordless clippers in my hand meant treats were coming. Over time, her emotional response shifted from “clippers mean danger” to “clippers mean cookies.” This changes the game from simple endurance to willing participation. Use this with vet visits, hoof picking, or trailer loading. It makes the process kinder and the results stickier.
Creating and Executing Your Training Plan
Think of this plan as your road map for building a braver horse. It turns vague hope into clear action. I keep mine scribbled on a feed bag in the tack room-it’s that practical.
Step 1: Pinpoint the Fear and Its Triggers
Your first job is to play detective. Watch your horse not just in the arena, but during turnout and routine chores. Does he snort at the wheelbarrow’s squeak or side-eye that flapping tarp? Note the exact moment his head goes up and his breath gets quick. True progress starts when you identify the specific sight, sound, or sensation that flips the fear switch, not just the general “spooky” behavior.
With my sensitive Thoroughbred, Luna, it wasn’t just “plastic.” It was the crinkling sound of a empty grain bag being shaken. Rusty, my steady Quarter Horse, couldn’t care less about noise, but a new, dark puddle on the trail would make him plant his feet. Write your observations down.
- Sound: Clippers, roaring tractors, bags rustling.
- Sight: Unfamiliar objects, sudden movements, shadows.
- Touch: Spray bottles, unfamiliar grooming tools, water.
- Location: Often the fear is context-specific, like the wash stall or gate.
This isn’t about judging their fear, but understanding it. A horse that spooks at a hose might have had a cold blast to the face years ago. Your patience here is everything, especially when you’re trying to rebuild trust with a fearful or traumatized horse.
Step 2: Map Out Your Session Strategy
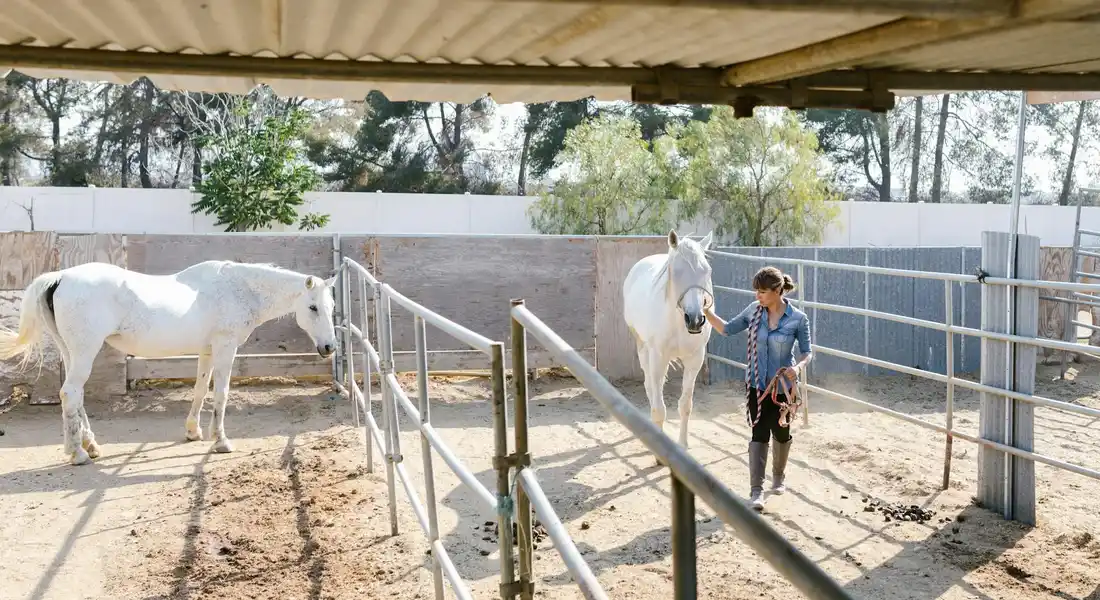
Now, build your session like a good fence-safe, clear, and with no sharp edges. Never start this work when you’re rushed or your horse is fresh from a full day in the stall. Always choose a familiar, enclosed space where your horse can move its feet safely if needed, like a round pen or quiet arena. This is part of creating a safe, enriching environment for your horse that supports calm learning. A well-chosen space helps your horse stay engaged and cooperative.
I map out three things for every session: the trigger object, my horse’s reward, and my exit strategy. For Pipin the pony and his clipper phobia, I had his favorite carrot chunks, the clippers unplugged, and a plan to stop the second he licked his lips or sighed.
- Keep sessions short-5 to 15 minutes is plenty.
- Gather your tools: the scary item, high-value treats, a halter, and a long lead.
- Wear gloves and sturdy boots. Your safety lets you be calm for them.
- Pick a time when the barn is quiet, not during farrier day or feeding frenzy.
The goal is controlled exposure, not flooding. You’re building a puzzle, one slow piece at a time.
Step 3: The Step-by-Step Desensitization Session
This is where you slowly introduce the trigger. The key is to work at a distance and intensity where your horse is aware but not panicked. Watch the ears, eyes, and tension in the neck. If he looks away, chews, or lowers his head, you’re winning. Make sure you have a solid understanding of horse behavior before you start. Understanding horse behavior can help you recognize these subtle signs.
- Present the Trigger at a Distance: Let your horse see the silent, motionless object from far away. I might just sit on a mounting block with a blue tarp folded next to me.
- Reward Calm Observation: The instant your horse glances at it and doesn’t react, mark that with a soft “good” and a treat. You’re rewarding the decision to be curious, not fearful.
- Decrease Distance Gradually: Move the object slightly closer, or introduce a mild version of the stimulus. For a scary sound, this might mean recording it and playing it softly on your phone.
- Pair with Positive Sensations: As the object gets nearer, combine it with something your horse loves. Scratch his withers with one hand while holding the spray bottle with the other.
- Know Your Threshold: If your horse snorts, spins, or tenses severely, you’ve gone too far. Immediately back up to the last step where he was calm. This isn’t failure; it’s vital information.
The moment your horse accepts the presence of the trigger without a fear response, end the session on that high note. This makes him eager for the next lesson. I learned this with Luna and the grain bag; stopping while she was calm built more trust than pushing for five more minutes.
Step 4: The Habituation Process in Practice
Desensitization gets the horse to tolerate the trigger; habituation is what makes him forget it was ever scary. This happens through dull, repeated exposure in daily life. Habitation is about boring your horse into acceptance by making the once-scary thing a normal, ignored part of the background.
After Rusty was okay with a stationary puddle, I began walking him past the same one every day. Then I’d stand him near it while he ate his hay. The puddle became associated with grazing and relaxation, not pressure.
- Incorporate the trigger into routine. Hang that tarp on the fence line for a week.
- Use “passive exposure.” Leave the clippers on a shelf in the grooming stall.
- Keep turnout time sacred. A horse with room to move and a herd to watch is mentally fresher for learning.
- Watch for true indifference. The end goal is a horse who hears a tractor and doesn’t even bother to look up from his hay.
This step requires consistency, not drama. It’s the quiet triumph of seeing Pipin doze off while I rasp his feet, the smell of fresh hay in the air, his worries long forgotten.
Reading Signals and Troubleshooting Progress
Think of your horse as a book written in muscle twitches and ear flicks. Your job is to learn the alphabet. Successful desensitization isn’t about dominating fear, but about translating moments of uncertainty into mutual understanding. I’ve spent countless hours in the quiet of the afternoon barn, just observing the herd, and that time is what taught me to see the difference between a curious glance and a pre-flight panic. I learned to desensitize spooky horses to new objects and sounds through slow, repeatable exposures that reward calmness. This approach builds confidence without creating new fears.
Signs of Success vs. Signs of Stress
A relaxed horse is a conversational partner. A stressed horse is a prisoner. Know the difference. Watch for the good signs first.
The soft, low snort, the lick-and-chew, and a lowered head are your gold stars. These are clear indicators your horse is processing and accepting the new stimulus.
- Soft, blinking eyes with a relaxed eyelid.
- A deep, sighing exhale.
- Standing square and balanced, not braced to flee.
- Ears that swivel loosely toward the object without pinning.
- Mouthing the lead rope or gently nudging your hand.
Stress signals often come in a cascade. Ignoring them is how trust erodes. With Luna, I saw her high-headed stare at a new tarp; the moment her nostrils flared, I knew to pause.
A rigid body, a fixed stare, or flared nostrils are your red alerts to stop and reassess. Pushing past these creates a ticking clock for a blow-up.
- White showing around the eyes (whale eye).
- Head held high and tense, neck stiff.
- Tail clamped tightly or swishing violently.
- Snorting sharply or holding the breath.
- Sweating in cool weather or trembling.
Common Mistakes to Avoid at All Costs
We all want progress, but hurry is the enemy of habit. I’ve made these errors myself, usually when I was tired or on a schedule. Learn from my missteps.
Flooding the horse-forcing prolonged exposure until they “give up”-does not create trust; it creates shutdown. This is welfare failure, not training.
- Rushing the Steps: Skipping from a stationary plastic bag to one flapping on a fence line is like asking someone afraid of spiders to hold a tarantula. Build increments painfully small.
- Correcting Fear: Never punish a spook or a wary look. You’re punishing communication. Instead, ask for a simple task they know, like backing up, to regain focus.
- Training Only in the Arena: Habits formed in one place stay there. Practice near the manure pile, at the gate, by the noisy tractor. Context is king.
- Ignoring Your Own Energy: Your tense grip on the lead rope screams “danger!” to your horse. Breathe, soften your elbows, and pretend you’re bored. It’s contagious.
- Neglecting Foundation: You can’t desensitize a horse who doesn’t respect your personal space or move off pressure. Basic ground work is the non-negotiable first chapter.
Timeline and Patience: How Long This Takes
Throw away the calendar. This work runs on horse time, not human time. For a solid, generalized confidence, think in months, not days.
The timeline is a waltz, not a race-three steps forward, two steps back is still progress. A breakthrough on Tuesday might be forgotten by Thursday, and that’s normal.
With my old soul Rusty, accepting a new fly spray took one session. For Luna, that same process needed a week of short, positive introductions. Pipin the pony? He’ll accept a balloon instantly if a cookie is involved, but he’ll pretend to be terrified of the same balloon tomorrow for more cookies. Their personality dictates the pace.
- Basic Object Desensitization (bags, ropes, tarps): A few weeks of consistent, 5-minute daily sessions.
- Complex or Fear-Specific Issues (trailers, clippers, injections): Three to six months of patient, incremental work.
- Lifelong Maintenance: Even a “bombproof” horse needs occasional refreshers. Make novel objects a regular, low-drama part of their world.
Your patience is the most important tool in your tack box. Celebrate the tiny victories-the first time your horse touches a scary object with his nose is a bigger win than him finally standing still for it. That moment of curiosity is the foundation of everything.
Tools, Tracking, and Long-Term Success
Training isn’t about magic; it’s about method. Having the right tools and a clear plan turns a hopeful idea into a repeatable success. I’ve found that a simple, consistent approach builds more trust than any grand gesture ever could.
Helpful Equipment for Safe Training
You don’t need a tack store’s worth of gear, but a few key items make the process safer and clearer for your horse. For first-time horse owners, knowing the essential supplies helps you start with confidence. Think of these as extensions of your own body language.
- A Rope Halter with a 12-foot Lead: The thinner diameter of a rope halter offers clearer pressure-and-release communication than a flat nylon one. The long lead gives you space to work safely.
- A Lunge Line or Long Rope (22-30 feet): Essential for creating distance with scary objects. It allows the horse to process pressure from a safer personal bubble.
- A Dressage Whip or Carrot Stick: This is not for punishment. It’s an arm extension for gentle tapping or presenting an object. I use mine to rustle a plastic bag near Luna’s feet while I stand safely at her shoulder.
- A Flag or Plastic Bag on a Stick: A classic desensitization tool. The slight rustle and movement are perfect for introducing unpredictable stimuli in a controlled way.
- Your “Scary Object” Kit: A dedicated bucket holding a tarp, an umbrella, empty plastic bottles, and a raincoat. Having it ready means you can seize a five-minute training window.
The most important tool is your own calm energy, which is far easier to maintain when you have equipment that gives you control without confrontation. Watching a horse like Pipin learn to touch a flapping flag with his nose, entirely by his own choice, is a victory that never gets old.
Keeping a Training Log
Your memory is unreliable, especially when you’re tired after mucking stalls. A simple logbook is your secret weapon for seeing real progress. I use a basic notebook in my tack trunk.
For each session, I jot down four things: the date, the specific stimulus (e.g., “blue tarp, unfolded on ground”), the horse’s reaction on a scale of 1-10, and the weather. This takes two minutes. Over weeks, patterns emerge. You’ll see that Rusty is fine with the tarp unless it’s windy, or that Luna needs three shorter sessions to accept something new.
| Date | Horse | Exercise | Reaction (1-10) | Notes |
|---|---|---|---|---|
| 4/10 | Pipin | Plastic bag near hindquarters | 4 (snorted, stepped away) | Stopped when he stood still. Session: 3 min. |
| 4/12 | Pipin | Plastic bag touching hind leg | 7 (tensed but didn’t move) | Used clicker reward. Big improvement! |
This log isn’t for judgement; it’s for data, turning fuzzy feelings into a clear map of your horse’s unique learning journey. It reveals the slow, upward trend that’s easy to miss day-to-day.
Maintaining Gains and Preventing Backslides
Training isn’t a “one and done” deal. Horses are living proof of the “use it or lose it” principle. The goal is to weave these lessons into the fabric of daily life so they become ordinary. It’s not just about repetition, but also about understanding how horses learn through conditioning and practice.
- Integrate, Don’t Isolate: Once your horse accepts the clippers, don’t just save them for the big body clip. Use them briefly every other week to touch up a bridle path. Familiarity breeds comfort.
- Vary the Context: If your horse is great with a tarp in the arena, drag it quietly near the pasture gate. Practice tying to the trailer at home, then at a quiet trailhead. Generalization is key.
- Schedule “Refresher” Sessions: Once a month, have a “spooky day” and pull three items from your scary object kit for a quick, positive review. Keep it light and reward curiosity.
- Read the Whole Horse: A backslide is often a signal. Is your horse sore? Did a sudden storm spook him? Is his herd dynamics stressful? Look beyond the behavior. Pushing through genuine fear or discomfort will destroy trust faster than you can build it.
- Celebrate the Choice: The ultimate maintenance is when your horse looks at a novel object and then looks to you for guidance. That moment of connection is the real trophy.
Finally, never underestimate the power of turnout. A horse with time to just be a horse, to process and move freely, will always be a more mentally resilient partner. Their brain, like a dusty computer, needs downtime to integrate the new files you’ve uploaded. Give them that grace.
Ethical Foundations and Knowing Your Limits
This work isn’t about breaking a horse’s spirit; it’s about building a dialogue where fear is replaced by curiosity. The entire point is to increase your horse’s confidence in the world and, by extension, their trust in you as a guide. I’ve seen too many sessions where the human’s goal overtook the horse’s readiness, and all it bred was resentment. Your ambition must always bow to the animal’s emotional state. Focus on building a strong bond and earning your horse’s trust, turning training into a cooperative journey. Trust grows when you listen, stay patient, and lead with calm confidence.
The Heart of the Matter: Welfare and Safety
Forcing a terrified horse to accept a tarp is not training-it’s flooding, and it can cause lasting psychological damage. True desensitization respects the freeze, flight, and fight responses. Your primary job is to manage pressure so the horse never feels trapped. Always provide a clear “release” moment-a step back, a pause, a deep breath-the instant your horse shows even a flicker of trying. Their try might be just standing still when they want to flee. Reward that.
Safety is the obvious layer: a panicked horse is a 1,200-pound hazard. But welfare runs deeper. Consider the pony, Pipin. He used to scoot sideways at the sight of a wheelbarrow. By moving it quietly, letting him sniff it, and never forcing the issue, he now tries to steal hay from it. The goal was calmness, not just tolerance.
- Physical Safety: Wear a helmet if working in hand near spooky objects. Use a long lead rope to give your horse space, but never wrap it around your hand.
- Emotional Welfare: Watch for subtle signs of stress: a tight muzzle, swiveling ears, a hard eye. These matter more than dramatic leaps. If you see them, dial back.
- Environment: Start in a familiar, enclosed space like a quiet arena. The soft footing and known boundaries offer security. The open field can wait.
The Trainer’s Demeanor is Everything
Your energy is contagious. If you approach with tension, bracing for a reaction, your horse will mirror it. I walk into these sessions with the same calm focus I use for grooming. Breathe deep. Slow your movements. Your voice is a powerful tool-keep it low and melodic. Horses are phenomenal at reading body language, so your relaxed posture is the first cue that there is no danger. Be the calm, assertive leader your anxious horse needs. Your steady presence helps it breathe with you, reducing anxiety and inviting trust.
Remember Luna, my sensitive Thoroughbred? A plastic bag once sent her into orbit. My old instinct was to grip the rope and get stern. It failed. What worked was absurd simplicity: I stood still, bag at my side, and ignored her while I hummed. My boredom became her curiosity. Within minutes, she was blowing her warm breath on that crinkly monster. My demeanor created the safe space for her to investigate.
- Check your own anxiety at the gate. Take three deep breaths before you even clip the lead rope.
- Move with intention, not hesitation. Fluid, predictable motions are less alarming than jerky ones.
- Celebrate the small wins audibly. A soft “good boy” when his eye softens reinforces the right behavior.
When to Call in a Professional
There is zero shame in recognizing a problem is beyond your current skill set. In fact, it’s a mark of a responsible horseman. Calling for help is not a failure; it’s a strategic decision for the welfare of your horse and your own safety. I’ve made that call myself, particularly with deep-seated trauma cases where my emotional connection to the horse was clouding my judgment.
Seek a professional if you observe any of the following:
- Your horse becomes dangerously reactive (rearing, striking, bolting) and you feel unsafe.
- You’ve hit a plateau for multiple sessions and frustration is building-on either end of the lead rope.
- The fear is specific and extreme, like a severe trailer phobia stemming from a past injury.
- You simply don’t know what the next step should be. A good trainer can see the path you can’t.
A professional brings fresh eyes, a neutral energy, and a toolkit of techniques. They can often demonstrate a breakthrough in one session, giving you a clear model to follow. Your job then becomes being a diligent student, so you can maintain the progress long after the trainer has left. Think of it as an investment in your partnership’s future.
FAQ: The Complete Guide to Desensitization and Habituation Training
How do you create a desensitization plan?
You create a desensitization plan by first identifying the specific fear trigger and then breaking it down into a step-by-step hierarchy, starting at a very low intensity. Next, you decide on your high-value rewards and choose a safe, familiar environment for your short, focused sessions. Finally, you commit to a patient schedule, progressing only when your horse remains calm at the current step.
What are common mistakes to avoid in desensitization?
A critical mistake is “flooding,” or forcing prolonged exposure that can lead to emotional shutdown instead of genuine confidence. Another error is correcting or punishing fear reactions, which punishes the horse for communicating its anxiety. Finally, rushing the steps and ignoring subtle stress signals will undermine trust and likely worsen the problem.
When should you consult a professional trainer or veterinary behaviorist?
You should seek professional help if your horse shows dangerous reactive behaviors like rearing or striking, creating an immediate safety risk. If your horse rears or bolts, practice safe handling by keeping a clear escape route and avoiding standing behind. This practical step helps protect you while you pursue guidance from a professional. Consulting an expert is also wise if you have hit a persistent training plateau that is causing frustration for you or your horse. Finally, for fears linked to known trauma or extreme phobias like severe trailer aversion, a professional can provide a neutral perspective and specialized techniques.
Your Training Journey Together
Effective desensitization hinges on controlled, repetitive introductions where the horse always feels safe enough to think. Progress is measured in relaxed breaths and soft ears, not in how quickly you check an item off your list.
True horsemanship is found in the quiet moments between exposures, where you learn to read your partner’s subtle signals. Your patience and their trust will build a confidence that lasts far longer than any single training session.
Further Reading & Sources
- Desensitization (psychology) – Wikipedia
- Horse Training 101: Desensitization and Habituation – Maverick Horseback Riding
- Habituation, desensitisation, and counterconditioning
- Habituation vs Desensitization Differences in Dog Training
At Horse and Hay, we are passionate about providing expert guidance on all aspects of horse care, from nutrition to wellness. Our team of equine specialists and veterinarians offer trusted advice on the best foods, supplements, and practices to keep your horse healthy and thriving. Whether you're a seasoned rider or new to equine care, we provide valuable insights into feeding, grooming, and overall well-being to ensure your horse lives its happiest, healthiest life.
Behavior