How to Polo Wrap a Horse’s Legs for Safe, Supportive Protection
Hello fellow equestrians. That moment of hesitation before a brisk ride or a busy barn day, wondering if you’re doing enough to guard against bowed tendons or splints, is a feeling I know well. Protecting your horse’s legs isn’t just about gear; it’s about preventing the costly and heart-wrenching downtime that comes with injury.
Let’s get your wrapping confidence up to speed. I’ll guide you through the key steps: choosing the correct type and size of polo wrap for your horse’s job and leg shape, the crucial pre-wrap leg check for cuts or heat, a foolproof winding pattern that provides even pressure without restriction, and spotting the dangerous errors that can compromise circulation or cause slippage.
My time managing a barn and training everything from fiery Thoroughbreds to steady trail mounts has taught me that a properly applied wrap is a cornerstone of proactive equine care.
What Are Polo Wraps and Why Does Your Horse Need Them?
Think of polo wraps as the soft, flexible athletic tape of the horse world. They’re long strips of fleece or similar fabric, usually with a Velcro closure, that you spiral around your horse’s leg. Their job isn’t to provide rigid support like a cast, but to offer a layer of cushioning and light, even pressure. I keep a set in my tack trunk for every horse, from sensitive Luna to sturdy Rusty, because they’re my first line of defense against the minor knocks and strains of everyday work.
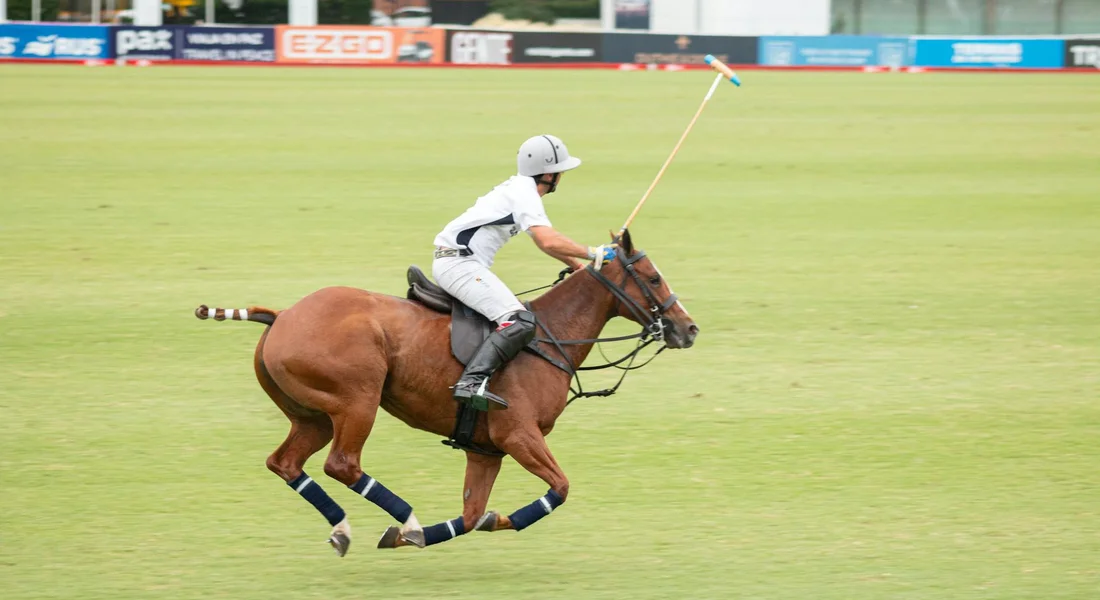
You might see other leg gear like splint boots or standing wraps. Polos are the versatile middle ground. They’re less bulky than shipping boots but offer more protection than just splint boots. I use them for light trail rides, lunging sessions, and even for stable rest when a leg needs a little extra TLC after a hard workout. The consistent, gentle pressure can help reduce minor filling and provide a psychological sense of security for a horse that’s prone to brushing or overreaching.
The Anatomy of Support: How Polo Wraps Protect Horse Legs
Wrapping isn’t just about covering the leg; it’s about understanding what’s underneath. A horse’s lower leg is a masterpiece of tendons, ligaments, and bone with surprisingly little muscle for protection. Every thud of a hoof on hard ground sends a shockwave up those structures. Understanding hoof anatomy and structure is essential for effective care.
Polo wraps act as a buffer. The fleece absorbs impact from the outside, like a knock from another hoof, and provides gentle compression from the inside, which can help stabilize soft tissue. Properly applied, they create a supportive sleeve that helps mitigate the fatigue and micro-trauma that can lead to bigger problems. It’s preventative care, plain and simple.
Key Areas of Vulnerability
When you wrap, you’re targeting specific high-risk zones. Knowing these areas changes wrapping from a routine chore to a deliberate act of care.
- Tendons (Flexor and Superficial Digital Flexor): These run down the back of the cannon bone and are the most common site of strain. They’re like thick, vital cables that allow your horse to move. Polo wraps provide a layer of compression that can help reduce vibration and stress on these critical structures.
- Splint Bones: These are the small bones on either side of the cannon bone. A direct strike here can cause a painful “splint.” The padding of a polo wrap helps dissipate the force of a bump or kick before it reaches the bone.
- Fetlock Joint: This high-motion joint is prone to scrapes, bumps, and swelling. Wrapping provides support to the joint capsule and protects the bony prominences on all sides from accidental contact.
- Pattern of Injury: Wrapping also guards against self-inflicted wounds. A brushing boot stops a hoof from hitting the opposite leg, but a polo wrap can protect the entire area from that same strike. For a horse like Pipin, whose cleverness often leads to paddock mischief, they’ve saved his legs from more than one foolish scrape against a fence.
Remember, the goal is to support the leg’s natural anatomy, not to constrain it; a horse must still be able to move and flex freely within the wrap. If the wrap is too tight or applied over a joint incorrectly, you can cause more harm than the protection is worth, potentially leading to injuries from fencing or other activities.
The Foolproof Wrapping Technique: A Step-by-Step Guide

Let’s walk through the actual wrapping process. I learned this on everything from steady Rusty to flighty Luna, and the core steps remain the same. Consistency in your technique is what builds muscle memory for you and trust in your horse, much like learning how to put a halter on your horse and tie a quick-release knot.
Step 1: Gather Your Gear and Prep the Leg
You’ll need clean polo wraps and a clean, dry leg. I keep a dedicated set for each horse to prevent spreading any skin issues. For a sensitive soul like Luna, I feel for any warmth or swelling before a single wrap touches her. Never wrap over dirt, mud, or an untreated injury-you’ll trap debris and create pressure points.
Your gear list is simple:
- Four clean polo wraps (always have a spare).
- A soft brush to remove any stable dust.
- A quiet, tied horse. I always do this after turnout when Pipin has burned off his cheeky energy.
Run your hand down the leg, familiarizing yourself with the cannon bone, tendons, and fetlock. This mental map guides your pressure and placement once the wrap is on.
Step 2: Starting the Wrap Correctly
Unroll the first foot of the wrap and find the Velcro end. Place this end on the inside of the cannon bone, just below the knee or hock. Start too high and you’ll restrict a joint; start too low and the wrap will slip down.
Hold the start flat against the leg with one hand while you make two firm, overlapping turns with the wrap. This anchors everything. I learned the hard way with Rusty that a sloppy start means a unraveled wrap halfway down the trail. Those first two turns are your foundation, so keep them snug and even.
Step 3: Executing the Wrap Pattern
Now, spiral down the leg. Your pattern is simple: overlap each previous layer by 50%. Aim for smooth, consistent tension-think of holding a baby chick, not squeezing a tennis ball. Uneven tension is worse than no wrap at all, as it can create harmful pressure bands.
When you reach the fetlock, give it one supportive turn before spiraling back up the leg. Keep the wrap flat. No wrinkles. Listen for the soft rasp of fabric; a loud crinkling sound means you’re wrapping too tight.
- Spiral down from the anchor point.
- Overlap by half the width of the wrap.
- Make a supportive turn at the fetlock joint.
- Spiral back up to just below your starting point.
Step 4: Securing the Closure
Finish the wrap on the outside of the leg, never over the front sensitive tendon area. The Velcro should stick to the wrap fabric, not the horse’s hair. For extra protection, do put boots on your horse when working or riding. Boots can complement the wrap and help guard the legs. Closing on the outside prevents the horse from catching the Velcro on something and tearing it off.
Press the closure firmly. Run your hands over the finished wrap. It should feel uniformly firm, with no gaps or lumps. You should be able to slip a finger under the top edge. If your horse stomps immediately or tries to bite at the wrap, it’s too tight—take it off and start over.
Front vs. Hind: Wrapping Adjustments for Horse Legs
Front and hind legs are built and move differently, so your wrapping approach should slightly shift. The bones and tendons sit in different alignments. Wrapping the hinds exactly like the fronts is a common mistake that can limit movement and cause discomfort.
For front legs, focus on supporting the tendons running down the back of the cannon bone. Your wraps should be snug but allow for full flexion of the knee and fetlock. On a front leg, I always check that Luna can comfortably bend her knee without the wrap pinching.
Hind legs require more room for engagement. The anatomy is angled, and the hock is a powerful joint. When wrapping Rusty’s hind legs, I start a touch lower and use slightly less tension over the Achilles tendon area. You must allow for the thrust and pull of the hindquarters without binding.
Here’s a quick comparison:
| Focus Area | Front Legs | Hind Legs |
| Primary Support | Tendons & Fetlock | Hock & Cannon Bone |
| Tension Key | Even from top to bottom | Lighter over tendon, snug on bone |
| My Rule of Thumb | “Support the stay apparatus.” | “Allow for propulsion.” |
With a clever pony like Pipin, I pay extra attention to his hind wraps. A hind wrap that’s too tight will annoy any horse, but it turns a food-motivated escape artist into a determined stocking-removal service. Feel the leg after wrapping; it should be warm, not hot, and the horse should stand comfortably. This is especially important when you wrap a horse’s hoof for care and protection.
Mastering Wrap Tension and Critical Safety Checks
Getting the tension right on a polo wrap feels like a secret handshake between you and your horse. Too tight, and you risk cutting off circulation or causing tendon strain. Too loose, and you invite a tangled, slipping mess that can trip them. I aim for a consistent, snug pressure that lets me slide two fingers under the wrap at any point. Proper tension should feel like a firm handshake, not a crushing grip or a limp farewell. Remember to check both legs as you go; horses, like people, can be asymmetrical.
Always run your hands down your horse’s legs before you start. Feel for any heat, swelling, or subtle cuts you might protect. After wrapping, have your horse stand square and take a few steps. Watch for any hesitation or odd movement. With my sensitive Thoroughbred, Luna, I learned to check and re-check after five minutes of walking. A quick post-wrap palpation can reveal hidden pressure points before they become a problem. Her subtle head toss was my first clue I’d wrapped her left front a notch too snug.
How to Spot a Bad Wrap
A bad wrap isn’t just ugly; it’s a hazard. You can spot one from a stall away. Here are the red flags:
- Visible wrinkles or folds running diagonally across the leg, which create pressure points.
- Gaps between the layers, especially over the tendons, leaving them unprotected.
- Bulges or uneven thickness, often from inconsistent tension or a poorly placed starting point.
- The wrap sits too high on the knee or too low on the fetlock, failing to cover the key support areas.
- You hear a crinkling sound of the Velcro being over-stretched to meet, a sure sign it’s too tight.
I once saw a pony, much like our resident escape artist Pipin, with a sloppily applied wrap. It had slipped down, bunching above his hoof. That single misstep could easily have become a tangled wreath around his pastern, leading to a panic and a injury. Your eye for detail is your horse’s first line of defense.
Polo Wraps vs. Other Leg Protection: Making the Right Choice
The tack room offers a buffet of leg gear: polo wraps, shipping boots, splint boots, and standing wraps. Choosing isn’t about what’s trendy; it’s about matching the tool to the job. Polo wraps are versatile, but they’re not a universal fix. Think of polo wraps as a customizable sweater for light work, while boots are like durable sneakers for high impact. Your horse’s discipline, conformation, and the day’s activity should guide your hand.
When Polo Wraps Are the Perfect Fit
Polo wraps shine in specific, low-to-medium impact scenarios. I reach for them during lunging sessions, for basic flatwork in the arena, or on relaxed trail rides with steady horses like Rusty. They provide excellent, customizable cushioning for knocking legs without the bulk. For the horse in light training, polo wraps offer just enough support to guard against minor bumps without restricting natural movement. They’re also my go-to for some turnout situations where a horse needs temporary protection from self-inflicted scratches in the paddock.
Their fabric construction allows for breathability, which is kinder on the leg during longer, slower work. I used them on Luna when she was building back to fitness; the gentle pressure seemed to soothe her, and I could adjust the support ankle-to-knee. This adaptability makes them a staple for the horseman who values a direct, tactile connection with their horse’s limbs, especially when used as fly boots for horses to provide protection during warmer weather. Just listen to the quiet thud of hooves on soft earth, knowing you’ve provided a simple, effective buffer.
When to Choose Boots or Standing Wraps
There are days when polo wraps should stay neatly rolled in your locker. For high-speed, high-impact work like jumping, galloping, or barrel racing, structured boots are safer. They’re designed to stay put and absorb serious concussion. Pre-fabricated boots with hard shells and shock-absorbing liners are built for the predictable, sharp impacts of sport. They slip on quickly, a bonus for the busy rider.
Choose standing wraps with quilted pads for overnight stall rest, injury recovery, or long-distance travel. They provide sustained, even pressure and are meant for static, not active, use. Remember Pipin’s knack for trouble? After a minor leg swell, standing wraps were our answer for his stall rest. Never use polo wraps for shipping or prolonged standing; their lack of a separate pad risks dangerous bandage burns. The right choice honors your horse’s work and welfare, ensuring their comfort from the warm-up to the cool-down.
Selecting and Caring for Your Polo Wraps

Choosing the right polo wrap is like picking a good work glove: it needs to fit the job and fit the hand, or in this case, the leg. A poorly chosen wrap can be worse than no wrap at all.
Material Matters: Feel the Fabric
Not all wraps are created equal. The material dictates breathability, cushion, and durability. Run your hands over a few options next time you’re at the tack shop.
- Traditional Fleece: This is the classic. It’s breathable, offers excellent cushioning, and molds to the leg. The downside? It holds moisture and dirt, so it requires diligent washing. My old reliable, Rusty, wears these for light work-they’re soft and forgiving on his seasoned legs.
- Cotton Blends: A happy medium. Often lighter than pure fleece, they’re still breathable and easier to wash. They can be less bulky, which is nice for a finer-legged horse like a Thoroughbred.
- Performance Polyester/Synthetic: These are the modern workhorses. They wick moisture, dry quickly, and are generally very durable. They often have less stretch, so application technique is key to avoid a too-tight finish. I use these on Luna after a sweaty workout because they don’t stay soggy.
The best choice often depends on your climate and your horse’s sweat level-a soggy, dirty wrap is a skin problem waiting to happen. If a blanket or wrap gets wet, remove it and dry your horse promptly for safety. Waterproofing tips can help keep blankets dry and your horse comfortable.
Sizing it Right: A Critical Measurement
Polo wraps are not one-size-fits-all. Too short, and you can’t secure them safely. Too long, and you’re tripping over excess material. You need two measurements: the length of the wrap and the width of your horse’s leg.
| Horse Type | Typical Leg Circumference (at cannon bone) | Recommended Wrap Length |
|---|---|---|
| Pony (like Pipin) | Under 8 inches | 7-8 feet |
| Average Horse | 8-10 inches | 9 feet |
| Large Horse/Draft Cross | Over 10 inches | 10-12 feet |
Grab a soft measuring tape. Measure around the widest part of the cannon bone, just below the knee or hock. Your wrap should be long enough to make 4 to 5 full, overlapping passes around that measurement, plus enough tail to fasten the Velcro securely without stretching it to its limit.
Care and Maintenance: Making Them Last
Neglected wraps become stiff, smelly, and can harbor bacteria or fungi that cause skin issues. Your care routine is non-negotiable.
- Shake and Brush Immediately After Use: Before tossing them in your tack trunk, shake off dirt and brush away hair and arena footing. This prevents grit from grinding into the fibers during storage.
- Wash Smart: Use a mild, horse-safe detergent. Avoid heavy fabric softeners as they can coat fibers and reduce breathability. I wash mine in a lingerie bag to prevent the Velcro from grabbing and tearing other wraps.
- Air Dry Thoroughly: Never, ever put polo wraps in a dryer. The heat can melt the Velcro and shrink or warp the fabric. Lay them flat or hang them over a railing in the sun. That fresh, clean smell is worth the wait.
- Inspect Before Every Use: Run your fingers over the entire wrap. Feel for thin spots, lumps from compacted filler, or debris caught inside. Check the Velcro. Is it still grabbing firmly? Frayed edges or weak Velcro are your cue to retire that wrap to a cleaning rag. A wrap with compromised fastening is a ticking time bomb for unraveling under hoof.
I keep a dedicated mesh bag for dirty wraps in my tack locker. It contains the smell and reminds me to wash them before the next ride. Your horse’s skin will thank you for the fresh, clean feel of a well-maintained wrap every time—especially when you know how to properly clean and maintain horse tack and blankets.
FAQ: How Do You Polo Wrap a Horse’s Legs for Protection?
How can I find reliable reviews for horse polo wraps?
Look for reviews on dedicated equestrian websites and forums where seasoned riders discuss performance and durability. Cross-reference feedback on retail sites like Amazon or Dover Saddlery, focusing on comments about material quality and long-term use. Prioritize reviews that mention specific activities, such as jumping or trail riding, to ensure the wraps suit your horse’s needs.
Where can I find horse polo wraps for sale locally?
Visit local tack shops, feed stores, or equestrian centers that stock horse care supplies, as they often provide hands-on assistance. Check with nearby barns or trainers for recommendations, as they may know of pop-up sales or trusted vendors in your area. Attending horse shows or clinics can also lead to discovering local retailers selling quality polo wraps.
What should I consider when buying horse polo wraps on Amazon?
Read through customer reviews thoroughly, noting common praises or complaints about fit, fabric breathability, and Velcro security. Verify the product dimensions against your horse’s leg measurements to avoid sizing issues, and check if the seller offers clear return policies. Opt for established equestrian brands with high ratings to reduce the risk of receiving subpar materials that could compromise protection.
Legs Wrapped, Ready to Ride
Keep your wraps clean, dry, and snug with even pressure from the inside of the cannon bone out. An uneven or too-tight wrap is far more dangerous than no wrap at all.
Your skill will grow with each careful application, so be patient with yourself. The best tool you have is your own observation, so always watch your horse’s reaction during and after work.
Further Reading & Sources
- How to Polo Wrap a Horse’s Legs – SmartPak Equine
- Guide To Polo Wraps – Equestroom
- How to protect your horse’s legs – Horses
- How To Put Polo Wraps on a Horse’s Legs – My New Horse
At Horse and Hay, we are passionate about providing expert guidance on all aspects of horse care, from nutrition to wellness. Our team of equine specialists and veterinarians offer trusted advice on the best foods, supplements, and practices to keep your horse healthy and thriving. Whether you're a seasoned rider or new to equine care, we provide valuable insights into feeding, grooming, and overall well-being to ensure your horse lives its happiest, healthiest life.
Equipment