Tack Fit Troubleshooting Checklist: Is Your Saddle or Bridle Causing Bad Behavior?
Hello fellow equestrians. Is your steady horse now tossing its head or swishing its tail the moment you tack up? That sudden “bad” behavior is often a sharp signal of pain, not disobedience.
Ignoring these signs risks your safety and your horse’s long-term comfort. I’ve watched too many good partners, like my reliable Rusty, become anxious over a simple pinched wither. Today, we’re moving past frustration and straight into practical detective work.
My tack fit checklist will guide you through a hands-on inspection. We will focus on:
- How to check your saddle’s tree width and balance for even pressure.
- Identifying hidden bridle pressure points at the browband, poll, and noseband.
- Decoding specific behaviors that point to saddle pain versus bridle discomfort.
- Applying gentle, immediate fixes you can do right in the aisle.
This advice comes from a decade of barn management and training, where I’ve learned that the right fit is the foundation of everything, from a quiet trail ride on a Quarter Horse to schooling a sensitive soul like Luna.
How Ill-Fitting Tack Talks: Connecting Behavior to Discomfort
Your Horse Isn’t Being Naughty, They’re Hurting
I’ve spent years listening to horses, and their primary language is comfort or the lack of it. A head toss, a hollowed back, a reluctant gait-these aren’t acts of rebellion. They are clear, desperate sentences. Your horse’s behavior is the most honest review of your tack fit you will ever get. My sensitive Thoroughbred, Luna, taught me this. What I dismissed as her typical “spookiness” turned out to be a reaction to a bridle whose browband was a mere half-inch too short, creating constant pressure on her ears. She wasn’t being dramatic; she had a headache.
Think of it this way: a pinching saddle is like wearing shoes two sizes too small on a hike. A tight noseband is a relentless sinus pressure. You’d grumble, limp, and refuse to move well, too. We ask them to perform in our chosen equipment, so the absolute least we can do is ensure it doesn’t cause pain. Addressing the fit is the first step in ethical and effective horsemanship.
The Subtle Signs You Might Be Missing
The obvious signs-bucking, rearing-get our attention. But horses often speak in whispers long before they shout. These are the subtle cues I check for during every grooming session and tack-up, especially when trying to determine if your horse is truly happy.
- The Dreaded Girthiness: More than just ticklishness. Flinching, pinning ears, or even snapping when the girth is done up signals pressure on the sternum or behind the elbows. My old gelding, Rusty, started doing this when his saddle tree had subtly widened.
- The Hollow Escape: Instead of rounding into contact, the horse dips its back down and away from the saddle pressure the moment you mount. It’s an instinctual evasion of a sore spot.
- The Reluctant Stand: A horse that fidgets endlessly at the mounting block, or one that used to stand like a rock and now won’t, is often anticipating discomfort.
- The Tail Swish (When It’s Not a Fly): A rhythmic, irritated swishing during work, especially in tandem with pinned ears, is a classic sign of back or saddle discomfort.
Observing your horse at liberty after untacking is just as telling as watching them under saddle. Do they immediately drop and roll, trying to scratch an itchy back? Do they stand stretched out, as if relieved?
Reading the Clues: Physical and Behavioral Red Flags
Where to Look for Soreness and Pressure Points
The body doesn’t lie. Run your hands over your horse daily, feeling for what’s changed. Pressure from ill-fitting tack leaves a map on their skin and muscles. Regular touch not only helps you spot issues but also deepens your connection with your horse.
Right After Untacking:
- Sweat Patterns: Dry spots under the saddle, especially directly under the pommel or cantle, indicate areas of excessive pressure where sweat couldn’t permeate. Even, damp sweat is ideal.
- White Hairs (Depigmentation): This is a late-stage red flag. Consistent pressure damages hair follicles, causing white hairs to grow in specific patterns, often along the withers or spine.
- Immediate Swelling or Ridges: Run your hand firmly along the back and withers. Can you feel any raised, puffy areas or distinct ridges where the saddle panel sat? These are pressure points.
During Routine Care:
- Muscle Atrophy: Look for hollows or dips behind the withers or along the topline. A saddle that bridges (makes contact only at the front and back) can cause muscles to waste away from lack of proper stimulation.
- Sensitive Spots: Does your horse flinch or sink away when you curry a specific area on its back, shoulders, or poll? This is localized soreness.
- Hair Loss or Scuffing: Check the corners of the mouth for rubs from the bit, behind the ears from the browband, and around the girth area. Our Shetland, Pipin, is a master at growing rubbing his fur off if his little roller buckles aren’t smooth.
Combining what you see on their body with what you feel under saddle is the definitive diagnosis for tack-related issues. A sore back leads to a short stride. A pinched shoulder leads to a reluctance to reach forward. It’s all connected.
The Horse n Hay Tack Fit Troubleshooting Checklist
Grab a notebook. The best troubleshooting starts with quiet observation, not frantic gear-swapping. I keep a barn log for each horse; a few notes on a bad day can reveal a monthly pattern you’d otherwise miss. It’s a crucial part of troubleshooting your horse’s health.
Step 1: Observe the Behavior Pattern
Is the behavior constant, or does it start ten minutes into a ride? Pinpointing the when gives you the why.
- During Tacking Up: Ear pinning, swishing tail, biting when girth is tightened. This is often pain, not spite.
- At Mounting: Swinging hindquarters, walking off. Could be saddle imbalance or panel pressure.
- Under Saddle: Refusing transitions, hollowing the back, rushing fences. The horse is seeking relief from discomfort.
- With the Bridle: Head tossing, gaping mouth, fighting the bit. Check the bit, the noseband, and the poll pressure.
My sensitive Thoroughbred, Luna, would start tail-swishing violently about twenty minutes into every ride; it turned out my saddle was bridging, putting awful pressure on her loins.
Step 2: Inspect Your Horse’s Body
Run your hands over your horse before and after riding. Look for what the hair and muscle tell you. Check for any signs of discomfort or lameness. Knowing how to tell if your horse is lame and what to do next can help you address any issues promptly.
- Feel for heat, especially along the withers, back, and girth area.
- Search for dry spots (where sweat didn’t form) under where the saddle panels sit.
- Look for white hairs, swellings, or scabs at the girth line or behind the elbows.
- Check for tenderness or flinching when you press along the spine and shoulder blades.
A dry spot is a major red flag-it means pressure was so intense it cut off circulation and prevented sweating.
Step 3: Inspect the Tack Itself
Lay your saddle and bridle out in good light. Look at them like a detective.
Is It Clean and Safe?
- Is there mud, sweat, or hair matted in the fleece? It creates lumps.
- Check for cracked leather, broken stitching, or rusted stirrup bars.
- Run your fingers along the underside of the bridle’s browband and noseband. Are there stiff, rough edges?
A dirty saddle pad is a common culprit for back soreness; it becomes as abrasive as sandpaper.
The Static Fit Assessment
Place the saddle on your horse’s bare back, without a pad. Don’t girth it up.
- Look from the rear: you should see a clear, even channel down the middle over the spine.
- Press down on the seat. The saddle should not rock or pivot.
- Slide your hand under the front of the panel. Can you fit 2-3 stacked fingers between the panel and the withers?
- Look from the side. Is the pommel roughly two to three inches above the withers?
If the saddle sits low and tight at the pommel, it’s a sign of a too-narrow tree that is pinching the withers.
Solving the Saddle Puzzle: Tree, Panels, and Girth
The saddle is a complex system. A poor fit in one area stresses the whole structure and your horse.
Checking Tree Width and Panel Configuration
The tree is the skeleton. Too narrow, it pinches. Too wide, it pounds down on the spine.
- Place the saddle and step back. The points of the tree (front of the panels) should follow the angle of your horse’s shoulder.
- Watch as your horse walks. The saddle should stay centered, not slide side-to-side or forward.
- Feel the panel contact. It should be even from front to back, not just touching at the front and back with a gap in the middle (bridging).
I once tried a saddle on Rusty that seemed perfect until he moved; it rocked like a seesaw, putting all its pressure on a single point behind his shoulders. Panels can be flocked with wool or made of foam. Wool needs regular professional adjustment to maintain even contact. Foam panels are static but can lose their shape over years.
Girth and Cinch Comfort: More Than Just Tightness
The girth is the anchor, but it shouldn’t feel like a tourniquet.
- Width & Shape: A too-narrow girth can pinch. Anatomical girths that curve around the elbow often provide relief.
- Material: Stiff leather needs breaking in. Neoprene can trap heat and sweat. Mohair or soft cord is often a cool, gentle choice.
- Position: Ensure it’s in the girth groove, not too far forward where it rubs the elbow, or so far back it interferes with the saddle’s balance.
- The Tightening Ritual: Always tighten gradually. Do a final check after walking a few circles, as the saddle settles.
A girth gall starts as a small rub and can sidelined a horse for weeks. I check Pipin’s girth area daily because his pony belly is always changing shape. Many common horse health issues are related to anatomy. Understanding how a horse is built helps with prevention and early detection.
Bridle and Bit Breakdown: Pressure From the Poll to the Mouth

The head is a hub of sensitive nerves and complex bones. A poorly fitted bridle doesn’t just cause a headshake; it can create a resentful, resistant horse. I’ve spent countless hours in the crossties, listening to the soft jingle of buckles, feeling for the subtle tell-tale signs of discomfort.
Bit Fit and Selection: It’s Not One-Size-Fits-All
A bit should rest quietly in the mouth, not act as a constant clamp. Fit is about millimeters and anatomy, not guesswork.
- Width: A bit that’s too narrow pinches, one that’s too wide slides and clacks. You should see about 1/4 inch of bit ring protruding on each side of the mouth.
- Height: It should create one or two soft wrinkles at the corner of the lips. More than that means it’s jacked up too high, pulling the lips. No wrinkles often means it’s hanging too low, banging on teeth.
- Type is everything. My sensitive thoroughbred, Luna, went from fussy to soft in the mouth simply by swapping a thick, single-jointed snaffle for a thinner, double-jointed one. The nutcracker action was gone. Choosing a bit is less about control and more about clear, comfortable communication.
- Check for wear! Run your thumb over the mouthpiece. Any roughness, sharp edge, or groove can feel like sandpaper to a horse’s tongue.
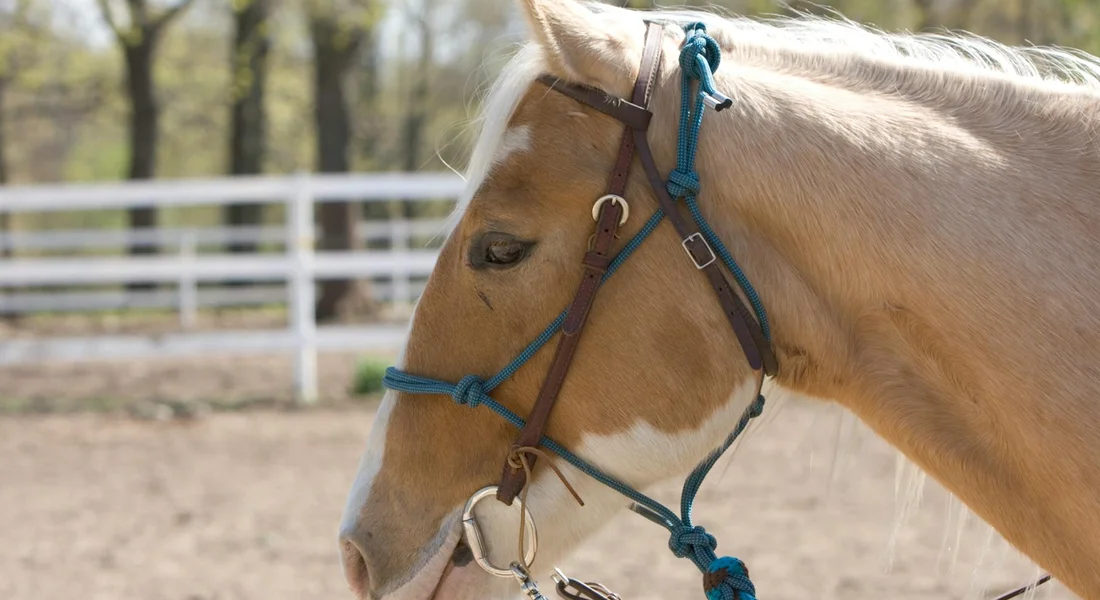
Headpiece, Browband, and Noseband Nuances
Every strap has a job, and every strap can cause grief if it’s wrong.
- Headpiece (the poll pressure point): Slide two fingers underneath it, right behind the ears. It should sit flat without digging. If your horse tosses his head when you first put the bridle on, this is often the culprit. A too-tight headpiece is like a permanent, low-grade headache for your horse.
- Browband: It’s not just decoration. It should rest smoothly against the forehead without pulling the headpiece forward. A short browband will create a visible forward tug on the headpiece, creating pressure right at the most sensitive spot.
- Noseband (cavesson, flash, etc.): This is a major offender. You must fit four fingers vertically under the front of it, on the nasal bone. Any tighter restricts breathing and swallowing. The buckle should sit at least two inches below the cheekbone to avoid pinching.
Making Corrections and Knowing When to Call for Backup

You’ve done your detective work. Now what? Some fixes are simple, others require an expert eye.
Immediate Adjustments You Can Try
Before you buy new gear, see what a few adjustments can do. Always make changes with the bridle off the horse for safety.
- Clean everything. Salt crust and dirt make leather stiff and abrasive.
- Loosen every strap by two holes and re-fit from scratch, using the finger-width rules.
- Try a bitless option or a different bit for a single, quiet lunging session. Observe the change in posture and relaxation.
- Check your saddle pad again. Often, back pain manifests as head and mouth issues. A grunt when girthing up or a swishing tail under saddle can be a red flag that the root problem starts farther back.
The Non-Negotiable Step: Hiring a Professional
There is no shame in calling for help. In fact, it’s a sign of a responsible horseman.
- Call a Certified Saddle Fitter if your saddle slips, you see dry spots, or your horse’s behavior changes over the withers or back. They see issues the untrained eye misses.
- Consult a Qualified Bit Fitter or Equine Dental Technician. A bit fitter can analyze your horse’s mouth conformation. An equine dentist can ensure there are no sharp hooks or wolf teeth interfering with the bit. I schedule Pipin’s dental checks religiously; that clever pony will exploit any mouth discomfort to avoid work.
- Involve your trainer. A good trainer can tell if the issue is tack or training. After we adjusted Rusty’s saddle, his “puddle-hating” evasion vanished-it was never stubbornness, it was pain.
Investing in a professional fitting is cheaper than vet bills for ulcers or rehabbing a sore back, and it rebuilds the trust you’re trying to build in the saddle.
FAQ: Tack Fit Troubleshooting Checklist
Is the behavior new or has it been ongoing?
A new, sudden behavior change is a major red flag that often points directly to a tack issue or recent physical discomfort. An ongoing, persistent issue could stem from a long-standing fit problem that has caused lasting soreness or a learned evasion. Pinpointing this timeline is your first critical step in the detective process outlined in the checklist.
Does the behavior occur with specific tack or all tack?
Noting if the problem happens with one specific saddle, bridle, or bit is a huge clue. If the behavior disappears with different equipment, you have likely isolated the primary source of discomfort. This observation directly informs which part of your tack requires the most thorough inspection from the checklist’s step-by-step guide.
Have you checked for physical signs of discomfort (e.g., sores, white hairs, swelling)?
Your horse’s body provides undeniable evidence. You must conduct a hands-on inspection before and after riding, as detailed in the article, feeling for heat, swelling, or sensitive spots. Looking for dry sweat patterns, white hairs, or hair loss maps the pressure points directly to the ill-fitting tack component. These checks also help you spot early signs of illness or injury in your horse, enabling timely professional care. If you notice anything unusual, seek veterinary advice promptly.
Ride Safe, Ride Smart
Methodically work through your tack fit checklist, focusing on saddle tree width, panel contact, and bit position at the standstill and in motion. When behavior shifts, your first stop should always be a thorough tack inspection-addressing physical discomfort resolves most issues faster than any training method.
True horsemanship means prioritizing your horse’s safety and well-being over the ride itself. Trust the feedback in a pinned ear or a tense back; those quiet signals are your most reliable guide to understanding horse behavior and psychology.
Further Reading & Sources
- Your Horse’s Tack Fit Affects His Health and Wellbeing
- Correctly Fitting Tack and Why It’s Important | Naylors Blog | Naylors
- Tacking up and ridden behaviours – World Horse Welfare
- How To Be A Tack-Fit Detective – Equus Magazine
At Horse and Hay, we are passionate about providing expert guidance on all aspects of horse care, from nutrition to wellness. Our team of equine specialists and veterinarians offer trusted advice on the best foods, supplements, and practices to keep your horse healthy and thriving. Whether you're a seasoned rider or new to equine care, we provide valuable insights into feeding, grooming, and overall well-being to ensure your horse lives its happiest, healthiest life.
Equipment