How to Support Your Horse’s Recovery from Injury or Surgery
Hello fellow equestrians. That moment you see your horse favoring a leg or facing a surgery date is a real heart-drop. Suddenly, you’re juggling vet bills, safety protocols, and the worry that your horse won’t understand why their world has shrunk to a stall.
Take a deep breath. I will guide you through a practical, step-by-step approach to recovery, focusing on transforming a stall into a safe healing space, mastering pain management and medication routines, adjusting feed for optimal tissue repair, becoming a pro at wound and bandage care, and safely reintroducing movement when the vet gives the all-clear.
I’ve spent over a decade as a barn manager and trainer, walking this path with everything from my stoic Quarter Horse Rusty to my high-strung Thoroughbred Luna, and I’m here to share the stable-smart lessons I’ve learned.
The Critical First Days: Immediate Post-Operative Care
The clock starts ticking the moment your horse is back in the stall. I’ve spent countless nights on a cot in the tack room, listening to the soft rustle of shavings, ready to act. Those first 48 hours set the tone for the entire recovery.
Your primary job is to be a vigilant observer and a calm presence, executing the vet’s orders with military precision. The horse is coming off anesthesia and managing surgical pain, which requires your full attention. Beyond this, understanding the broader scope of advanced equine medical procedures every owner should know helps you advocate for your horse during recovery. This knowledge will guide your questions and decisions as you work with the veterinary team.
Following Your Veterinarian’s Plan Precisely
This is not the time for creative interpretation. Your vet’s discharge sheet is your bible. Tape it to the stall door.
- Medication Schedule: Antibiotics and anti-inflammatories are often given on a strict timetable to maintain effective levels in the bloodstream. Set phone alarms.
- Wound or Suture Care: This may involve cold hosing, applying a prescribed topical, or simply keeping a bandage clean and dry. Never use products not approved by your vet.
- Weight-Bearing Instructions: Know exactly how much, or how little, pressure the limb can bear. Is toe-touching okay? Absolutely no weight?
- Dietary Adjustments: They might recommend wet mashes for easier consumption and hydration, or restrict hay types to prevent gas colic.
Monitoring Vital Signs and Early Warning Signals
You need to know your horse’s normal baseline. A quick refresher:
- Temperature: 99-101°F. A rising temperature is often the first sign of infection.
- Pulse: 28-44 beats per minute. Feel for the artery under the jaw or inside the fetlock. A persistent elevated pulse signals pain or distress.
- Respiration: 8-16 breaths per minute. Watch the flank rise and fall.
Check these at least twice daily. More importantly, know the red flags. Any sign of increased heat, sudden swelling, a foul odor from the incision, or discharge is a direct line to your veterinarian. Also watch for depression, loss of appetite, or pawing-signs of pain or colic.
Giving medication? For oral paste, deposit it on the back of the tongue by sliding the applicator in from the side. For injections, follow your vet’s demonstration for site and technique to ensure safety and efficacy.
Mastering the Confinement Phase: Stall Rest and Controlled Turnout
Stall rest tests the patience of both horse and human. I’ve walked Pipin, our Shetland, in endless circles just to use up his clever energy. The goal is to prevent re-injury while the body heals, but a happy horse heals faster.
Confinement isn’t just locking the door; it’s creating a secure, therapeutic space that minimizes stress and maximizes physical safety.
Creating a Healing-Friendly Stall Environment
Think of the stall as a recovery room. Every detail matters.
- Deep, Supportive Bedding: Use dust-free shavings or straw banked high against the walls. A deep bed encourages lying down to rest, which is crucial for healing and preventing stocking up.
- Remove All Hazards: Check for loose boards, protruding nails, or anything a bored horse might lip at. Automatic waterers should have their edges smoothed.
- Boredom Busters are Non-Negotiable: A slow-feed hay net stretches foraging time. A lickit or a treat ball (with vet-approved snacks) provides mental stimulation. If possible, allow safe visual or grooming contact with a calm neighbor.
- Ventilation: Fresh air is vital. Keep windows open or fans running (safely caged) to reduce dust and respiratory irritants.
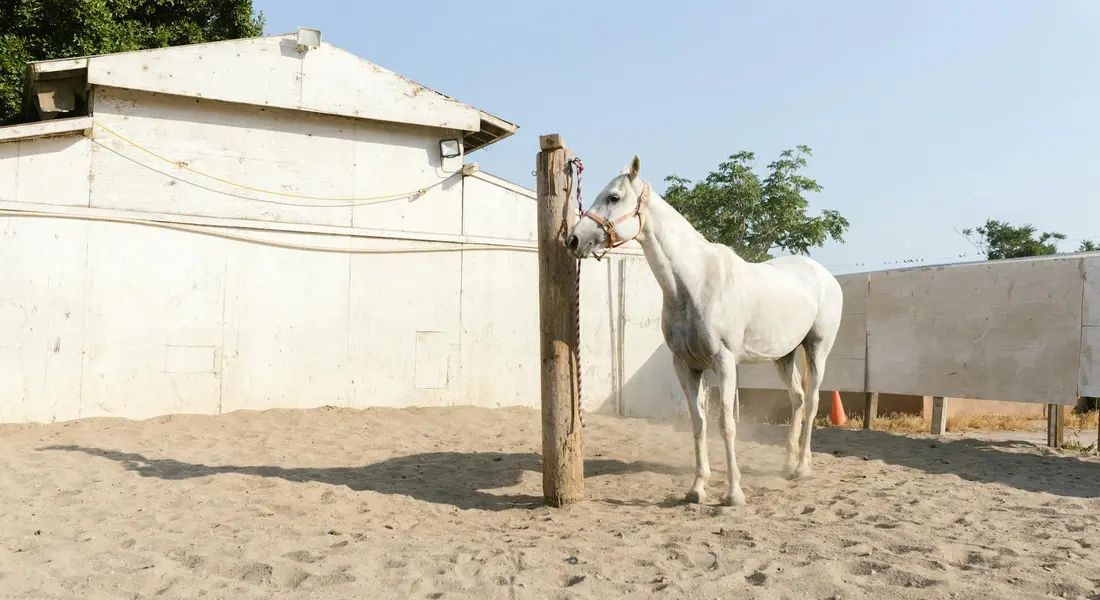
Safely Reintroducing Turnout Time
The first step back outside is a milestone. It’s also a moment of high risk. With Luna, after her tendon strain, we started with just five minutes.
- Start Small and Supervised: Initial sessions should be 10-15 minutes, in a small, flat paddock or round pen. You should be present, not watching from the window.
- Perfect the Footing: The area must be even, dry, and free of holes. No mud, no deep sand that could strain tendons.
- Safety-Check the Fencing: Walk the entire perimeter. Ensure there are no loose wires, broken posts, or gaps.
- Gradually Increase Time and Space: Add 5-10 minutes every few days, as directed by your vet. Only increase the paddock size once the horse is walking calmly in the current space.
Always hand-walk your horse for a few minutes in the aisle before turnout to let them assess their own comfort and stiffness, which can prevent an explosive reaction to open space. For beginners, a handle horse safely beginners guide can offer quick, practical steps. It provides a friendly bridge to the next steps. This phased approach respects the healing tissue while rebuilding confidence.
The Hands-On Work: Wound Care and Bandaging
Your daily touch is what keeps infection at bay and comfort high. I learned with Rusty that a methodical, gentle approach to wounds prevents small issues from becoming big problems. This hands-on time is your chance to monitor healing closely and bond with your horse.
Daily Wound Cleaning and Antiseptic Use
Cleaning is about removing debris, not scrubbing the skin raw. Always start by haltering your horse securely and speaking in a low, calm voice to keep them still. Gather your supplies first: a clean bucket, warm water, sterile gauze, and your chosen antiseptic. Your horse’s face, ears, and other sensitive areas require extra care during cleaning. We’ll cover how to safely clean those areas in the next steps.
- Flush the wound gently with a steady stream of warm saline or clean water. I use a squeeze bottle for control.
- Pat the area dry with sterile gauze, moving from the wound center outward to avoid dragging dirt back in.
- Apply a vet-recommended antiseptic with a fresh piece of gauze. Never pour liquid directly onto the wound.
Not all antiseptics are equal. Dilute chlorhexidine is my go-to for most cuts because it’s effective yet gentle on new tissue. Povidone-iodine is another option but can dry the skin. Plain saline is perfect for simple, clean scrapes. Healing signs include pinkish new skin (granulation tissue), less swelling, and a mild, clean smell. Call your vet if you see yellow pus, red streaks, or feel excessive heat.
Effective Bandaging and When to Change It
Selecting the Right Bandaging Materials
A proper bandage is a three-layer system that protects without restricting. The right materials prevent pressure sores and keep the wound environment optimally moist. Here is what you need in your kit:
- Primary Layer: A non-stick pad like Telfa that sits directly on the wound. For a dry wound, hydrogel sheets can promote moisture.
- Padding Layer: Roll cotton or combine. This cushions the area and absorbs any discharge. Use extra on legs to evenly distribute pressure.
- Outer Wrap: Self-adherent vet wrap (like Vetrap) or a stable bandage. This holds everything in place without pins or tape.
Choose materials based on location. A leg wound needs robust padding to prevent “bandage bow,” while a body wrap must allow full chest expansion.
The Bandage Change Routine
Consistency is key. Change bandages once daily, or as your vet directs, to inspect the wound and prevent moisture buildup. Work in a clean, well-lit area like a wash stall.
- Cut the old bandage off carefully with bandage scissors, always pointing the blades away from the skin.
- Discard the old dressing and note the wound’s appearance. Take a photo with your phone to track progress.
- Clean the wound using the steps above, then apply a fresh primary dressing.
- Wrap the padding layer smoothly. It should be snug but loose enough to slip two fingers underneath.
- Apply the outer wrap with a 50% overlap, ensuring no wrinkles that could cause rubs.
Stay alert for red flags between changes. Contact your vet immediately if you notice sudden lameness, a foul odor, the bandage is saturated, or your horse is feverish. Know the emergency signs for horses and when to call the vet. Getting prompt advice can prevent serious outcomes. Trust your eyes and your gut.
Fueling the Healing Process: Nutrition, Hydration, and Hoof Care
Healing demands energy from within. Think of recovery as a construction project where forage is the lumber and protein is the nails. Good hoof care supports the entire structure by ensuring comfort and circulation.
Building a Recovery Diet with Forage and Supplements
Never cut back on quality hay during recovery. Your horse should consume at least 1.5% of its body weight in forage daily to maintain gut health and provide steady calories. For a 1000-pound horse, that’s 15 pounds of hay. On stall rest, use slow-feed nets to mimic natural grazing and prevent boredom. For a full breakdown of how much hay a horse should eat daily, covering different weights and activity levels.
Soaked feeds like beet pulp or hay pellets can add hydration and calories for a picky eater. Always consult your vet before adding supplements, but common healing aids include omega-3s for inflammation, probiotics for gut support, and balanced electrolytes for hydration. Weigh your horse weekly with a tape; unplanned weight loss steals the resources needed for repair.
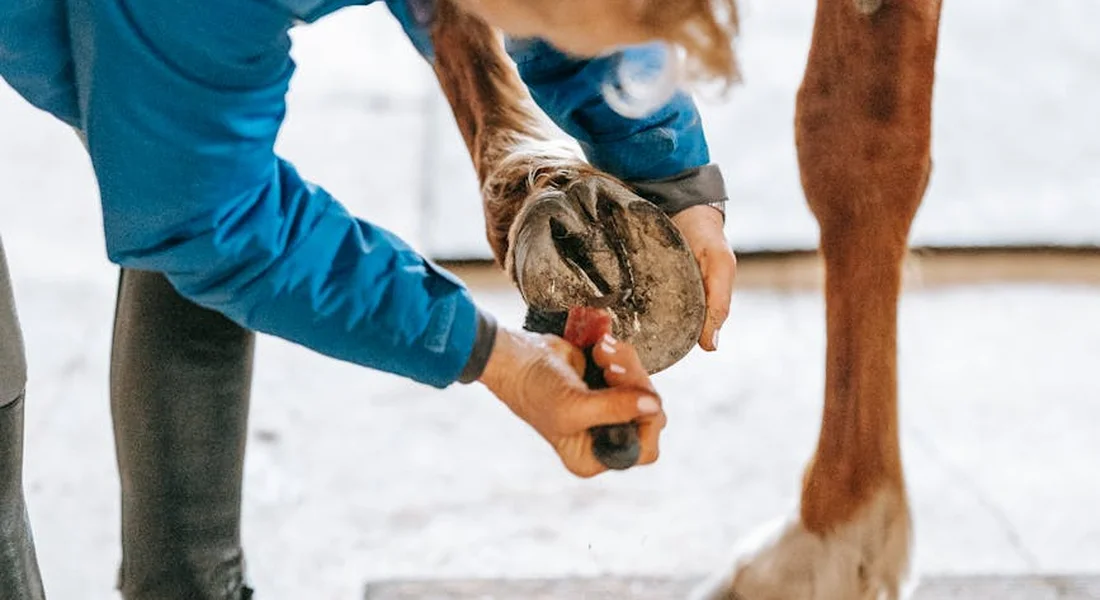
Supporting Recovery Through Hoof Health
The hoof is a mirror to overall health. Daily picking isn’t just about removing stones; it’s a chance to check for unusual heat or a digital pulse that signals pain or inflammation. Clean, dry hooves are less prone to thrush, which can complicate standing still.
Involve your farrier early in the recovery plan. Therapeutic shoeing, like using a heart bar shoe for support or a pad for cushioning, can make all the difference in a horse’s comfort. Even on stall rest, a balanced trim is crucial. Ask your farrier about a more frequent schedule to prevent uneven wear when movement is limited.
Managing Comfort: Pain Control and Anti-Inflammatory Strategies
Keeping your horse comfortable after an injury isn’t just about ethics; it directly impacts how well and how quickly they heal. Unmanaged pain stresses their body, delaying tissue repair and making stall rest even more frustrating for a creature built to move. Many horses receive common medical treatments, such as anti-inflammatories and analgesics, under veterinary guidance. Your veterinarian will prescribe a core protocol, but blending those meds with supportive, hands-on methods creates a full circle of care.
Complementary therapies can reduce reliance on pharmaceuticals and address stiffness from confinement. Always get your vet’s green light before starting any new therapy, especially near a surgical site or fresh wound. Here are a few methods I rely on in my barn:
- Cold Therapy (Cryotherapy): Excellent for reducing acute inflammation and providing pain relief through numbness.
- Gentle Massage: Eases muscle tension from compensation, improves circulation, and offers valuable bonding time.
- Controlled Hand-Walking: When cleared, this prevents joints from seizing up and stimulates mind and body.
Safety is paramount with all methods. Never use a therapy that causes obvious distress, and always protect the skin from direct ice contact to avoid thermal injury. I learned this with Luna; her thin skin required a thicker towel barrier during cold hosing.
Using Vet-Approved Medications Safely
Drugs like phenylbutazone (“bute”) are workhorses in the recovery barn, but they are powerful tools, not cure-alls. Administering the exact dose for your horse’s current weight is critical, as even small overages can lead to gastric ulcers or kidney issues over time. I keep a weight tape right on the med cabinet to avoid guessing.
Common medications your vet may prescribe include:
- Phenylbutazone: A classic non-steroidal anti-inflammatory drug (NSAID) for pain and swelling.
- Flunixin Meglumine: Another NSAID often used for more severe pain or colic episodes.
- Firocoxib: A newer generation NSAID targeting specific inflammation pathways.
Monitor your horse closely while on any medication. Watch for subtle side effects like a dip in appetite, softer manure, or a dull demeanor, which signal you need to call your vet. With a food-motivated pony like Pipin, if he refuses a carrot, I know something is off immediately.
Supportive Therapies: Cold, Massage, and More
Cold therapy is my first go-to for fresh injuries. Apply cold for 15-20 minutes at a time, using a wrap or towel to prevent frostbite, and always allow the tissue to fully rewarm between sessions. Here’s a safe routine I follow:
- Ensure the wound or incision site is clean and dry per your vet’s instructions.
- Place a cold pack or use a gentle cold hose stream over a light bandage or damp cloth.
- Set a timer-going longer than 20 minutes risks damaging the skin.
- Afterward, dry the area and observe for any adverse reaction like excessive redness.
Massage requires no fancy equipment, just patience. Start with slow, rhythmic strokes along large muscle groups like the neck and hindquarters, following the direction of hair growth to promote relaxation. Avoid direct pressure on the injury site unless advised. Giving Rusty a good shoulder rub during his tendon recovery kept him calm and seemed to ease his stiffness.
Vigilant Observation: Spotting Complications and Infection
Your daily observation is the most critical nursing skill you possess. Infections can escalate from a minor concern to a crisis in less than a day, so knowing the signs of trouble separates a smooth recovery from a prolonged one. Trust your gut; you know your horse’s normal better than anyone.
Key Signs of Infection or Healing Setbacks
Healing tissue will be slightly warm and may have mild swelling, but this should gradually improve. Drainage that changes from clear to thick, yellow, or greenish pus is a classic indicator of infection, often accompanied by a foul smell. Behavioral changes are equally telling; a normally tolerant horse becoming head-shy or resistant to handling is crying out in pain.
- Heat and Redness: The area feels hot to the touch and looks angrier or more inflamed than the day before.
- Increased Lameness: Your horse becomes more reluctant to bear weight on the limb, not less.
- Loss of Appetite: A clear signal of systemic upset or increased pain levels.
- Lethargy or Depression: Standing isolated in the stall with a dull eye, showing little interest in surroundings.
- Fever: A rectal temperature over 101.5°F indicates the body is fighting something.
Your Daily Monitoring Checklist
Make this a quick but thorough part of your morning and evening routine. Keeping simple notes on your phone or in a barn log helps you spot trends that a single day’s check might miss. Run through this list every visit:
- Wound or Incision Site: Look for clean, dry edges closing neatly. Note any new swelling, discharge, or sutures pulling loose.
- Basic Vital Signs: Know your horse’s baseline. Quick check: temperature, gum color (should be pink), and capillary refill time.
- Feed and Water Intake: Is hay consumption normal? Is the water bucket level dropping appropriately?
- Manure Production: Note the quantity and consistency. Reduced output or dry balls can signal pain or dehydration.
- General Demeanor: Is she resting comfortably, alert, and interactive? Or is she parked in a corner, sweating, or pawing?
If you note any key signs of infection or a sudden decline in any category, call your veterinarian immediately-do not delay until the next scheduled recheck. Time is always of the essence with complications.
Guided Rehabilitation: Reintroducing Movement and Mental Wellness
Rehab is not a straight line but a careful dance between rest and controlled activity. Your veterinarian’s protocol is the blueprint, but your daily attention to your horse’s mood and movement will determine the pace. We aim to rebuild the body without breaking the spirit, which means equally focusing on physical healing and mental peace.
- Every increase in activity must be approved by your vet, based on rechecks and sometimes ultrasound. Rushing this process is the fastest way to a setback.
- Rehabilitation exercises range from basic to advanced. Common, accessible options include diligent hand-walking, gentle hill work in-hand, and passive range-of-motion stretches. For facilities with the resources, hydrotherapy like water treadmills provides low-impact conditioning.
- Confinement stress is a real hurdle. A bored horse is a creative one, often in ways that hinder healing, so we must plan for their brain as much as their limb.
Step-by-Step Reintroduction to Exercise
Think of this phased plan as building a foundation, one slow, deliberate brick at a time. I learned with Luna that skipping ahead a day because she “seemed fine” only led to a tense back and a worried mind-for both of us.
- Foundation Phase: Structured Hand-Walking. Begin with two short, 5-minute sessions daily on level footing. The goal is a rhythmic, relaxed walk. After 3-4 days, add only 2 minutes per session if there is no heat, swelling, or lameness.
- Engagement Phase: Introduce Low-Impact Challenges. After a solid week of straight-line walking, add wide, sweeping circles or a very slight incline. Incorporate carrot stretches by holding a treat to encourage them to bend gently at the poll and toward their girth area.
- Freedom Phase: Supervised Turnout. When your vet gives the green light, provide short, 10-15 minute sessions in a tiny, hazard-free pen. This allows for voluntary walking and grazing. Rusty’s first time out after surgery was just standing and dozing in the sun-pure therapy.
- Return to Work Phase: Under-Saddle Walking. This starts only after weeks of successful hand-walking and turnout. Initial rides are just walking, replicating the hand-walking duration and terrain, with a focus on perfect balance from the rider.
Supporting Your Horse’s Mental Well-Being
Stall rest can make the kindest horse feel like a caged tiger. Your consistency provides a scaffold of predictability in a suddenly small world. From my years managing the barn, I’ve seen that mental distress often manifests physically, slowing healing.
- Unyielding Routine: Feed, muck, and medicate at the same times each day. The sound of your footsteps at the expected hour becomes a comfort.
- Safe Socialization: If the injury allows, ensure they can see and touch noses with a quiet pasture mate over a safe barrier. Isolation fuels anxiety.
- Strategic Enrichment: Use a slow-feed hay net to stretch meal times. Provide a lickable toy or a root vegetable hung from a string. Pipin, our resident escape artist, would patiently untie knots in a thick rope for hours.
- Sensory Variety: Change their view by occasionally moving their stall guard. Spend time not just doing, but being-read a book aloud while you groom. The smell of fresh hay and the thud of your voice on the quiet barn air are calming signals.
FAQ: Supporting Your Horse’s Recovery from Injury or Surgery
What are the initial post-operative or post-injury care steps?
Begin by strictly adhering to your veterinarian’s discharge instructions, including medication schedules and wound care protocols. Closely monitor vital signs like temperature, pulse, and respiration at least twice daily to establish a baseline and detect early issues. Consider following the take-your-horses vital signs step-by-step guide for a practical, hands-on approach to monitoring these numbers. Ensure your horse has a quiet, safe stall with deep bedding and minimal stressors to promote rest and healing.
How should pain and inflammation be managed during recovery?
Use vet-prescribed anti-inflammatory medications, such as phenylbutazone or firocoxib, at the precise dosage for your horse’s weight to effectively control pain while minimizing risks like ulcers. Incorporate supportive methods like cold therapy for acute swelling and gentle massage to relieve muscle stiffness, always with veterinary approval. Observe your horse for any side effects, such as reduced appetite or behavioral changes, and report them to your vet promptly.
What are the signs of complications or infection to watch for?
Watch for increased heat, sudden swelling, or red streaks around the injury site, along with thick, discolored discharge or a foul odor. Behavioral red flags include lethargy, loss of appetite, increased lameness, or signs of colic like pawing or sweating. Maintain a daily checklist to track vital signs, wound appearance, and overall demeanor, and contact your veterinarian immediately if any concerning symptoms arise.
The Long Walk Home
Stick to your vet’s plan, create a calm and consistent routine, and remember that controlled, gentle movement is often the best medicine. Your most important job is to follow the professional guidance you’ve been given, even when progress feels slow.
True healing happens on your horse’s timeline, not yours. Listen more than you speak, and let their comfort be your guide-that’s good horsemanship from the barn aisle to the pasture gate.
Further Reading & Sources
- Equine Rehabilitation: A Scoping Review of the Literature – PMC
- Injury Rehabilitation for Horses: Managing Expectations & Optimizing Recovery for Your Equine Partner | Mad Barn
- Rehabilitation and Recovery for Sport Horses: Getting Back in the Game | Bluegrass Equine Surgery | Versailles Equine Vet
- Equine Rehabilitation Programs: What to Expect When Your Horse is Recovering – [Guide] | Mad Barn
At Horse and Hay, we are passionate about providing expert guidance on all aspects of horse care, from nutrition to wellness. Our team of equine specialists and veterinarians offer trusted advice on the best foods, supplements, and practices to keep your horse healthy and thriving. Whether you're a seasoned rider or new to equine care, we provide valuable insights into feeding, grooming, and overall well-being to ensure your horse lives its happiest, healthiest life.
Health