8 Trail Riding Safety Mistakes That Can Lead to Serious Accidents
Hello fellow equestrians! That tightness in your chest when you think about hitting the trails isn’t just excitement-it’s often a real worry about your horse’s safety or a nasty fall. I’ve watched a simple trail ride turn chaotic, leading to everything from strained muscles to scary vet visits, and I know that gut feeling all too well.
In this guide, I’ll walk you through the critical errors I’ve seen time and again, so you can ride with confidence. We’ll focus on key solutions like mastering pre-ride checks, understanding horse fatigue signals, planning for weather and terrain, and packing the right safety gear.
My advice comes from over a decade in the saddle and the barn, managing the care of steady geldings like Rusty and training sensitive thoroughbreds like Luna.
1. Skipping Vital Pre-Ride Checks
Rushing to mount up is the first domino that can topple a perfect ride into a problem. I’ve learned this the hard way after a hurried tack-up led to a slipped saddle halfway down a ravine with my trusty gelding, Rusty. Your pre-ride ritual is the foundation of everything that follows, and it starts long before your foot hits the stirrup.
Begin with your horse, not your gear. Run your hands down all four legs, feeling for heat or swelling. Watch them move at a walk on a firm, flat surface for any hint of a head bob or shortened stride. Also, stay alert for early signs of illness or injury your horse may show. Catching these early can help you act quickly and consult your vet.
- Eyes, Ears, Nose: Check for clear, bright eyes free of discharge. Note if their ears are alert or lethargic. Ensure nostrils are clean.
- Hydration & Gut Sounds: Do a simple skin-pinch test on the neck; the skin should snap back quickly. Press your ear against their barrel and listen for the steady gurgle of digestion.
- Hoof Inspection: Pick out all four feet. Look for lodged stones, loose shoes, or cracks. This is non-negotiable.
Now, move to your tack. Run every inch of leather through your fingers.
- Saddle: Check the tree for integrity by pressing on the cantle and pommel. Inspect all billets and stirrup leathers for stretching, cracking, or worn stitching. Feel underneath the panels for lumps.
- Bridle: Examine the crownpiece, cheekpieces, and throatlatch for wear. Ensure the bit is secure and smooth. Test the buckle on the reins.
- Girth/Cinch: Look for frayed edges or weak spots. Smell it; a musty odor can mean rot.
Finally, do a personal gear check: are your phone charged, your emergency contact info on you, and does someone know your route and expected return time? A last-minute glance at a weather radar can save you from a lightning storm on an open ridge. Knowing if recent rains have turned your favorite creek crossing into a torrent is knowledge worth having.
2. Neglecting Tack and Personal Gear Maintenance
Leather and nylon don’t fail suddenly; they whisper their warnings through cracks, faded spots, and stiff patches long before they break. I keep a “retirement bucket” for old tack, a sobering collection of what could have been a disaster. A stitch in time doesn’t just save nine-it can save a trip to the emergency room.
Common tack failures are predictable. Stirrup leathers wear thin where they bend over the bar. Reins become brittle where your hands constantly hold them. Billet straps stretch and weaken. Cinches can chafe and fray where they meet the buckle.
Your maintenance routine doesn’t need to be complex.
- Weekly: Wipe down all leather with a damp cloth after riding to remove sweat and dirt. Condition leather every 4-6 weeks, more in dry climates.
- Monthly: Do a full inspection. Take the bridle apart. Examine every hole, stitch, and buckle tongue. Oil any squeaky or stiff points.
- Seasonally: Deep clean everything. Check synthetic tack for UV degradation and abrasion.
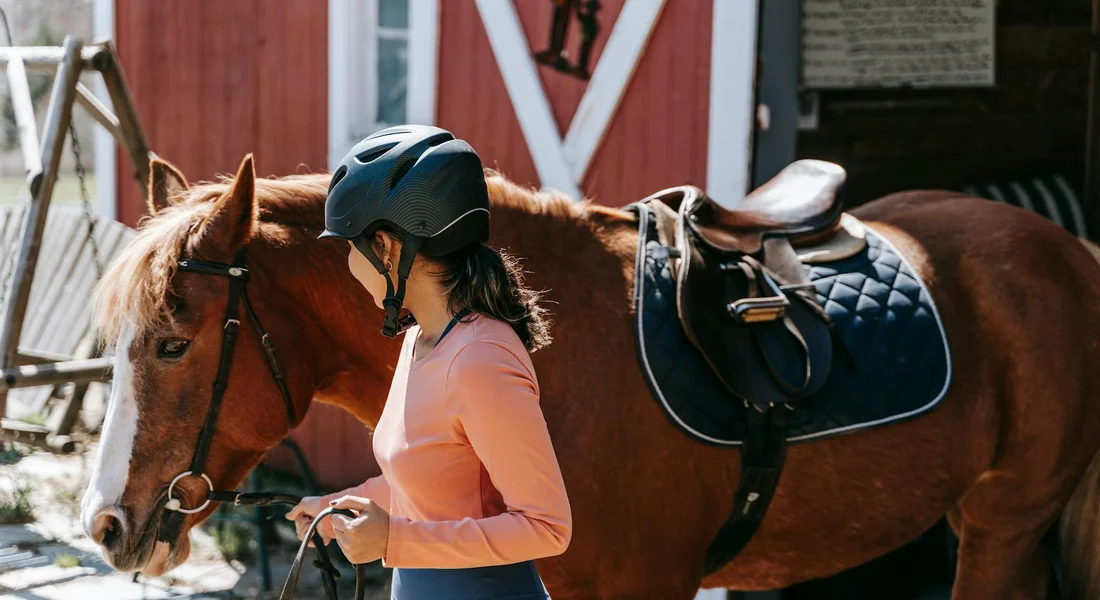
Your personal safety gear is even more non-negotiable. Your helmet is not a hat; it’s essential equipment.
Replace your ASTM/SEI certified helmet immediately after any significant impact, even if no damage is visible, and at least every five years as the protective foam degrades. Your boots should have a defined heel (about 1 inch) to prevent your foot from sliding through the stirrup. Gloves protect your hands from blisters and give you a better grip on the reins if they get sweaty. Sunglasses or clear eye protection shield your eyes from branches and insects.
| Gear Item | Quick Audit Question |
|---|---|
| Helmet | Is the certification label intact? Any dents or cracks in the shell? |
| Stirrup Leathers | Are there deep creases or cracks at the fold? Is the stitching secure? |
| Reins | Are they supple, or dry and stiff? Are the buckle tongues straight? |
| Boots | Is the sole in good condition? Is the heel still defined? |
| Emergency Kit | Is it in your saddle bag? Are the hoof pick, knife, and quick-release bandage fresh? |
3. Ignoring Trail Hazards and Weather Changes
Spotting Environmental Dangers
Trail riding isn’t a manicured arena ride; the course is designed by nature and it plays by its own rules. Your primary job up there is to become a scout for your horse. Your eyes need to be scanning the trail 20-30 feet ahead, not just at your horse’s ears, to anticipate problems before you’re in them. Low branches are sneaky-what clears your head might catch your rider’s chest or your horse’s brow. A loud crack followed by a panicked jump is a lesson you only need once. This is especially important when you’re trying to build trust and confidence with your horse on challenging trails.
Uneven terrain, like hidden holes or slick rock slabs, requires deliberate speed management. This isn’t a race. When the footing gets tricky, collect your horse’s gait, shorten your reins, and let them pick their way through at a cautious walk. That patient walk teaches a horse how to walk and navigate obstacles with confidence. It’s a skill that keeps us safe on uneven trails. I learned this with old Rusty, who would wisely slow to a crawl over questionable ground, while the more impulsive Luna needed a steady, reminding hand to think before she trotted.
Water crossings are a classic trouble spot. Never assume depth or footing. Dismount and lead through unknown water if you have any doubt. A horse that loses its footing in current can go down in a terrifying flash, putting you both in extreme danger. It’s vital to know when and how to trust your horse to handle water crossings. Let them sniff it, let them paw at it, and give them a clear, confident line to follow.
Adapting to the Sky
The weather you saddle up under is rarely the weather you finish in. A bright morning can dissolve into a chilling downpour or a humid, heavy heat. Always, and I mean always, pack more layers than you think you’ll need-a light rain shell stuffed in a saddlebag has saved my day more times than I can count. Hypothermia can sneak up on a damp rider when the wind kicks up.
More critical is watching your horse for weather stress. On hot days, I’m obsessively checking Luna for signs she’s done: flared nostrils that don’t recover, persistent sweating long after we’ve stopped, or a glazed look in her eye. If your horse’s breathing remains elevated and ragged after a five-minute rest in the shade, your ride is over-it’s time to walk home slowly and let them cool down properly. Turning back early isn’t a failure; it’s skilled horsemanship. If you notice signs your horse is overworked, it could benefit from a more regular, progressive exercise plan to build stamina. A gradual conditioning routine helps prevent burnout in the long run.
Check the radar before you go, but trust your gut and your eyes once you’re out. If the sky turns that strange green-grey or you hear distant thunder, your window for a safe return is closing fast. Get off the high ground, dismount if lightning is close, and head back. The trail will be there another, brighter day.
4. Riding Out Alone Without a Backup Plan
I love a solitary ride as much as anyone. The quiet, the connection, it’s magic. But it’s a calculated risk, not a casual stroll. Solo riding amplifies every other mistake; a simple spook becomes a crisis if you’re knocked unconscious and your horse heads for home without you. My rule is simple: if I ride alone, I prepare as if I’m leading an expedition.
Your communication plan is non-negotiable. Before I even groom Pipin for a solo adventure, I text a barn buddy or my partner my precise route and my hard “must be back by” time. Name the trailhead, describe your horse and tack, and state clearly: “If you don’t hear from me by X time, send help or come looking.” This isn’t paranoia; it’s the protocol that turns a search into a rescue.
Your gear must back you up. A fully charged phone in a zipped pocket is your lifeline, but service is often nonexistent on the best trails. A standalone GPS device or a satellite messenger is a wiser investment for the solo rider than any new pair of boots. Carry a basic human first-aid kit and know how to use it on yourself. Remember, you are your own only first responder. Plan for the worst, and you’ll enjoy the peaceful solitude of the ride so much more.
5. Forgetting Trail Etiquette and Clear Communication
Equine Manners on the Path
Sharing the trail means respecting every user, from hikers to bikers to other horses. Good etiquette isn’t just politeness; it’s a critical safety protocol that prevents startled horses and angry encounters. I learned this watching Pipin the pony try to herd a group of unsuspecting joggers-chaos we avoided with a few simple rules.
- Always announce your approach. Call out “Hello!” or “Passing on your left!” well before you reach others, especially from behind. A calm voice prevents surprises.
- Grant right-of-way to uphill riders. It’s harder for a horse to stop and restart on a slope. For everyone else, slow to a walk and communicate; most will yield to your horse.
- Keep a horse-length between mounts. This “bubble” prevents kicking, crowding, and gives each animal space to react. In groups, I put a steady Eddy like Rusty in the lead.
- Control your horse on the outside. When passing others, keep your horse between you and the obstacle or drop-off. Use steady leg pressure to maintain position.
- Wait for complete clearance at obstacles. Don’t enter a water crossing or gate until the rider ahead is fully out. A backup can cause a dangerous chain reaction.
Hand Signals and Voice Commands
Wind and distance can swallow shouts, but a clear visual signal cuts through the noise. Establishing a silent language with your riding partners before you head out is as important as checking your girth. Here are the signals that have saved our skins more than once.
- Stop: Raise a closed fist high overhead. Pair it with a firm “Whoa” for your own horse. I drill this with Luna, who sometimes thinks “whoa” is a suggestion.
- Hazard: Point directly at the ground near the hazard-a hole, wire, or low branch. Say “Heads up” to alert others to the specific location.
- Speed change: A patting motion with a flat hand means slow down. A circling hand means pick up a trot. Keep voice commands like “Easy” or “Trot on” consistent every ride.
- Direction change: Clearly point in your intended direction of travel before turning. On wooded trails, add a verbal “Turning left!” so followers aren’t caught off guard.
- Emergency: Wave both arms overhead in a crossing motion. This universal signal for a loose horse or serious trouble means clear the path and assist if safe.
6. Compromising on Protective Equipment Fit and Quality
I once helped a rider who took a fall in a department-store helmet; it offered no real protection. Your safety gear is a non-negotiable investment, and proper fit is everything-a helmet that shifts on your head is just a plastic hat.
An equestrian-specific helmet must be ASTM/SEI certified and fit so snugly it doesn’t rock when you shake your head. Unlike bike helmets, they’re engineered for equine impacts and are tested for retention. The harness should be tight enough that you can only fit one finger under the chin strap.
Your boots need a heel to stop your foot from sliding through the stirrup iron. Ankle-supporting footwear, like paddock boots, prevents twists and sprains on unpredictable terrain, something I’m grateful for every time Rusty sidesteps a rock.
Gloves provide grip and prevent rein burns. Leather-palmed gloves give you a secure hold in wet weather or sweat, allowing for gentle pressure instead of harsh pulls on your horse’s mouth. Luna’s sensitive nature demands nothing less.
Eye protection is often overlooked. Wraparound sunglasses or clear glasses shield your eyes from snapping branches, dust, and insects, ensuring you can see hazards clearly. After a debris cloud left me temporarily blinded on a trail, I never ride without them.
7. Lacking a Practical Emergency Response Strategy
Hope is not a plan. I learned this the hard way when Luna spooked at a fallen branch and I found myself fumbling for a hoof pick while she stood on three legs. Assuming everything will be fine is the quickest way to make sure it isn’t. A practical strategy turns panic into procedure.
Building Your First-Aid Kits
Your kits need to be small, organized, and always within reach-strapped to your saddle or in a pocket. I keep mine in durable, waterproof bags. One is for my two-legged self, the other for my four-legged partner. Forgetting these kits at the barn renders the whole safety exercise useless, so make packing them as automatic as bridling.
Here’s what lives in my human kit:
- Adhesive bandages in multiple sizes
- Antiseptic wipes and a small tube of antibiotic ointment
- Gauze pads and a roll of self-adhering bandage
- Pain relievers like ibuprofen
- A compact emergency blanket
- A whistle and a charged power bank for your phone
The equine kit is different. It’s for stabilizing issues until you get home or the vet arrives.
- A sharp hoof pick (for clearing stones or checking for pulses)
- Self-sticking vet wrap and a standing bandage
- Povidone-iodine solution in a small spray bottle
- A roll of duct tape (for temporary boot repairs or securing bandages)
- Sharp scissors with rounded tips
- A digital thermometer in a protective case
Your Step-by-Step Emergency Plan
When Pipin decided to test a fence and got a nasty scrape, having a mental checklist kept me from freezing. Your plan starts before you even mount up. Always tell someone your route and expected return time; it’s the simplest life-saver you’ll ever use.
If something goes wrong, follow these steps:
- Assess immediate safety. Are you or your horse in further danger? Move away from traffic, cliffs, or unstable footing. Get your horse’s lead rope secured.
- Administer calm first aid. Stop any bleeding with direct pressure. Check your horse’s vital signs-gum color, respiration rate. Use your kit items, but don’t play vet for serious injuries.
- Call for help. Use your phone or whistle. Know the exact location using a GPS app or landmarks. Have your vet’s number and a local equine ambulance service saved in your contacts.
- Execute the exit strategy. Can you walk out? Does someone need to come to you? Keep your horse as quiet and comfortable as possible while you wait.
I program my vet’s number and a friend with a truck and trailer into my phone’s favorites. Practicing this drill in your head makes the real thing feel less like a crisis and more like a managed situation. Your horse trusts you to lead; a solid plan honors that trust.
FAQ: 8 Trail Riding Safety Mistakes That Can Lead to Serious Accidents
What are the most common trail riding mistakes?
The most prevalent mistakes stem from inadequate preparation and a lapse in situational awareness. Riders often fail to thoroughly inspect their horse, tack, and personal gear before departure. Another common error is not having a clear communication plan or emergency strategy in place for unexpected events. These are exactly the kinds of mistakes that break your horse’s trust—avoid them to maintain a strong partnership. Identifying and avoiding these pitfalls helps protect trust and safety for both horse and rider.
Why do trail riding accidents happen?
Accidents frequently occur due to a combination of rider complacency and environmental unpredictability. They happen when riders ignore their horse’s early signs of fatigue or stress, pushing beyond safe limits. Furthermore, a lack of respect for trail hazards, weather changes, or proper group etiquette creates dangerous situations that are easily preventable.
How can trail riding be dangerous?
Trail riding introduces variables not found in an arena, such as unpredictable wildlife, challenging terrain, and rapidly shifting weather. The isolation of many trails means a minor incident, like a tack failure or a slip, can become a serious emergency without help nearby. The inherent partnership also means a horse’s natural flight response to a spook can immediately put the rider in peril.
Ride Safe Out There
Prevent accidents by methodically checking your tack and your horse’s condition before every ride. Your single most important job is to match your ambitions to your horse’s confidence and fitness on that particular day, as well as to adhere to essential riding safety requirements.
True safety grows from patience and the willingness to turn back when things feel wrong. Trust that nudge from your horse—it’s the best warning system you’ll ever have. Sometimes, horse owner safety means listening to your instincts more than anything else.
Further Reading & Sources
- MTB riding technique: pro tips for more control & safety on the trail
- 6 Trail Riding Mistakes, And How To Avoid Them – YouTube
- Trail Riding Safety
- A Guide to Staying Safe On the Trail – Horse and Rider
At Horse and Hay, we are passionate about providing expert guidance on all aspects of horse care, from nutrition to wellness. Our team of equine specialists and veterinarians offer trusted advice on the best foods, supplements, and practices to keep your horse healthy and thriving. Whether you're a seasoned rider or new to equine care, we provide valuable insights into feeding, grooming, and overall well-being to ensure your horse lives its happiest, healthiest life.
Equipment