
The Best Way to Manage Your Horse’s Mane and Tail: Healthy Habits for a Tangle-Free Coat
Published on: September 9, 2026 | Last Updated: September 9, 2026
Written By: Henry Wellington
Hello fellow equestrians. You’ve spent hours brushing, only to find your horse’s mane knotted again by morning, or winced at the sight of precious tail hairs snagged on a stall door. That frustration is real-mats can trap dirt and moisture, leading to skin irritations, while breakage from rough handling steals that beautiful, flowing look.
In this guide, I’ll share the stable-tested methods that actually work. We’ll cover:
- The right daily routine to detangle without pulling hair.
- How to choose brushes and products for your horse’s specific coat type.
- Simple steps to prevent mane rubbing and tail breakage.
- Gentle practices that encourage strong, healthy growth from the roots.
I’ve honed these techniques over years of managing barns and training horses like my sensitive Thoroughbred, Luna, who taught me the value of a patient hand.
Why Regular Mane and Tail Care is Non-Negotiable
Think of mane and tail care not as vanity, but as vital preventative medicine. A neglected tail becomes a matted bird’s nest, a perfect home for dirt, moisture, and pests like ticks. That damp, packed hair against the skin is a direct invitation to fungal infections and other equine skin conditions. I’ve spent too many afternoons with a sweaty horse and a bottle of medicated shampoo treating issues that started with a simple tangle.
Regular brushing spreads the skin’s natural oils down the hair shaft, creating a healthier, more waterproof coat that sheds dirt easier. It’s also your frontline diagnostic tool. Running your fingers through the roots every few days is how you find the tiny cut from a fence wire, the early patch of rain rot, or the burr hiding at the top of the tail. You find problems with your hands, not your eyes.
Beyond health, consistency is kindness. A tail brushed weekly is a quick, painless process. A tail ignored for a month is a hours-long battle of pulling, snagging, and frustration for you and the horse. Horses like Luna, with her thoroughbred sensitivity, will remember a single bad tail-pulling experience and become tail-shy for life, making every future grooming session a tense negotiation. Build trust through gentle, routine care.
Building Your Grooming Kit: Tools for Tails and Manes
Your toolkit doesn’t need to be fancy, but each item should have a dedicated purpose. A random collection of stiff brushes and combs will do more harm than good. Keep it simple, effective, and horse-friendly. If you’re wondering what are essential grooming tools for a horse, these basics cover it. They keep grooming focused on safety and comfort rather than clutter.
Choosing the Right Brush for the Job
Not all brushes are created equal. Using the wrong one is like trying to paint a wall with a toothbrush-ineffective and frustrating.
- The Wide-Tooth Detangling Comb: This is your first-responder tool, made of flexible plastic or rubber. Always start here on dry hair to gently work out the big snarls before you introduce any moisture or finer brushes.
- The Dandy Brush (Stiff Bristles): Use this only on the body. I never use a stiff brush on manes or tails, as it snaps and breaks the long hairs. Its job is for muddy coats, not silky tails.
- The Body Brush (Soft Bristles): Perfect for a final polish on a clean, detangled mane to smooth the top layer and add shine.
- Your Fingers: Your most valuable tool. Use them to separate large sections, feel for tangles at the skin, and apply detangler. They provide feedback no brush can match.
For tails, I follow a strict hierarchy: fingers first, then the wide-tooth comb, and finally a soft brush only if the tail is completely tangle-free and maybe for a show. This preserves length and thickness season after season.
Detanglers and Conditioners: What Really Works
The market is flooded with potions. Save your money and focus on function over fragrance. I categorize them by their job.
- The Quick-Detangling Spray: A water-based, silicone-rich spray used on dry hair. Spritz it on a section, let it sit for a minute, and use your comb. It provides slip without grease. This is my go-to for pre-ride touch-ups on Pipin’s unruly pony mane.
- The Deep Conditioner: A creamy, rinse-out product used during baths. This is for rehabbing dry, sun-bleached, or damaged hair. Coat the tail, leave it on for 5-10 minutes, and rinse thoroughly. Any leftover film will attract dirt.
- The Leave-In Oil or Serum: A tiny amount of a lightweight oil (like coconut or argan) applied to the ends of a clean, dry tail. This seals split ends and prevents moisture loss. The golden rule with oils is less is more-a dime-sized amount for the entire tail is often plenty. A greasy tail is a dirt magnet.
- The Homemade Standby: A spray bottle of 50% water and 50% silicone-free human hair conditioner. Cheap, effective, and you control the ingredients. This works wonders for daily maintenance.
Test any new product on a small section of the mane first. Some horses, especially greys like Luna, can have sensitive skin that reacts to heavy perfumes or certain oils. Being aware of common horse allergies helps with early identification and management. If symptoms appear, consult a veterinarian to determine triggers and steps to reduce exposure.
The Gentle Mane Routine: From Washing to Styling
How to Wash a Mane Without Stress
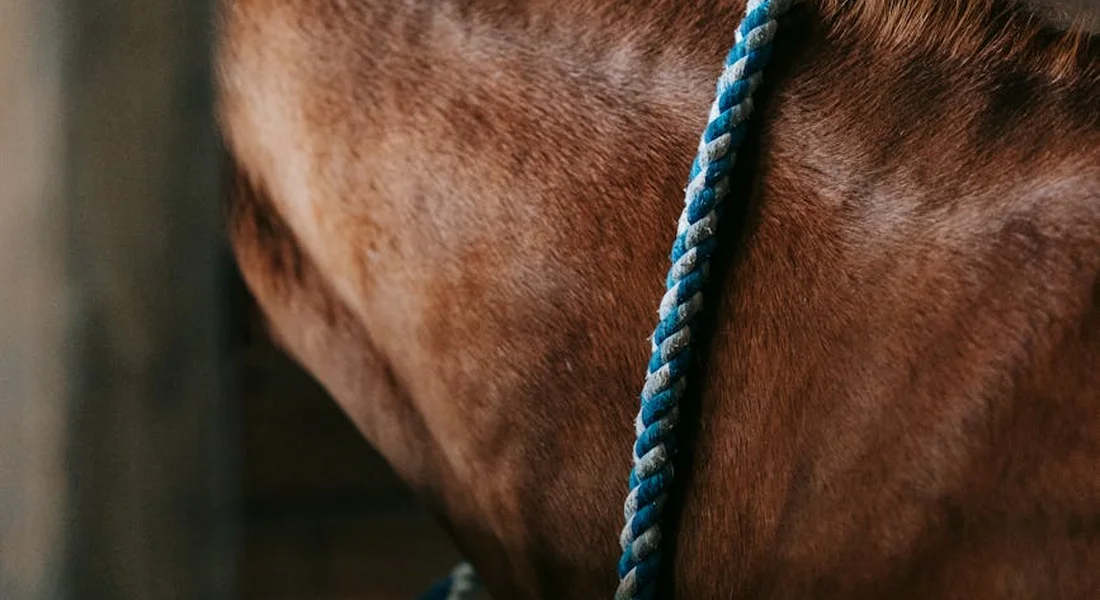
Gather your supplies first: a bucket of lukewarm water, a gentle equine shampoo, and a sponge. Always start with a dry mane, using your fingers to flick out any large bits of straw or mud before it gets wet. Wet the mane thoroughly from the poll down, avoiding a direct spray in the ears which most horses hate. I work the shampoo into a rich lather at the roots of Luna’s dapple grey mane, talking to her in a low voice the entire time. Her ears stay forward now, where they used to pin back. You can find more tips on how to properly bathe your horse.
Rinse until the water runs absolutely clear, which often takes three bucketfuls. Leftover shampoo is a common culprit for itchiness and dryness, so be thorough with your rinse. I squeeze the water out section by section instead of rubbing, which prevents tangles before they start. Finish with a cool water splash to close the hair cuticles and add shine.
Detangling Techniques That Don’t Hurt
Reach for a detangling spray or a homemade mix of conditioner and water before you touch a comb. Your fingers are the ultimate detangling tool, allowing you to feel every knot and gently coax it apart without snapping hairs. Start at the very bottom of a small section, maybe two inches wide, and work upwards only when the ends are smooth.
For stubborn mats, especially the ones Pipin gets from scratching his cheeky pony head on everything, use a wide-tooth plastic comb. Never, ever use a brush on a damp or tangled mane; it acts like a rake on fragile grass, tearing through the hair. I hold the base of the mane firmly with one hand to absorb the tugging sensation, so he feels pressure, not pain. A steady supply of pony treats helps too.
To Pull, Trim, or Leave It? Mane Length Decisions
Your choice here shapes your grooming time and your horse’s comfort. Pulling removes hairs from the root to thin and shorten, giving a traditional show ring look, but it must be done with extreme care to avoid discomfort. I only pull manes after a good workout when the skin is relaxed, and I take just a few hairs at a time with a pulling comb.
Trimming with sharp scissors is my go-to for reliable trail partners like Rusty. Fold a section of mane over and trim the ends that protrude for a natural, layered look that avoids a blunt, choppy line. Understanding why horses have manes isn’t just trivia; their mane helps protect the neck from insects and sun, and it can play a role in social signaling. Knowing the function can guide grooming decisions. Leaving the mane entirely natural is a perfect choice for horses with full turnout. A thick, untouched mane is a built-in fly swatter and raincoat. Judge by your horse’s life, not just the rule book.
Tail Care Demystified: Keeping It Clean and Full
The Right Way to Wash a Tail
Wash the tail separately from the body to prevent dirt from the rump washing into the tail hairs. Fill a bucket with warm water and shampoo, then immerse the tail, swishing it gently to let the soapy water penetrate without harsh rubbing. Massage the dock area with your fingertips to clean the skin, but never twist or wring the tail bone. Rinse by pouring clean water from the top down, lifting the tail to ensure it flows through.
A light conditioner applied after rinsing makes combing easier and adds protection. Conditioner weighs less than you think and won’t make the tail greasy if you use a formula designed for equine hair. I rinse conditioner out on Luna, but leave a tiny bit in on Pipin to help repel stains. Tailor it to your horse’s needs.
Combing Without Breakage: A Step-by-Step Method
This method saves hairs and your patience. Follow these steps in order every single time.
- Spray a detangling product liberally on the damp, washed tail.
- Divide the tail into two or three main sections with your hands.
- Grip one section firmly above the point you will comb.
- Using a wide-tooth comb, start at the very bottom tip of the tail.
- Comb only the inch of hair you have freed from tangles.
- Slowly work your way up the section, moving your grip higher as you go.
- Repeat with each section until the comb glides from top to bottom.
That crucial grip above your combing hand isolates tension so the pull never reaches the sensitive roots where hair grows. I’ve seen tails transform from wispy to full by sticking to this ritual.
Protective Tail Wraps and Bags: When and How
These are tools for specific jobs, not everyday jewelry. Use a tail bag or a loose knit wrap primarily for travel in a trailer to prevent hair from being rubbed out on partitions. They can also guard against deep mud in a paddock before a show. Apply only to a perfectly clean and detangled tail to avoid trapping dirt against the skin.
Secure wraps or bags loosely at the top of the tail bone. You must check underneath every day for moisture, irritation, or hair becoming wrapped around the fastener. For general pasture life, I prefer a simple, loose braid. Rusty’s tail gets braided for overnight trail rides to keep burrs out, and we always unplait it in the morning to let the skin breathe. Protection should never mean restriction.
Pitfalls to Dodge: Common Grooming Mistakes
The Detangling Disaster: Why Yanking is a No-Go
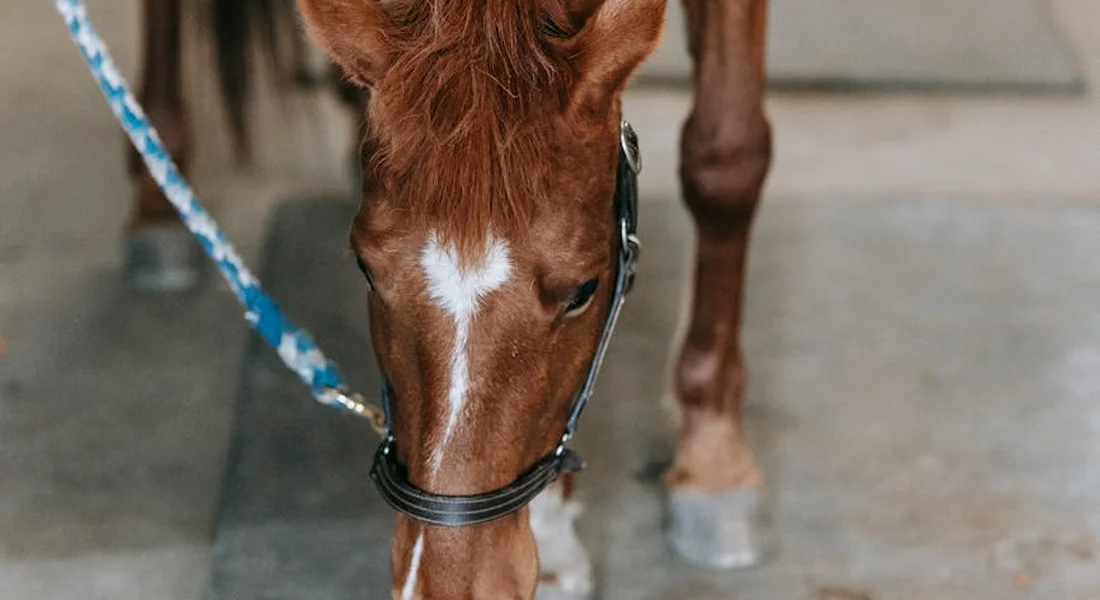
We’ve all been there. You find a gnarl in Luna’s tail the size of a small bird’s nest, and your first impulse is to grab a brush and power through. I learned the hard way with my sensitive thoroughbred that this approach only leads to a fight and broken hair. Yanking on knots stresses the hair follicle and can cause permanent thinning. Always start your detangling session with your fingers, not a tool, to gently separate the biggest tangles before you ever reach for a comb.
Listen to your horse during this process. A sharp head toss or pinned ear is a clear “ouch” signal. For tough knots, I keep a spray bottle of water with a drop of gentle conditioner nearby to mist and soften the hair. Work from the bottom of the tail upward in small sections. Grooming touch is a quiet conversation that builds trust between you and your horse. Each calm stroke deepens your connection and helps your horse feel safe. Using a detangling spray and a wide-toothed comb in slow, patient strokes saves more hair than any speedy, aggressive brushing ever will.
My Shetland, Pipin, is a master at rolling in mud and creating impressive tangles. With him, I make detangling a positive, food-motivated ritual. A handful of his favorite treat keeps him still while I carefully pick apart his mane. Turning a stressful chore into a bonding moment protects both the hair and your relationship with your horse.
Product Overload: How Conditioners Can Backfire
It seems logical: more conditioner equals more shine. But slathering on thick creams or oils can create a sticky film that actually attracts dirt, dust, and bedding. I’ve seen tails so over-conditioned they looked greasy and clumped together within hours of a grooming. Product buildup weighs hair down, clogs pores at the skin level, and can lead to itchy, flaky skin under the mane.
Think of conditioner like a rich dessert-a little is fantastic, but too much makes you feel sluggish. For most horses, a light, water-based detangler used sparingly is plenty. Rinse all products thoroughly after a bath; any residue is an open invitation for grime. If your horse’s mane feels tacky or looks dull shortly after grooming, you’re likely using too much product or the wrong type for their coat.
Rusty’s sorrel coat taught me this lesson. His mane looked limp no matter what I used, until I stripped it back with a gentle clarifying shampoo and switched to a simple, silicone-free leave-in spray. The difference was immediate. Sometimes the best conditioner is simply regular brushing, which distributes natural oils from the skin down the hair shaft.
Beyond Basics: Tips for Luscious Growth and Shine
Diet and Supplements for Hair Health
Shiny hair starts from the inside out. A horse on a poor diet will have a dull, brittle mane and tail, no matter how many products you use. The foundation is always quality forage. Ample turnout time on good pasture provides the essential fatty acids and nutrients that serve as building blocks for healthy hair growth.
If your hay is lacking or your horse is a hard keeper, consider adding a fat source like flaxseed or a vitamin E supplement. I noticed a significant improvement in Luna’s dapple grey coat and tail fullness after adding an omega-3 supplement to her grain. Biotin is popular, but it’s not a magic bullet. Focus on a balanced, forage-first diet before investing in specific supplements; often, the solution is already in the hay net. For weight management, pair this with portion-controlled feeding and regular body-condition monitoring. A weight-conscious diet centers on forage quality and appropriate calories to support activity, and learning to manage your horse’s diet is essential for overall health.
Hydration is critical. A dehydrated horse cannot produce strong, flexible hair. Ensure constant access to fresh, clean water. I watch the water tanks as closely as I watch the feed bins. That steady crunch of hay and the quiet slurp from the bucket are the most reliable sounds for promoting a lustrous coat.
Homemade and Commercial Leave-In Solutions
You don’t need a salon cabinet to achieve show-ring shine. A simple homemade spray can work wonders. My barn hack is a mix of one part aloe vera juice to ten parts water in a spray bottle. It’s light, moisturizing, and doesn’t attract dirt. For a detangling boost, add a few drops of pure coconut oil to warm water, shake well, and spray on damp hair before combing.
Commercial products have their place, especially for horses in heavy work or harsh climates. Look for leave-in conditioners with simple ingredients like panthenol or hydrolyzed protein. Avoid long lists of chemicals you can’t pronounce. Apply any product from the mid-lengths to the ends of the hair, avoiding the skin directly at the roots to prevent buildup.
Test any new solution on a small patch first. Pipin, my cheeky pony, once had a reaction to a heavily perfumed spray that left him rubbing his mane raw. Now, I stick to unscented, gentle formulas. The best leave-in treatment is one that protects the hair without disturbing the natural balance of your horse’s skin and coat.
Braids, Bands, and Wraps: Styling with Sense
Styling isn’t just about ribbons and polish. A thoughtful braid or band can be a tool for protection and comfort, but a poorly chosen one can cause real harm. I’ve seen the good, the bad, and the tangled aftermath in my own barn.
Safe Braiding for Turnout and Show
Braiding for turnout and braiding for the show ring are two completely different beasts. For daily turnout, the goal is simple: keep mane out of tangles and eyes without creating pressure points or snag hazards. I use a loose, forgiving braid for Rusty’s thick neck when the summer flies are bad.
A simple, loose running braid or a few loose hunter braids with soft yarn are your safest bets for the field, as they allow for movement and don’t pull tightly at the roots. Never use rubber bands for turnout braids-they weather, dry out, and snap into the hair, becoming impossible to remove without cutting.
Show braiding is tighter and neater, but the principles of care remain. Always start with damp, conditioned hair to prevent breakage. Your braiding technique should be even and consistent, but never yank or pull strands to the point of tension. I learned this the hard way with Luna’s fine mane; one impatient braiding session left her with a sore neck and a distrust of my hands near her poll for a week.
- Materials Matter: Use blunt-ended latch hooks for yarn braids. For banding, opt for soft, latex-free bands specifically designed for horse hair.
- Braiding Wet vs. Dry: Braiding slightly damp hair helps set the braid and reduces frizz, but braiding soaking wet hair can lead to rot or skin irritation underneath if left in too long.
- Timing is Everything: Take braids out within 24 hours for shows, and never leave any tight braid in for more than a week. Let the hair and skin breathe.
- Check Daily: For horses with braids in turnout, run your fingers under each braid every day to ensure no debris is trapped and the base isn’t too tight.
The Lowdown on Tail Banding
Tail banding-wrapping small sections of the tail in tiny rubber bands-is popular for creating a sleek, pulled look without actually pulling hair. Used correctly, it’s a decent temporary solution. Done poorly, it’s a recipe for broken hairs and misery.
The key is in the application. The band must be placed around a small section of hair, high up near the top of the tailbone, not down the length. You should be able to easily slide the band off without cutting it; if you can’t, it’s too tight and is cutting off circulation to the hair follicle. I band Pipin’s tail for the occasional in-hand show, and I re-do it weekly without fail.
Never, ever band a wet tail or leave bands in for extended periods. Moisture gets trapped, weakening the hair shaft, and constant tension from old, brittle bands will cause breakage. A tail full of broken “broomsticks” is a clear sign of banding overuse.
- Start with a clean, completely dry, and detangled tail.
- Take a section no wider than a pencil from the very top of the tail.
- Wrap a single, high-quality latex-free band twice-never more.
- Test it immediately. Can you slide it off with gentle pressure? If not, cut it off and try again with a looser wrap.
- Remove all bands at least once a week to massage the skin and check for damage.
Think of banding as a temporary hairstyle, not a permanent solution. For long-term tail health, regular conditioning, protection from rubbing, and gentle detangling will always beat a row of tight little bands.
FAQ: The Best Way to Manage Your Horse’s Mane and Tail
How can I implement an effective horse mane care routine to prevent damage?
Start by brushing the mane gently with a wide-tooth comb before wetting it to avoid tightening tangles. Use a silicone-based detangler spray on dry hair to reduce friction and breakage during combing. Regularly check the mane base for skin health, ensuring no debris or moisture is trapped to prevent infections.
What are the benefits of using a specialized horse mane cream, and how do I apply it correctly?
Horse mane creams provide deep conditioning for sun-bleached or brittle hair, helping restore moisture and elasticity. Apply a small amount to clean, damp hair after washing, focusing on the lengths and ends rather than the roots to avoid greasiness. Always rinse thoroughly to eliminate residue that could attract dirt and lead to scalp irritation.
What strategies should I follow for maintaining a horse’s mane in a demanding career, such as competitive showing?
For show horses, adopt a tailored grooming schedule that includes gentle detangling and minimal product use to preserve hair integrity. Invest time in proper grooming before events, using high-quality, latex-free bands for temporary styling and removing them promptly after events to prevent breakage. Monitor diet and hydration closely, as internal health directly impacts mane growth and shine under frequent styling stress.
A Last Thought on Tangles
Focus on a patient, bottom-up detangling method using your fingers first, and invest in a quality detangling spray or conditioner to make the job easier. Always work on a thoroughly wet, conditioned tail or mane to minimize breakage and preserve those precious hairs.
Your horse’s comfort during grooming is the best measure of your technique. A calm, willing partner is the ultimate goal, far more important than achieving a perfectly sleek look. A step-by-step approach to grooming can help you build a stronger bond with your horse. This gentle, consistent practice often yields trust you can see in his eyes.
Further Reading & Sources
- Mane and Tail Care Tips for Your Horse
- Pro Tip: Mane and Tail Care | US Equestrian
- Tips for Maintaining the Perfect Horse Mane and Tail
- Amazon.com: Mane ‘N Tail Shampoo & Conditioner Combo Set (32 oz Each) For Horses and Humans For A “Down to the Skin” Cleansing and Conditioning : Pet Supplies
At Horse and Hay, we are passionate about providing expert guidance on all aspects of horse care, from nutrition to wellness. Our team of equine specialists and veterinarians offer trusted advice on the best foods, supplements, and practices to keep your horse healthy and thriving. Whether you're a seasoned rider or new to equine care, we provide valuable insights into feeding, grooming, and overall well-being to ensure your horse lives its happiest, healthiest life.
Coat and Mane Care