
How to Properly Blanket Your Horse: A Step-by-Step Guide for Health and Comfort
Published on: October 14, 2026 | Last Updated: October 14, 2026
Written By: Henry Wellington
Hello from the barn aisle! That sinking feeling when you see your horse shivering or spot a rubbed shoulder from a poorly fitted blanket is all too real. Getting blanketing wrong risks your horse’s health, your wallet with vet bills, and their trust during handling.
Let’s fix that. This guide will walk you through a clear, compassionate process built on years of trial and error with my own herd. We will cover the foundational reasons why a horse needs a blanket, moving beyond simple temperature charts.
- How to accurately assess your individual horse’s needs based on coat, body condition, and lifestyle.
- Navigating the rack of blanket types, weights, and fabrics to find the right one.
- A foolproof, step-by-step routine for putting on and taking off a blanket safely and calmly.
- Daily fit checks and maintenance tips to prevent rubs, sores, and surprises.
I’ve managed barns for over a decade, blanketing everything from my heat-sensitive Thoroughbred, Luna, to my easy-keeping Quarter Horse, Rusty, always advocating for more turnout and less stress.
Why We Blanket (And When We Shouldn’t)
We blanket horses to help them manage weather they aren’t naturally adapted to handle. A healthy horse with a full winter coat and constant access to shelter can often stay comfortable without help. Blanketing becomes a tool for welfare when we’ve altered their natural state through clipping, age, or health concerns. I blanketed Rusty last winter after he lost some muscle mass; that extra layer kept him from burning calories just to stay warm. Horses can usually handle cold weather on their own, but sometimes they need a little extra care.
Think of blanketing as adjusting the thermostat for an individual. A senior horse like Pipin might need a stable blanket overnight because he doesn’t move as much to generate heat. A clipped, high-strung horse like Luna needs protection from wind and rain to prevent chilling. The goal is to prevent unnecessary energy loss, not to make them sweat under a pile of fabric.
There are clear times to skip the blanket. If your horse has a full coat, temperatures are mild, and they have a good windbreak, let them be. Over-blanketing is a real risk. I’ve seen horses come in soaked in sweat under a heavy rug on a 50-degree day. Your best guide is your horse’s own body; feel behind the elbow for warmth, not the ears or neck.
- Do Blanket: Clipped horses, seniors, hard keepers, in driving rain or bitter wind, or when temperatures drop below what their coat condition can handle.
- Don’t Blanket: Horses with full coats in dry, mild weather, those with access to a deeply bedded stall or a thick stand of trees, or any horse without a proper fit that could rub or trap moisture.
Advocating for turnout time means sometimes the blanket is what makes that possible. A good turnout blanket lets Luna play in the pasture during a spring shower instead of being stuck inside. It’s about enabling their horse-ness, not coddling them.
Navigating the Blanket Aisle: Types and Materials
Walking into a tack shop can be overwhelming. You’ll see lightweight sheets, heavy rugs, and everything in between. The key is matching the fabric and build to the job. Listen for the rustle of nylon, feel the crinkle of a waterproof outer shell. Higher denier numbers mean a tougher fabric-ideal for the pony who treats fences as scratching posts.
Fill is measured in grams. A 100g blanket is for cool weather, 200g for cold, and 300g+ for brutal cold. Breathability is non-negotiable; a waterproof blanket that doesn’t breathe will steam your horse like a vegetable. Always choose a breathable, waterproof outer layer for any turnout gear to avoid a damp, miserable animal.
Turnout vs. Stable: Choosing Your Horse’s Armor
A turnout blanket is your horse’s outdoor jacket. It’s built with a waterproof, rip-resistant shell, secure leg straps, and a cut that allows for rolling and movement. The thud of hooves on frozen ground won’t faze it. This is the blanket for day-long pasture wear, designed to take abuse from the elements and pasture buddies.
A stable blanket is the indoor sweater. It’s often softer, with a quilted or smooth lining that won’t catch on stall fixtures. It’s not waterproof and will soak through quickly outside. Use a stable blanket for a clipped horse in a dry stall, or as a comfortable layer for overnight. I use a stable blanket for Rusty in his stall after a trail ride, so his muscles stay warm while he rests.
Mixing them up causes problems. A stable blanket in the rain becomes a heavy, wet sponge. A turnout blanket in a stall can overheat a horse and is often unnecessarily rugged. Match the tool to the task: turnout for outside, stable for inside.
The Lowdown on Liners, Neck Covers, and Layering
Layering is your smartest, most budget-friendly blanketing strategy. Instead of buying six different weights, get a waterproof outer shell and add removable liners. This lets you adjust to a chilly morning versus a freezing night. A layered system is versatile, easy to wash, and lets you customize warmth without swapping the entire blanket.
A wicking liner sits against the coat to pull moisture away, while a fleece or insulated liner adds warmth. Neck covers attach for full-body protection, crucial for a fully clipped horse. Always ensure neck covers fit smoothly without restricting movement or rubbing the withers. Luna wears a neck cover in deep winter; without it, her high shoulders get cold.
Here’s a simple layering approach for changing conditions:
- Start with a moisture-wicking liner against the skin for dry warmth.
- Add an insulated liner for core temperature boost.
- Top with a waterproof turnout shell for weather protection.
- Attach a neck cover if needed, ensuring all layers lie flat.
Check fit at each step. You should be able to slide your hand comfortably under all layers at the shoulder. Listen to the quiet rustle of properly fitted layers; loud rubbing means chafing is happening. Layering only works if each piece fits perfectly; a bulky misfit creates pressure points and discomfort.
Stopping Problems Before They Start: Common Blanket Issues
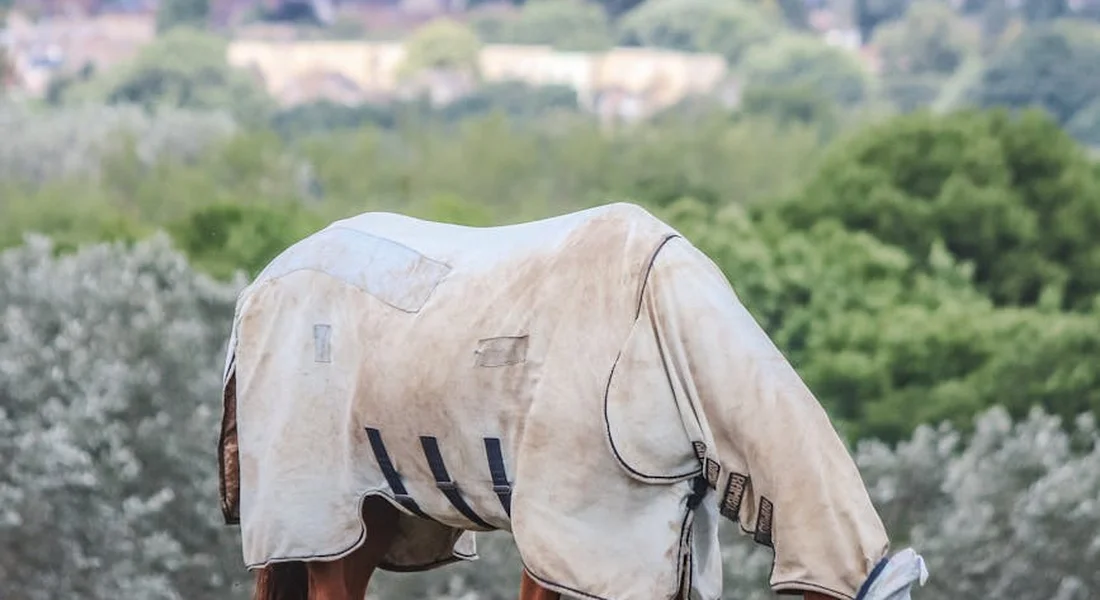
A blanket that doesn’t fit is a daily nuisance and a real hazard. I’ve spent too many mornings readjusting twisted surcingles on a grumpy horse. The goal is a secure, comfortable fit that allows for freedom.
Watch for telltale signs of trouble: rub marks on the shoulders, withers, or chest are a blanket screaming for a better fit. These often come from front closures that are too tight or a neckline that sits wrong. A blanket that slips to one side is a disaster waiting to happen; it can trip your horse and create painful pressure points. Check the shoulder gussets for freedom of movement.
Chewing is another barn headache. Some horses, like my pony Pipin, see a dangling strap as a personal challenge. Using a taste deterrent spray on the chest straps and surcingles can save you a costly repair bill. For confirmed chewers, a nylon chew guard or a bib-style attachment is a smart investment. Always ensure leg straps are snapped together or crossed safely to prevent a hooked hoof.
The Blanketing Rulebook: Temperature and Fit
Blanketing isn’t about the calendar; it’s about reading your horse and the weather. A common mistake is over-blanketing. A horse generating its own heat can sweat under a heavy rug, then chill dangerously as that moisture cools.
The most reliable gauge is your own hands, not a stable thermometer. Feel for sweat, especially under the blanket’s front and along the girth area. A damp horse is a horse that needs a lighter layer or no blanket at all. Your goal is a dry, comfortable coat.
Does My Horse Feel Cold or Hot? The Hands-On Check
Forget the ears-they’re always cold! Place your bare hand under the blanket at the withers or behind the shoulder. You’re checking for moisture and temperature. Is his skin cool and dry? Perfect. Is it clammy or downright wet? He’s too hot.
If he’s shivering visibly or his muscles feel tight and quivery, he’s likely genuinely cold and needs a warmer layer. Remember, a resting horse in good weight is more cold-tolerant than we think. Their digestion generates internal heat, which is why constant forage is key in winter.
Guidelines for the Clipped Horse
A fully clipped horse has lost his natural insulation. He needs your help to conserve energy. Start with a lightweight sheet around 50°F to block wind. As temperatures drop into the 40s, switch to a medium-weight blanket; in the 30s or below, a heavyweight is usually necessary. Always factor in wind and wetness—a damp, windy 40°F feels much colder. For a trace-clipped horse, you can often go one weight lighter than these guidelines.
Guidelines for the Fuzzy, Unclipped Horse
Most pleasure horses, like my good man Rusty, grow a superb winter coat. His blanket is for weatherproofing, not warmth. He often goes without until it’s wet or brutally windy. A healthy, unclipped horse rarely needs a blanket before temperatures hit the low 30s, and even then, a lightweight or medium is often sufficient. The exception is the old or thin horse who struggles to maintain weight. For them, blanketing conserves calories they’d spend on staying warm. Let the coat and the horse’s condition be your guide, not your own chill.
Step One: Getting the Right Size and Fit
A blanket that rubs, gaps, or pulls is worse than no blanket at all. I learned this after a chilly night turned Luna’s shoulders into a raw mess from a poorly-fitted rug. Measuring from the center of the chest to the edge of the tail is your starting point, but the real truth is in the try-on.
Where It Should Sit: The Withers, Chest, and Back
The withers are your ground zero. You should easily slide your flat hand between the blanket’s front seam and your horse’s withers. If it’s tight, it will pinch. If there’s a cavernous gap, it will shift and rub. A well-fitted blanket follows the shape of the horse’s shoulder, allowing free movement without hanging like a sack. Across the back, it should lie flat without pulling tight over the hips or drooping at the sides.
Watch for any pressure points. Pipin, our Shetland, is a master at showing discomfort-if his blanket is off, he’ll stand rigid, refusing to move until I fix it.
Strap Safety: Adjusting Surcingles and Leg Straps
Straps are not an afterthought; they’re your primary safety system. The belly surcingles should be adjusted so you can comfortably fit a hand’s width between the strap and the horse’s belly. Too loose, and a hoof can get caught. Too tight, and it causes painful pressure.
Front closures should meet without gaping or pulling the chest hair. Crossing leg straps is non-negotiable-it prevents them from swinging into the path of a hind leg. Once crossed through each other, each strap should have enough slack to fit four fingers between it and the horse’s inner thigh.
The Barn-Tested, Step-by-Step Blanketing Process
Rushing leads to twisted straps and grumpy horses. Follow this rhythm, and it becomes a calm, daily ritual.
Step 1: The Pre-Flight Check
Before you even approach your horse, inspect the blanket. Shake it out. Run your hands along the lining for tears or burrs. Check every strap and buckle for wear.
- Listen for the sound of ripped stitching.
- Feel for stiff or cracked rubber on buckles.
- Smell for mildew-a sure sign it wasn’t stored dry.
Finding a problem now prevents a midnight emergency later. If you notice these issues cropping up regularly, they may be signs your horse blanket needs replacing. Staying proactive helps keep your horse warm and comfortable.
Step 2: Calm Approach and Drape
Fold the blanket lengthwise, lining-side up. Approach your horse’s shoulder calmly, letting them sniff the blanket if they wish. Drape it evenly over the withers, then unfold it back toward the tail. This prevents it from slapping them in the face or rump. A smooth drape sets the tone.
Step 3: Securing the Chest and Surcingles
Fasten the chest closures first, starting from the top. They should meet without pulling or leaving extra space. Next, fasten the belly surcingles. I always start with the one closest to me, then walk around to fasten the other. Always check that the surcingle webbing lies flat, not twisted, against the horse’s belly. A twist can create a painful rub by lunchtime.
Step 4: The Leg Strap Dance
- Reach for the left leg strap and clip it to the D-ring on the right side of the blanket.
- Take the right leg strap and thread it through the left strap’s loop before clipping it to the D-ring on the left side.
- Adjust the length for that crucial four-fingers of slack.
This crossover method keeps straps centered and out of the way of flying hooves.
Step 5: The Final Fit and Comfort Assessment
Run your hands under the blanket at the shoulders, chest, and withers. Feel for any bunching or tightness. Watch your horse walk away. The blanket should stay centered without shifting side-to-side. Your final sign of success is a soft sigh, a relaxed lower lip, and the sound of peaceful chewing as they return to their hay. If they’re stamping or looking back at their sides, something is pinching.
Daily Blanket Care: Removal, Checks, and Storage
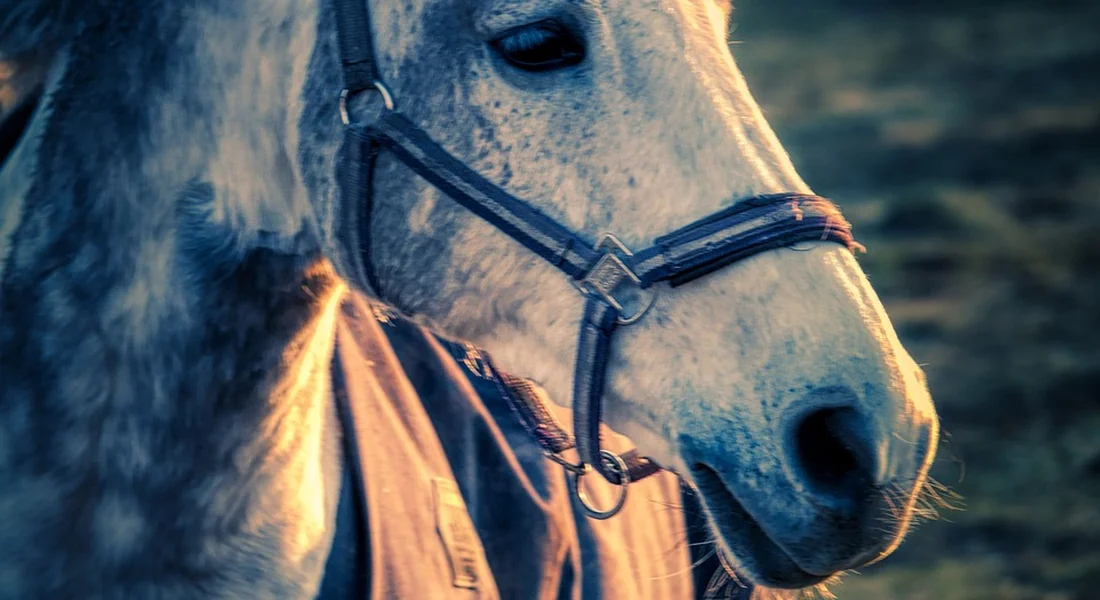
Putting the blanket on is only half the job; taking it off thoughtfully matters just as much. Daily routine here is your best defense against skin problems and blanket breakdowns.
Removing the Blanket with Confidence
Always approach your horse from the side, talking in a low voice so they know it’s you. I start with Luna by letting her sniff my hand-her dappled grey coat hides nothing, and a calm start keeps her from dancing. Unfasten the chest buckles first, then the belly straps, and deal with leg straps last to avoid tangled surprises.
Listen for the smooth click of each buckle releasing, not a strain. Fold the blanket inward as you pull it off, trapping the dirt and hair inside. This simple fold keeps your clothes clean and contains the mess for later shaking.
- Stand at the shoulder, not the rear, to stay safe from sudden moves.
- Check for dampness or sweat marks on your horse’s back the moment the blanket is free.
- Feel the warmth of their coat with your palm; a hot horse might need a lighter layer tomorrow.
The Five-Minute Daily Inspection
Once the blanket is off, your hands become your best tools. Run them firmly over your horse’s withers, shoulders, and chest. Search for any raised hair, scabs, or unusual heat that whispers “rub” before it screams “sore.”
With sturdy Rusty, I found a friction spot on his sorrel shoulder just by feel-catching it early meant a simple strap adjustment, not a wound. Now, turn your attention to the blanket itself.
- Inspect every inch of stitching, especially where straps meet fabric.
- Test buckle integrity by bending them; cracked plastic needs immediate replacement.
- Sniff the lining. A sour, mildewy odor means moisture is trapped and it needs airing, not storage.
- Look for accumulated dirt and hay chaff in the neck cover; this grit grinds away at fabric.
A thorough daily check is cheaper than a new blanket and far kinder than treating a preventable gall.
Practical Storage for Longevity
Never toss a blanket into a dark corner. How you store it dictates how long it lasts. I shake ours out in the aisle, watching the dust motes dance in the sunbeam from the door. Hang blankets on a wide, ventilated rack immediately after shaking-draping them over a stall door invites chewing and fading.
- Use a stiff brush to knock off dried mud and hair from the lining.
- If the blanket is damp, hang it in a breezy, covered spot until bone-dry.
- Store completely dry blankets in a breathable cotton bag or a trunk with cedar blocks to deter moths.
For Pipin’s miniature turnout sheet, I use a high hook he can’t reach. Proper storage preserves waterproofing and fiber loft, so your blanket actually works when you need it. It’s a quiet act of care that pays off every frosty morning.
FAQ: How to Properly Blanket a Horse
What are the key temperature thresholds for blanketing in Celsius?
For a clipped horse, start with a lightweight blanket around 10°C, switch to medium-weight near 5°C, and use heavyweight below 0°C. Unclipped horses typically need blanketing only when temperatures approach freezing, around 0°C, especially if they are thin or elderly. Always factor in wind and rain, which can make it feel colder than the actual temperature reading. That ties into the blanketing based on temperature approach when deciding whether to blanket. It helps ensure your horse stays comfortable as weather changes.
How should I modify blanketing guidelines during harsh winter conditions?
In harsh winter, prioritize waterproof and windproof turnout blankets to shield horses from moisture and chill, regardless of weight. For clipped or sensitive horses, consider layering with liners or using neck covers for extra protection against snow and biting winds. Increase daily checks for dampness or rubbing, as fluctuating conditions may require frequent adjustments to blanket weight or fit. For a complete, practical overview, the ultimate winter horse care guide covers blanket choices, feeding, and safe exercise. A cohesive plan helps balance warmth, nutrition, and movement throughout the season.
What is a simple rule-of-thumb for blanketing based on temperature and coat type?
A basic rule is to blanket clipped horses below 10°C and unclipped horses below 0°C, but always assess individual factors like body condition and shelter access. Use the “hand test” under the blanket to ensure the horse is warm and dry, not sweaty or cold. Adjust layers gradually based on weather changes, and remember that over-blanketing can be more harmful than under-blanketing for healthy horses. Understand how much cold horses can tolerate before deciding on layering.
From the Tack Room: One Last Check
Focus on a secure, comfortable fit that allows free movement, and always start with a dry horse and a clean blanket. The single most critical habit is to monitor your horse’s temperature and sweat level daily, removing or adding layers accordingly-blankets are for comfort, not a set-and-forget routine. If the blanket gets wet, remove it promptly and dry the horse to prevent chilling. For ongoing protection, consider waterproofing tips to keep the blanket effective.
Go slow and steady to keep yourself and your horse safe during the process. Your horse’s demeanor and physical cues are the ultimate guide; trust them over any blanket chart.
Further Reading & Sources
- The Ultimate Horse Blanketing Guide – SmartPak Equine
- The Ultimate Horse Blanketing Guide – Farm House Tack
- When to Blanket Your Horse – A Temperature Guide
- From Turnout to Stable: A Complete Guide to Horse Blankets
At Horse and Hay, we are passionate about providing expert guidance on all aspects of horse care, from nutrition to wellness. Our team of equine specialists and veterinarians offer trusted advice on the best foods, supplements, and practices to keep your horse healthy and thriving. Whether you're a seasoned rider or new to equine care, we provide valuable insights into feeding, grooming, and overall well-being to ensure your horse lives its happiest, healthiest life.
Equipment