Horse Tack and Tacking: A Practical Guide for Safety and Comfort
Hello fellow equestrians! That moment of resistance when you bring out the saddle, or the sight of a new rub mark on your horse’s shoulder, can send a wave of worry right through you. Ill-fitting or poorly adjusted tack doesn’t just cause behavioral issues-it leads to physical discomfort, vet bills, and real safety risks for both of you.
Let’s clear up the confusion. This guide will walk you through the fundamentals, including:
- The full scope of what “tack” includes and why each piece matters for your horse’s welfare.
- A step-by-step tacking up procedure that prioritizes your horse’s comfort and prevents common errors.
- How to spot critical fit issues with saddles, bridles, and girths before they become problems.
- Stable-tested tips and hacks to make the entire process smoother and build trust with your horse.
I’ve spent years as a barn manager and trainer, tacking up everything from steady Quarter Horses like Rusty to sensitive souls like Luna, and I’m here to share that hands-on knowledge with you.
Defining Horse Tack: More Than Just Gear
Let’s start with the basics: “tack” is simply a shorter way of saying “tackle,” as in the gear you use to outfit your horse. It’s an all-encompassing barn word for everything you put on a horse to ride, drive, or handle them safely. You might also hear it called a “rig” or someone’s “kit.” Getting the fit right matters for comfort and safety, so next we’ll cover how to properly fit and adjust horse tack. That way you can ride with confidence and keep your horse comfortable.
Think of it as your horse’s functional wardrobe and your essential toolset, all rolled into one. Good tack isn’t about control-it’s about creating a clear, comfortable channel for communication between you and your horse.
In my years of fitting horses, I’ve seen how the right tack can transform a worried horse like Luna into a relaxed partner, and how ill-fitting gear can make a steady soul like Rusty irritable. Every piece has a purpose rooted in safety and mutual understanding.
Anatomy of a Tack Room: Key Pieces Explained
The Saddle System
This is your primary interface with the horse. The saddle’s hidden heart is the tree, the rigid frame that must match your horse’s back shape. For Western saddles, you’ll talk about the seat, skirts, and the long leather fenders your leg rests against. English saddles have panels for cushioning and flaps for leg position.
Never underestimate the pad or blanket underneath. A proper saddle pad is your first line of defense, cushioning the back, absorbing sweat, and protecting the saddle’s lining from wear. I’ve seen more sore backs from rotten, lumpy pads than from old saddles themselves.
Bridles and Bits: The Communication Suite
This system directs your horse. The main components are the headstall (which goes over the head), the bit (or a bitless alternative), and the reins you hold. The browband, noseband, and throatlatch help keep everything secure and comfortable.
The bit is a major conversation point. For sensitive horses, bitless bridles that use pressure on the nose and poll can be wonderful tools. Choosing communication tools is a responsibility; always opt for the mildest option that allows you to speak clearly and safely with your horse. Luna, for instance, thrives in a simple, thick snaffle.
Supporting Tack: Girths, Breast Collars, and More
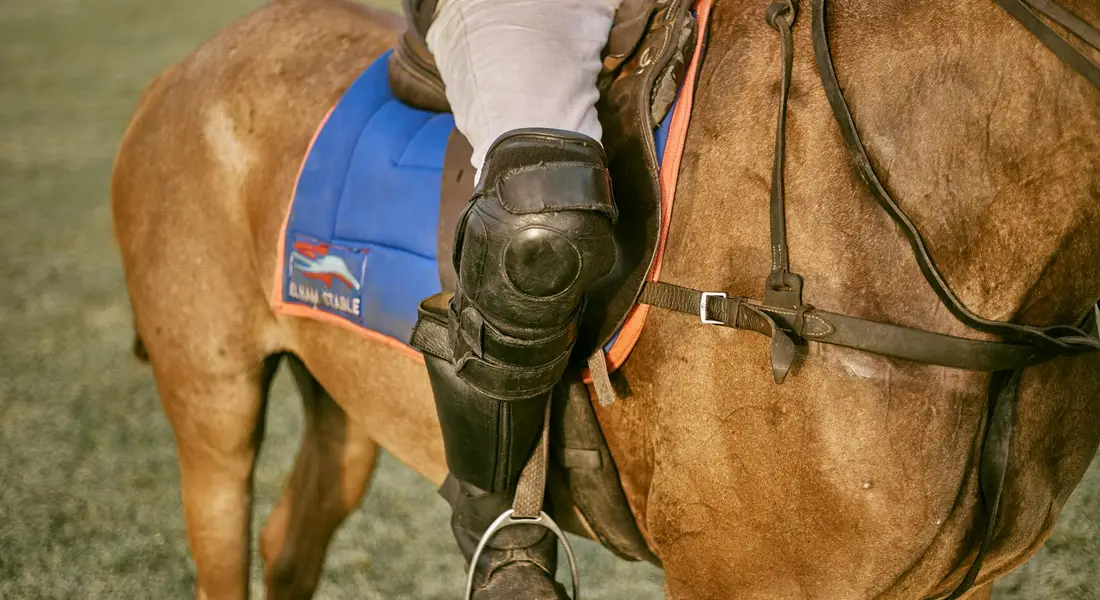
These pieces secure everything and add function. The girth (called a cinch in Western) holds the saddle on. Always check for tightness after mounting, as a horse’s belly expands. Stirrups give your foot a place to rest.
Breast collars prevent the saddle from sliding backward on steep trails, a must-have for Rusty’s hill adventures. Martingales help manage head carriage. Every extra strap should solve a specific problem, not just be added for tradition’s sake; clutter can confuse a horse and create rub points.
While training aids like longe lines are vital, your core riding tack forms the reliable foundation for every partnership. Keep it clean, fitted, and purpose-driven.
How to Tack Up Your Horse: A Calm, Step-by-Step Process
Rushing creates tension, for you and the horse. I always take a deep breath of that stable air-hay, leather, horse-before I begin. This routine builds trust. A slow, methodical approach prevents spooks and ensures your horse stays comfortable from the first brush to the final buckle.
-
Start with grooming and hoof picking to ensure comfort and check for issues. Run your hands over their coat to feel for lumps or heat. Brush away dirt that could chafe under the pad. Picking hooves isn’t just for stones; it’s a health check. I found a concerning crack in Luna’s hoof once during this quiet moment, which let us address it early.
-
Secure the horse with a halter and lead rope in a safe, familiar area. Cross-ties in a well-lit aisle or a sturdy tie ring in a quiet stall work well. Give them enough slack to stand comfortably but not enough to tangle. I always double-check the knot—Pipin has taught me much about creative escapes.
-
Place the saddle pad and saddle gently, checking alignment. Set the pad forward, over the withers, and slide it back into place to smooth the hair. Lower the saddle onto it without a thud. The front of the saddle should sit behind the shoulder blade, allowing free movement. For a broad-backed guy like Rusty, I ensure the panels extend evenly on both sides.
-
Attach the girth or cinch loosely at first, then tighten gradually. Buckle it on the first or second hole. Let your horse stand for a minute, maybe walk a few steps, then tighten it a notch more. Before you start, measure your horse’s girth to ensure the cinch will fit correctly. Knowing the size helps you tighten gradually with confidence. Always tighten the girth incrementally to avoid a sudden, pinching sensation that can make a horse suck in air or bolt. Do a final snug-up right before you mount.
-
Put on the bridle carefully, minding the ears and bit placement. Hold the bridle in your left hand, use your right to guide the bit. Gently slide the bit into the mouth, not clacking on teeth. Fold each ear softly under the crownpiece-never yank. For a thin-skinned Thoroughbred like Luna, I unbuckle the browband to make more room for her ears.
-
Make final adjustments: tighten girth, check stirrup length, and secure reins. Re-check that girth one last time. Your stirrup iron should hit your ankle bone when your arm is extended. Ensure reins are untwisted and fastened if using a buckle. This is your last safety check before you move out.
For sensitive souls like Luna, I talk softly and move like molasses. If she tenses at the girth, I rest my hand there until she exhales. For food-motivated Pipin, a single carrot chunk after the bridle goes on works wonders for his patience. Adapting your pace to the horse’s personality turns a chore into a partnership.
Fitting Tack: Why One Size Does Not Fit All
Ill-fitting tack causes pain, behavioral issues, and long-term damage. It’s not just about leather and stitching; it’s about anatomy. I’ve seen sweet horses turn sour from a pinching saddle. Many common health issues trace back to anatomy—the back, withers, and spine influence how gear sits. These links explain why fit matters for health as well as comfort. Your horse’s comfort is the absolute foundation of every ride, and it starts with proper fit.
-
Check saddle fit by assessing wither clearance, panel contact, and tree width. You should fit two to three fingers vertically between the withers and the pommel. The panels must make even contact along the back, without bridging or pressure points. The tree width must match your horse’s shoulder angle-too narrow pinches, too wide sits low and pounds. Rusty’s wide, flat back requires a very different tree than Luna’s prominent withers and sharper build.
-
Bridle fit focuses on avoiding eye rubbing with proper bit and noseband placement. The browband shouldn’t pull the headpiece into the ears. The cheekpieces should be adjusted so the bit just wrinkles the corners of the mouth, not pulling them tight. A noseband should allow two fingers to slide underneath easily. Luna’s fine head means I often punch extra holes in her bridles to avoid loose, flopping straps.
-
Safety signs of poor fit include white hairs from pinching, rub marks, dry spots under the saddle, or restricted movement. Watch for tail swishing, ear pinning, or reluctance to move forward under saddle. Are these signs pointing to a poorly fitting saddle? If so, checking your saddle fit early can prevent further issues. Any persistent soreness or behavioral change is your horse shouting that something hurts.
-
Personal anecdotes reinforce the need for custom attention. My quarter horse Rusty developed white hairs over his withers from a saddle that was too narrow before I owned him. It took months of careful pad fitting to find a solution that relieved the pressure. For Luna, a standard-width bit was too thick for her delicate mouth, causing her to toss her head; a simple swap to a thinner, lighter bit made her instantly quieter.
English vs. Western Tack: Understanding the Differences
Think of tack like work boots versus running shoes. Both cover your feet, but they’re built for different jobs and feel distinct. The same goes for English and Western gear.
Saddle Designs: A Study in Contrast
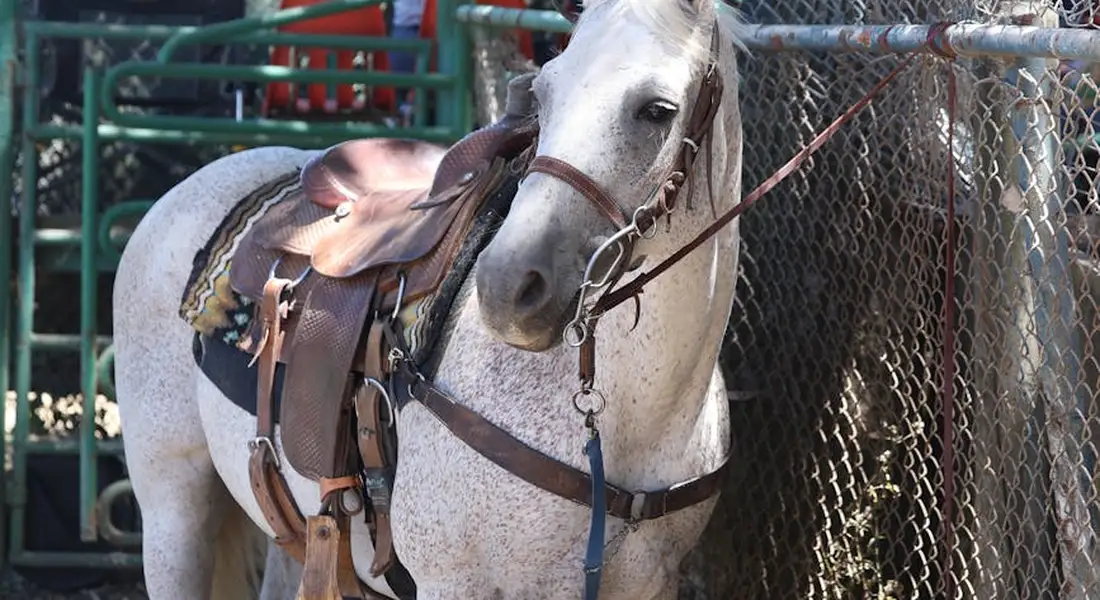
An English saddle is minimalist. It’s lighter and sits closer to the horse, designed for closer contact and communication. You’ll feel every shift of your horse’s muscles. A Western saddle is like a comfortable armchair with a job, built for long hours and stability with its horn, deeper seat, and heavier frame. I’ve spent years in both, and the choice always comes down to what you and your horse are doing that day.
- English: Flatter seat, no horn, lighter tree. Used for jumping, dressage, and eventing.
- Western: Deep, secure seat with a horn for roping or dallying. Used for trail riding, reining, ranch work, and pleasure.
Bridle Styles and Bit Philosophy
The headgear tells a story too. English bridles often use a noseband (cavesson) to keep the horse’s mouth closed and refine aids. Western bridles are frequently simpler, sometimes just a headstall and bit, but they often employ leverage with a curb chain for precise neck-reining cues. My Thoroughbred, Luna, fusses with too much noseband pressure, so we use a simple English bridle.
- English: Often includes browband, noseband, and separate cheekpieces.
- Western: Often a one-ear or slit-ear headstall, commonly paired with a curb bit.
Your discipline matters, but your horse’s comfort matters more. Rusty, my Quarter Horse, can do his job perfectly in a mild Western curb, but he’d find an English double bridle confusing and harsh. Choose for partnership, not just tradition.
Tack Maintenance: Care to Keep It Safe and Lasting
Leather and hardware take a beating from sweat, dirt, and pressure. A simple, consistent care routine isn’t just about shine-it’s a critical safety check you perform with your hands.
Cleaning Your Tack
I wipe down my bridle after every ride. Once a week, everything gets a deep clean. Start by taking the bridle completely apart. Dried sweat is acidic and will eat away at stitching and make leather brittle, so cleaning after sweaty work is non-negotiable.
- Use a damp sponge and glycerin saddle soap to lift dirt.
- Rinse the sponge frequently and avoid soaking the leather.
- Once dry, apply a quality leather conditioner to replenish oils.
- For bit and hardware, use water and a soft brush to remove saliva and grass; dry thoroughly to prevent rust.
Regular Inspection for Wear and Tear
Before you even put the saddle pad on, run your hands over every inch. Your fingers will find problems your eyes might miss. A stitch popping on a girth or a hairline crack in a critical stress point is a failure waiting to happen at the worst possible moment.
- Check stitching: Especially on girths, billet straps, and rein attachments.
- Feel for leather cracks: Bend straps to see if the leather is dry or rotting.
- Examine metal: Look for bit rust and weak points on buckles or D-rings.
- Inspect surfaces: Look for frayed reins or worn stirrup leather grooves.
Proper Storage Practices
Never just toss a saddle on a dusty floor or leave a bridle dangling on a nail. Tack needs support and a good environment. I learned this the hard way after finding mold on a girth I’d left in a damp corner; proper storage is preventative medicine for your gear.
- Store in a dry, cool, and well-ventilated area away from direct sunlight.
- Use a shaped saddle rack to support the tree, not just the pommel.
- Hang bridles on proper bridle hooks to maintain their shape.
- Keep bits and metal items dry; a light coat of mineral oil can prevent rust in humid climates.
Choosing Tack for Your Horse: A Practical Guide

Think of your horse’s tack like a bespoke suit of armor or a perfectly broken-in pair of boots. The goal is a harmonious fit that allows for freedom and comfort, not a one-size-fits-all solution that causes pinches and protests. Your selection must start with your horse’s unique blueprint, especially when you saddle a horse properly.
The Three Pillars of Selection: Conformation, Discipline, Personality
First, examine your horse’s conformation. A wide, round-barreled horse like Rusty needs a different tree width than a lean, narrow Thoroughbred like Luna. A high-withered horse requires a saddle built to clear that bone, while a mutton-withered type needs a design that won’t slip forward.
Next, consider your primary discipline. The deep seat and knee rolls of a dressage saddle support collected work, while a Western saddle’s horn and secure seat are for ranch tasks. A simple web or leather halter is for daily handling, while a stronger, padded one is for cross-ties or trailering.
Never underestimate your horse’s personality. A sensitive soul like Luna might need a soft eggbutt snaffle and sheepskin-lined everything. A stoic veteran like Rusty can handle a bit more variety, but still deserves thoughtful choices. The right tack can build confidence, while the wrong choice can create lasting behavioral issues.
Budget Smart: Where to Invest and Where to Save
Horse shopping can make your wallet gasp. My advice? Invest heavily in the pieces that directly impact safety, spinal health, and long-term comfort. Your saddle and bridle (specifically the bit) are non-negotiable areas for quality.
You can often save on items like saddle pads, grooming kits, or hoof picks without compromising welfare. Look for durable, washable pads and well-made but less-branded tools. It is far better to have one well-fitted saddle than three cheap, poorly fitting ones collecting dust in the tack room. A quality used saddle from a reputable dealer often beats a flashy new poorly constructed one.
The Golden Rule: Try Before You Buy
Never, ever buy a critical piece of tack-especially a saddle-without a trial period. Many reputable tack shops and saddle fitters offer this. Sit in it, have your horse move in it, and get a qualified second opinion. For custom orders, insist on a trial with a demo model or a detailed fitting guarantee. Even with a trial, it’s important to monitor your tack for proper fit over time.
I learned this after buying a lovely saddle online that looked perfect. On Pipin’s back, it was a comedy of errors; it perched like a hat on a dinner plate. A saddle must be fitted to the dynamic, moving horse, not just the static one standing in cross-ties.
Real Barn Examples: From Pony to Thoroughbred
Let’s apply this to my crew. For Pipin, the Shetland, standard horse-sized tack is a hazard. He needs properly scaled pony-sized halters, girths, and bits. A too-large halter can slip over his ears, and a horse-sized bit would bang painfully against his teeth.
For Luna, the sensitive Thoroughbred, everything is about subtlety and softness. Her bits are mild, smooth-mouth snaffles. Her bridle has a padded browband and noseband to avoid pressure points. A harsh bit or stiff leather would make her tense and nervous.
For Rusty, our sturdy trail partner, durability and function are key. His tack is built for long days, with secure stitching and materials that can withstand weather and brush. Comfort is still paramount-his wide back needs a saddle with ample panel contact-but his gear doesn’t need the fine-tuning Luna’s does.
FAQ: Horse Tack and Tacking
What is the slang meaning or alternative word for “horse tack”?
In barn slang, “tack” is often casually called a “rig” or someone’s “kit.” It’s an all-encompassing term for your horse’s gear, much like “tackle” in other contexts. These terms are used interchangeably among equestrians when referring to the full collection of saddles, bridles, and related equipment.
What is the origin of the word “tack” in horse riding?
The term “tack” is a shortened form of the word “tackle,” which historically refers to equipment or gear. Its use in equestrianism stems from this general meaning of apparatus. It entered common parlance as a quick, practical way to refer to all the gear used to outfit a horse for work or riding, which can vary in cost.
Are there synonyms for “tack” when talking about horse equipment?
Yes, common synonyms include “gear,” “equipment,” or the more formal “equine equipment.” In specific contexts, you might hear the collective set called a “rig,” especially in Western disciplines. These all refer to the functional items used to ride, drive, or handle a horse.
Final Thoughts from the Stable
Tacking up is a daily ritual that builds partnership, founded on meticulous gear checks and a focus on your horse’s comfort. The single best habit you can form is to pause before mounting and assess your horse’s entire demeanor, ensuring their ease with the tack as much as its physical fit.
True skill here isn’t measured in speed, but in the quiet confidence you both gain from consistent, careful practice. The most reliable guide for any adjustment will always be the horse standing patiently in front of you.
Further Reading & Sources
- Horse tack – Wikipedia
- Horse Equipment Safety Tips | Equine Programs
- Essential Guide to Horse Tack – Farm House Tack
- Essential Horse Tack Guide – How to Choose The Right Gear
At Horse and Hay, we are passionate about providing expert guidance on all aspects of horse care, from nutrition to wellness. Our team of equine specialists and veterinarians offer trusted advice on the best foods, supplements, and practices to keep your horse healthy and thriving. Whether you're a seasoned rider or new to equine care, we provide valuable insights into feeding, grooming, and overall well-being to ensure your horse lives its happiest, healthiest life.
Equipment