How to Give Your Horse a Shot: A Safe, Step-by-Step Guide
Hello, barn friends. The thought of giving your own horse a shot can tie your stomach in knots. You worry about hurting them, making a mistake, or triggering a panic that ends with a bent needle and a terrified animal.
Mastering this skill is about confidence, calm, and a solid plan. Let’s walk through the process together. We’ll cover gentle restraint that keeps everyone safe, picking the perfect injection site, the precise technique for a smooth injection, and smart aftercare to prevent reactions.
I’ve administered countless vaccines and medications to everything from squirmy ponies to high-strung Thoroughbreds, and I’m here to share that practical, barn-floor knowledge with you.
1. Gather Your Wits and Your Widgets: Pre-Shot Preparation
Take a deep breath before you pick up that syringe. I learned this lesson with Luna, my dapple grey Thoroughbred. If my hands shook, she’d dance sideways like a leaf in the wind. Good preparation builds confidence for you and trust from your horse.
Assemble everything you need before you bring your horse in. Scrambling for a swab with a loaded syringe in hand is a recipe for stress. A calm routine makes the experience smoother for everyone involved. That same preparation helps ensure a safe, calm vet examination. When you arrive with a relaxed horse, the vet can work more smoothly and assess health more accurately.
Your Injection Toolkit Checklist
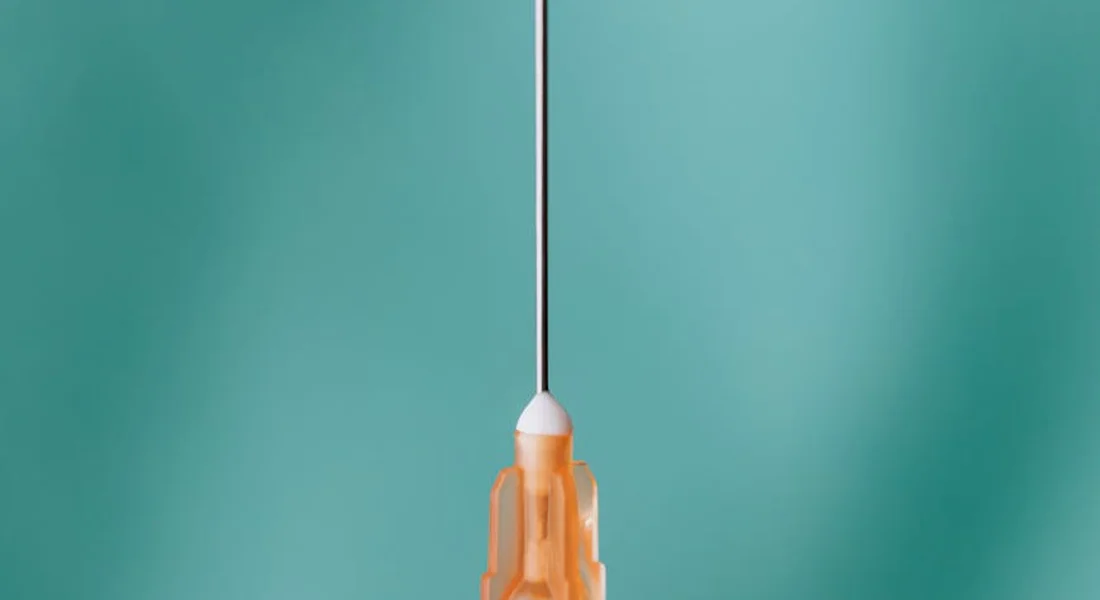
- Sterile syringes and needles: For most vaccines and antibiotics, 18 or 20-gauge needles, 1 to 1.5 inches long, are standard. Thicker medications like penicillin may require a 16-gauge.
- Medication or vaccine: Check the label for storage instructions and expiration date. Is it clear or cloudy? Any particles mean it’s no good.
- Alcohol swabs or antiseptic spray: Rubbing alcohol in a small spray bottle works well for larger areas. Clean skin is your first defense against infection.
- Disposable nitrile gloves: They keep things sanitary and protect you from accidental exposure. I never skip them, especially with messy paste dewormers.
- Sharps container: You must have a puncture-proof container for used needles immediately available. An old plastic laundry jug is a decent barn hack, but label it clearly.
- Fresh hay or a feed tub: Distraction is a powerful tool. Letting Pipin munch on his favorite orchard grass keeps his mind occupied.
Set up your workspace on a clean, stable surface like a tack trunk or feed barrel. Follow this order to prevent fumbles and keep your focus on your horse: Before you start, make sure your tack is properly fitted and adjusted for your horse. This small check saves time and keeps the session focused on safety and comfort.
- Spread out a clean towel to create a sterile field for your supplies.
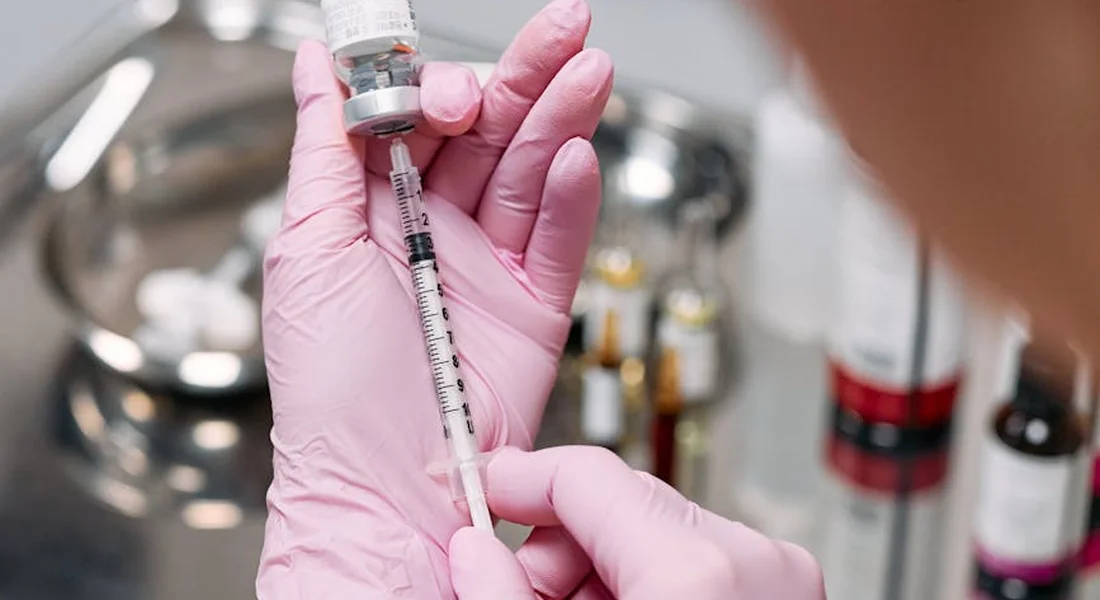
- Lay out your gloves, swabs, syringe, needle, and medication.
- Open all packages. Attach the needle to the syringe without removing the cap.
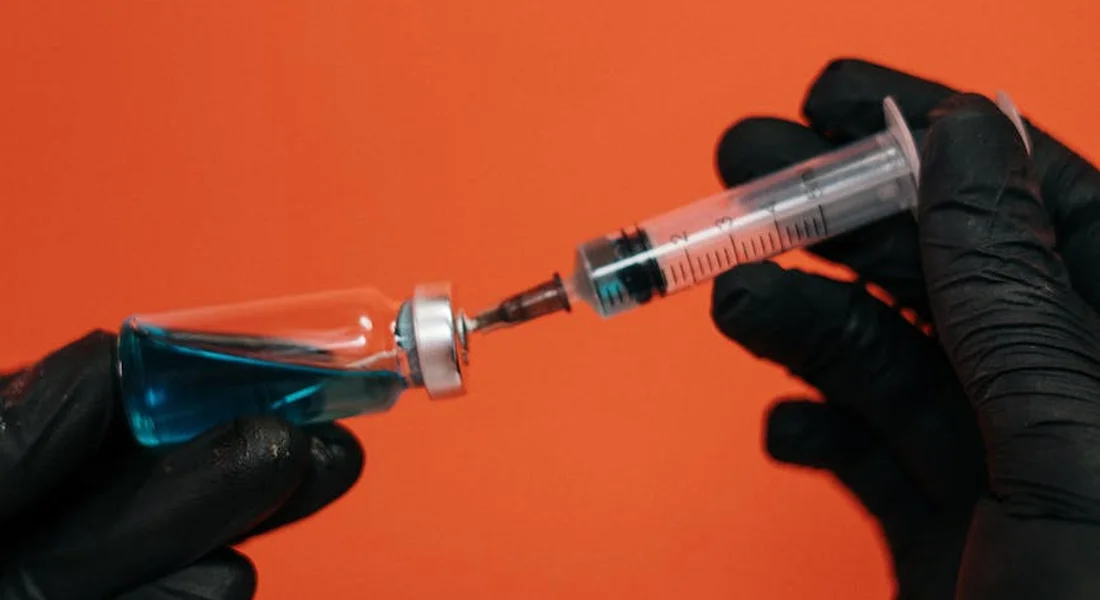
- Read the medication label aloud to confirm the dose. Draw the correct amount into the syringe.
- Check the medication temperature. A cold shot can make a horse jump; warm it in your pocket for a few minutes.
- Place your sharps container right next to your workspace so you can dispose of the needle in one motion.
Mindset and Safety First
Your calm energy is the most important tool in your kit. Horses feel tension in your posture and your breath. Speak in a low, steady voice and move with deliberate purpose. I always take a moment to ground myself, feeling the solid warmth of Rusty’s neck before we begin.
Silence your phone and tuck it away. An unexpected buzz can ruin your careful preparation. If you’re unsure or your horse is green, have a savvy helper stand at the horse’s head, keeping them steady and focused. A good holder makes all the difference.
2. Picking the Perfect Patch: Injection Sites Explained
Choosing the right spot isn’t just about technique; it’s about anatomy and comfort. The goal is to deliver the medicine effectively without causing pain or damage. You’ll primarily use two methods: intramuscular (IM) and subcutaneous (Sub-Q).
| Type | Common Site | Depth | Common Uses |
|---|---|---|---|
| Intramuscular (IM) | The neck triangle | Into the thick muscle mass | Most vaccines, antibiotics (e.g., penicillin, gentamicin) |
| Subcutaneous (Sub-Q) | Loose skin behind the elbow or shoulder | Under the skin, above the muscle layer | Certain vaccines, insulin, some sedatives |
Never inject into the rump, hindquarters, or anywhere near a major nerve or blood vessel. The risk of a painful abscess or nerve damage is too high. If the site is muddy, wash it with mild soap and water, then follow with antiseptic. For very thick coats, a quick clip ensures your antiseptic reaches the skin.
The Neck Triangle: Your Go-To IM Location
Find this safe zone by touch. Run your hand down the lower third of the horse’s neck, feeling for the solid muscle between the spine, the neck vertebrae, and the shoulder blade. You want the meaty center of that triangle, away from any bony ridges or the prominent nuchal ligament. The muscle should feel firm and springy. In horse anatomy, this region illustrates how neck muscles link the head, spine, and shoulder. It’s a core topic in equine biology. This area offers good absorption and is easy for you to access while keeping an eye on your horse’s reaction.
Finding the Sub-Q “Tent”
This method is often gentler. Look for an area with plentiful loose skin, like the crease behind the shoulder or the side of the chest. Pinch a substantial fold of skin and lift it up to create a distinct tent away from the muscle beneath. Your needle goes into the base of this pinched fold, parallel to the body. It’s much like the pinch used for a human insulin shot. The medication forms a small, temporary lump that disperses slowly, which can be easier on sensitive horses like Luna.
3. The Moment of Truth: Injection Techniques Step-by-Step
This is where your calm preparation meets action. A confident, smooth technique keeps your horse comfortable and makes the process quick. As a calm, assertive leader, you guide an anxious horse with steady presence, building trust before you begin. That steady leadership helps your anxious horse stay focused. I’ve found that horses respond best to a predictable rhythm: swab, dart, inject, reward.
Giving an Intramuscular (IM) Injection
IM injections go deep into large muscle groups, like the neck or hindquarter. The goal is a clean, efficient motion that minimizes discomfort. Hold the syringe like you’re throwing a dart; a quick insertion is far kinder than a hesitant, slow push.
- Swab the chosen site thoroughly with an alcohol pad. Wait for it to dry completely to avoid stinging.
- Uncap the needle without letting it touch anything to maintain sterility.
- Grip the syringe barrel like a dart, with your thumb resting near the plunger. Position the needle at a perfect 90-degree angle to the skin.
- In one firm, quick motion, insert the needle all the way to the hub. You’ll feel a slight pop as it enters the muscle.
- Before injecting, gently pull back on the plunger about half a milliliter to aspirate. If blood appears, you’ve hit a vessel. Withdraw, apply pressure, and start over at a new spot.
- If clear, depress the plunger with steady, even pressure to administer the medication.
- Swiftly withdraw the needle and immediately apply light pressure with a clean cotton ball.
I always follow Rusty’s IM shots with a vigorous withers scratch. The steady pressure of the injection is often less memorable to him than the itchy relief that comes right after.
Giving a Subcutaneous (Sub-Q) Injection
Sub-Q shots deposit medication just under the skin, which is less sensitive than muscle. It’s a great technique for nervous horses. Your main job is to create a solid skin tent-this ensures the needle stays in the subcutaneous layer and doesn’t slip into muscle.
- Clean a loose skin area, like the side of the neck, with alcohol and let it dry.
- Pinch a generous fold of skin between your thumb and fingers, lifting it up to form a tight tent.
- Uncap the needle and hold the syringe at a 45-degree angle to the body.
- Quickly insert the needle into the raised tent of skin. You should feel a distinct lack of resistance.
- Release the skin fold while keeping the needle in place. Slowly depress the plunger to deliver the fluid.
- Withdraw the needle and gently massage the area to help disperse the medication and prevent a bump.
With Pipin, I use the pinching step as a deliberate distraction. His clever brain is so focused on the odd sensation of his skin being lifted that he barely notices the quick needle prick that follows.
4. A Calm Horse is a Cooperative Horse: Restraint and Routine
Your needle skills are useless if your horse is dancing on the cross-ties. Gentle restraint is about smart positioning, not strength. Always administer shots in a secure, enclosed space like a stall or a corner, with the horse’s body positioned against a solid wall to limit sideways movement.
Use a sturdy halter and lead rope, either tied safely at eye level or held by a calm helper. The helper’s job is to offer scratches or steady talk, not to wrestle. I learned this with Luna. Her early vaccine days were full of tense sidestepping and wide eyes. We changed the script by making shot practice a game. For weeks, I’d simply tap her neck with a pen cap and give her a carrot. The poke became a predictor of good things.
Building a Positive Association
Training for veterinary care is simple classical conditioning. You are building a neutral or positive history with the sensations involved. Start by routinely handling the injection sites during grooming, then progress to light pressure or taps that mimic a needle poke, followed instantly by a high-value treat.
Keep sessions short and positive. For the actual injection, have your helper offer a continuous stream of scratches or a handful of soaked hay to keep the horse’s mind occupied. Afterward, make it a celebration-more treats, calm praise, and a return to their normal routine or turnout. Turning Luna out after her shots let her shake off any residual nervous energy and reinforced that the vet visit was just a brief pause in her otherwise excellent day of grazing and rolling.
This approach turns a potential battle into a boring routine. A cooperative horse isn’t about dominance; it’s about trust built through predictable, gentle handling.
5. After the Needle: Monitoring and Aftercare
Your job isn’t over when the needle comes out. What you do next is just as critical for your horse’s comfort and safety. Immediately after the injection, I like to give the spot a gentle rub with my flat palm-it soothes the horse and helps disperse the medication. Keep your horse calm and in a familiar, quiet space for at least the next hour. Watch your horse like you’d watch a toddler near a cookie jar; subtle changes in behavior are your first clue that something might be off. Over the next 24 hours, limit strenuous work and check the injection site a couple of times for any changes.
Some minor swelling or a small, firm knot at the site is normal, especially with certain vaccines or intramuscular injections. This should feel like a pea or marble under the skin and start to diminish within a day or two. You can apply a cold compress if your vet okays it. A normal reaction is localized and doesn’t make your horse feel sick all over. If the medication protocol allows, gentle massage can help, but always ask your veterinarian first-some drugs need to stay put.
Signs That Mean “Call The Vet”
Knowing the difference between a harmless bump and a red flag can save you a late-night emergency. Here are the signs that mean you should reach for the phone, not a home remedy.
- Swelling that spreads, gets hot, or is painful to the touch. This isn’t a knot; it could be an abscess or severe reaction.
- Hives or welts appearing anywhere on the body, not just the injection site.
- Unusual lethargy, depression, or a sudden lack of interest in food.
- Signs of colic: pawing, looking at the flank, frequent lying down and getting up, or lack of manure.
- Difficulty breathing, staggering, or swelling around the eyes or muzzle. This is anaphylaxis and needs immediate vet care.
- The knot at the injection site grows larger after 48 hours or begins to ooze.
When in doubt, a quick call to your vet is always the right move-it’s far cheaper than treating a crisis. I learned this after Pipin, our Shetland, had a puffy neck from a vaccine; a call confirmed it was normal, saving me a panic.
One non-negotiable step is sharps disposal. That used needle is a danger to you, your barn mates, and any animal that gets into the trash.
- Use a dedicated, puncture-proof sharps container. An old laundry detergent bottle works in a pinch.
- Never, ever recap a used needle. This is how most handler needle-sticks happen.
- Do not throw needles or syringes into the regular trash or recycling bin.
- When full, seal the container and dispose of it according to your local biohazard regulations-many vets or pharmacies will take them.
Proper disposal is a final act of responsibility that protects every creature on your property, two-legged and four-legged alike.
6. Oops-Proofing Your Practice: Common Mistakes to Avoid
Let’s be frank: we’ve all made a few blunders at the barn. The goal is to learn from them so your horse doesn’t have to. Here are the frequent fumbles I’ve seen (and yes, made myself) that can turn a simple shot into a big problem.
- Injecting into wet or dirty skin. The risk? You’re pushing bacteria right under the skin layer, which can cause a nasty infection or abscess. The fix? Always scrub the area with alcohol and let it dry completely-feel for that squeaky-clean spot.
- Going too slow with the needle insertion. The risk? A hesitant, slow poke is more painful and can make your horse jump or tense, causing the needle to bend or break. The fix? Be a confident decision-maker. Use a quick, dart-like motion to pierce the skin, then slow down to depress the plunger.
- Hitting a vein or nerve. The risk? Injecting certain medications into a bloodstream can cause a severe reaction or collapse. Hitting a nerve is painful and can cause temporary lameness. The fix? Know your anatomy. For intramuscular shots in the neck, aim for the thick triangle of muscle, away from the spine and jugular groove. Always pull back slightly on the plunger before injecting to check for blood.
- Using a bent or damaged needle. The risk? A bent needle can break off under the skin or cause unnecessary tissue trauma. The fix? Inspect every needle before use. If it looks at all questionable, swap it for a new one. They’re cheap; surgery is not.
- Not wearing gloves. The risk? It’s not just about cleanliness for the horse. Some medications can be absorbed through your skin, and you have no idea what’s on your hands that could contaminate the site. The fix? Make nitrile gloves a non-negotiable part of your kit. They also give you a better grip on that slippery syringe barrel.
Every one of these mistakes ties back to a single principle: rushing or cutting corners compromises safety for you and comfort for your horse. These are the common mistakes that break a horse’s trust—avoid them to protect safety and your partnership. I once saw a well-meaning rider inject a damp Luna; we spent the next week treating a cellulitis infection. It was a hard lesson in the value of taking those extra 30 seconds to do it right. Your horse’s trust is built on these careful, consistent moments.
7. Knowing Your Limits: When to Hand the Syringe to the Vet
After years in the saddle and countless hours in the barn aisle, I’ve learned that the most skilled horsemen and women know when to step aside. Recognizing your own boundaries is a sign of strength, not weakness, and it often prevents a small procedure from becoming a big, stressful ordeal. There’s no shame in handing the syringe to your veterinarian; in fact, it’s one of the kindest things you can do for your horse.
Here are the clear scenarios where I make the call without a second thought:
- Intravenous (IV) Injections: Hitting a vein requires precise knowledge of anatomy and a rock-steady hand. A miss can cause swelling or damage, and introducing air is a real risk. This is always vet territory.
- Joint Injections: These require sterile technique and pinpoint accuracy to avoid infection or joint damage. It’s not a muscle shot; it’s a medical procedure that demands a professional’s touch.
- The Severely Needle-Phobic Horse: Some horses, often due to past trauma, have a deep, visceral fear. I remember Pipin, our Shetland, who would transform from a cheeky pony into a panicked escape artist at the sight of a needle. For everyone’s safety, the vet’s sedation and experience are non-negotiable.
- Any Doubt Whatsoever: If the medication seems unfamiliar, the dosage confusing, or your gut whispers “I’m not sure,” stop. A quick vet call is cheaper and safer than a guess that goes wrong.
I think of it like this: my job is to provide daily care and build trust through gentle handling. The vet’s job is to bring specialized medical expertise, and respecting that division of labor is the cornerstone of true equine welfare. Your horse will thank you for the calm, competent care.
FAQ: How to Give a Horse a Shot Safely
How do I choose the correct injection site on a horse?
For intramuscular (IM) injections, the primary safe site is the neck triangle, a meaty area in the lower third of the neck away from bones and ligaments. For subcutaneous (Sub-Q) injections, choose an area with loose skin, such as behind the elbow or shoulder. Always avoid the rump, hindquarters, and areas near major nerves or blood vessels to prevent serious injury.
What is the proper technique for giving an intramuscular (IM) injection?
Insert the needle at a 90-degree angle to the skin using a quick, confident dart-like motion to minimize discomfort. Before injecting, always pull back slightly on the plunger to aspirate and ensure you haven’t entered a blood vessel. Apply steady pressure to depress the plunger, then swiftly withdraw the needle and apply light pressure to the site.
What are the most common mistakes to avoid when giving a horse a shot?
Avoid injecting into wet or dirty skin, as this introduces bacteria and risks infection. Never insert the needle slowly or hesitantly, as this causes more pain and can make the horse jump. Always check for a bent needle and wear gloves to protect both yourself and your horse from contamination.
Steady Hands and Quiet Confidence
Organize your supplies, choose the correct injection site, and ensure your horse is properly restrained before you begin. Your calm, assured presence is the best tool you have to prevent a reaction and ensure the medication goes where it should. If the horse is stressed or prone to bucking, pausing to calm them before proceeding can help stop bucking and keep you both safe. Focusing on a calm, confident approach to calming a stressed horse sets the stage for a smoother procedure.
This task becomes routine with patience and consistent, gentle practice. Always watch your horse’s ears and eyes-they will tell you everything you need to know about their comfort and whether they’re happy.
Further Reading & Sources
- How to Administer Injections into Muscle (IM) of Horses
- How To Give a Horse a Shot | PetMD
- Needle Knowledge | Elevated Equine
- How to Give Your Horse an Intramuscular Injection | Extension Horses
At Horse and Hay, we are passionate about providing expert guidance on all aspects of horse care, from nutrition to wellness. Our team of equine specialists and veterinarians offer trusted advice on the best foods, supplements, and practices to keep your horse healthy and thriving. Whether you're a seasoned rider or new to equine care, we provide valuable insights into feeding, grooming, and overall well-being to ensure your horse lives its happiest, healthiest life.
Health