
How to Blanket a Wet Horse Safely: A Step-by-Step Guide with Waterproofing Tips
Published on: October 7, 2026 | Last Updated: October 7, 2026
Written By: Henry Wellington
Hello fellow equestrians. You’ve just led your horse in from a downpour, and now you’re faced with a damp coat and a dry blanket, worried that putting it on might trap moisture and cause chills or skin issues. That gut feeling is right-mishandling this can lead to preventable vet bills and a very uncomfortable horse.
Let’s get your equine partner dry and cozy without the risk. In this guide, I’ll cover the key steps to manage this common barn dilemma, including:
- How to quickly and safely dry a wet horse before blanketing.
- The right way to put a blanket on a damp coat to prevent rubbing and mildew.
- Simple, effective methods to wash and reproof your waterproof blankets.
I’ve spent countless seasons in the drizzle and mud blanketing everything from my sensitive Thoroughbred Luna to my puddle-hating Quarter Horse Rusty, so this advice comes from direct, often soggy, experience.
The Core Risk: What Happens Under a Wet Blanket?
How Moisture Traps Heat and Causes Overheating
Think of your horse’s winter coat like a fluffy down jacket. When it’s dry, it traps warm air close to the skin. Soak that jacket with water, and the fibers mat down, losing their loft and their ability to insulate. A wet hair coat conducts heat away from the body far faster than a dry one, leaving your horse vulnerable to the chill. Now, throw a blanket over that wet coat. You’re not adding warmth; you’re creating a sauna. The blanket traps all that humid, moist air against the skin, which can’t evaporate. It’s like wearing a soaked sweater under a raincoat—you’ll overheat and then get clammy and cold. After exercise, a proper cool-down helps your horse stop sweating and start drying safely. Only once the coat is dry and the heart rate has slowed should you consider blanket use. The consequences range from simple chilling to setting the stage for skin fungus like rain rot, or even causing a horse to overheat if they’re still damp from exercise.
I learned this the hard way with Luna, my sensitive Thoroughbred. After a sudden spring shower, I made the mistake of tossing her stable sheet on while her dapple grey coat was still misted. An hour later, steam was practically rising from her shoulders when I checked. That damp heat under the sheet was a perfect breeding ground for bacteria, and it took a week of careful grooming to soothe her irritated skin.
Signs Your Horse is Too Wet to Blanket Immediately
Use your senses. Your eyes, ears, and hands will tell you everything. Don’t rely on a quick glance; get in there and feel the coat. Here is your quick-check list:
- See visible steam rising from the back or shoulders when the air is cool.
- Watch for water dripping in streams from the belly or between the legs.
- Feel for shivering or a body that feels cool to the touch behind the ears or along the chest.
- Listen for the distinct squelch of a hoof in deep mud or the heavy, sodden sound of a wet tail swishing.
- Smell that thick, damp horse smell-it’s a sure sign moisture is packed against the skin.
If you note any of these signs, your number one job is to dry the horse, not cover them up. Blanketing now does more harm than good — just one of many blanketing myths that can make your horse sick.
Step-by-Step: From Soaked to Safe and Blanketed
Step 1: Assess Temperature and Horse’s State
First, put your hand on your horse’s chest and feel their ears. The chest should feel warm, not hot or cold. Ears are a great indicator of core temperature; cool ears might mean they’re chilled. Factor in the environment: a brisk wind will wick heat away faster than a still, cold day. Is the rain still falling? Is Pipin the pony still puffing from his latest escape attempt? If the horse is wet from sweat, walking them quietly on a dry lead line helps promote air drying and cools them gradually. This initial assessment prevents you from locking in sweat or storm water. In winter, you’ll want to consider how horses handle cold weather. Some cope well, while others may need extra shelter or a blanket.
Step 2: The Dry-Off Protocol (Stall Drying vs. Toweling)
You have two good options. Gather your tools: a flexible sweat scraper, several ultra-absorbent towels (like waffle weave), and access to a dry, draft-free stall with fresh hay to keep them busy.
Method One: The Towel Dry. Perfect for horses who tolerate handling. Start by using the sweat scraper to remove the bulk of the water. Follow with vigorous but gentle rubbing with dry towels. Pay special attention to the trench along the underbelly, behind the elbows, and the soaked roots of the mane and tail. Change towels as they become saturated. This towel-dry method is a building block in a full bathing routine. For a complete, properly bathe your horse step-by-step guide, see our detailed steps.
Method Two: Stall Dry. Ideal for a horse like Luna who might be fussy about toweling. Lead them into a dry stall with plenty of hay. The movement of eating encourages blood flow and natural drying. Ensure good ventilation but no direct drafts. This method takes longer but aligns with a patient, gentle approach.
Whichever method you choose, the goal is a coat that feels barely damp to the touch, not soaking wet.
Step 3: Selecting and Fitting the Blanket for Damp Conditions
Never use a non-breathable stable sheet on a damp horse or in wet weather. You need a breathable, waterproof turnout blanket. Its lining allows moisture vapor from the horse to escape while keeping external rain out. Once the coat is nearly dry, perform this four-point fit check:
- Withers Clearance: Slide your hand flat over the withers. You should have room for your palm to move freely without pressure.
- Shoulder Freedom: The blanket must allow full, unrestricted movement at the shoulder. Watch for any pulling when the horse steps forward.
- Chest Buckle Snugness: Fasten the front buckles so you can just fit your closed fist sideways between the blanket and the horse’s chest. Too loose catches wind; too tight restricts breathing.
- Leg Strap Length: Leg straps should be adjusted to hang about a hand’s width below the belly. Cross them to prevent rubbing on the inner thighs.
Step 4: Securing the Blanket and Post-Blanketing Monitor
Fasten everything in this order for safety and a smooth fit. First, secure the front chest buckles. Second, attach the belly surcingles, ensuring they are snug but not tight. Third, connect and adjust the leg straps. Finally, do a full walk-around check, smoothing out any wrinkles over the back and shoulders. Your job isn’t done once the blanket is on; plan to check underneath it every few hours for the first day. Feel for damp spots, heat, or any new wrinkles that could cause rubs. A comfortable, blanketed horse will act normally-grazing, resting, or interacting with buddies. Signs of discomfort include frequent rolling, standing hunched, or repeatedly trying to bite at the blanket.
Choosing the Right Blanket: Your Horse’s Weather Shield
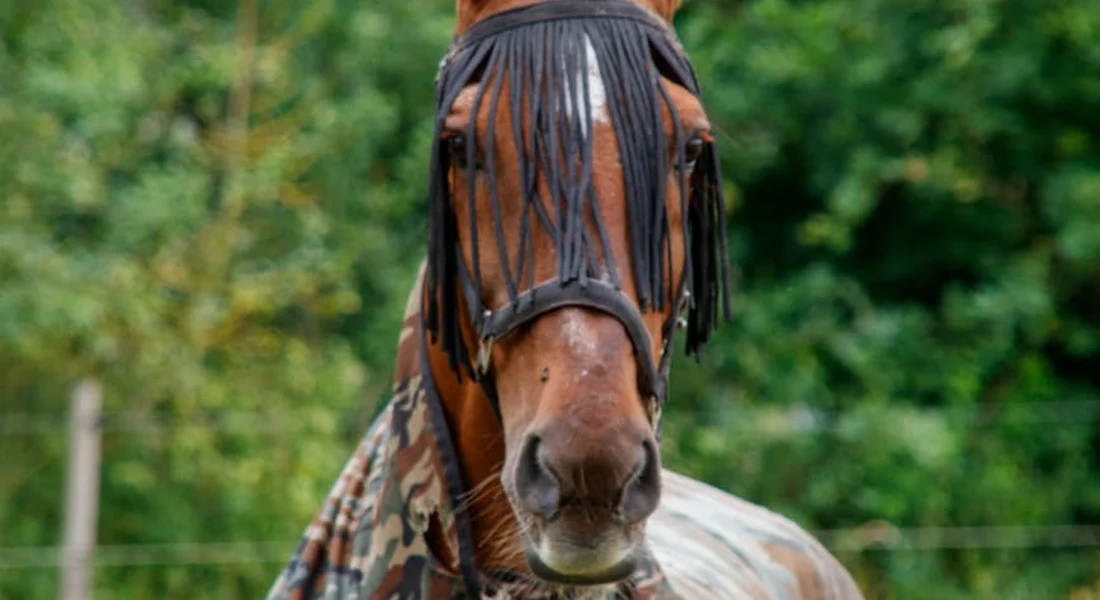
Decoding Blanket Types: Turnout, Rain Sheet, and Layers
Think of your horse’s wardrobe like your own: you have a light rain jacket and a heavy winter coat. A rain sheet is that light jacket-no insulation, just a waterproof and breathable shell for chilly rain. A turnout blanket is the insulated winter coat, built to repel wind and wet while providing warmth. The secret is in the layering system; some blankets allow you to add or remove a separate liner, giving you flexibility without buying three separate rugs.
Breathability is non-negotiable; a waterproof blanket that traps sweat is a recipe for a damp, chilled horse.
Here’s a quick comparison to keep straight in the tack room:
| Type | Best Use | Material & Key Feature |
|---|---|---|
| Turnout Blanket | Cold, wet, and windy weather. | Ripstop nylon outer, waterproof/breathable membrane, filled insulation. Built for durability against fence rubbing. |
| Rain Sheet | Warm-season rain or a clipped horse in mild, wet weather. | Lightweight, waterproof/breathable shell with no fill. Often has a silky lining to smooth the coat. |
| Layered System | Fluctuating temperatures; one shell, multiple insulation weights. | Durable outer shell with straps or clips for separate liners. Cost-effective for variable climates. |
My old gelding Rusty, the puddle-hater, taught me the value of a tough turnout. A cheap blanket’s waterproof coating shredded on the first bramble he brushed against. Investing in a durable, well-constructed turnout meant he stayed dry through his dramatic puddle-avoidance maneuvers.
The Anatomy of a Good Fit: Withers, Buckles, and Straps
A poorly fitted blanket rubs, restricts movement, and, critically, lets water in at the seams and neck. The goal is snug but not tight, with room for full shoulder extension. Always measure from the center of the chest to the point of the buttock for the correct size.
A blanket that is too tight across the shoulders will pull forward, rub the withers raw, and strain the chest straps dangerously.
Perform these visual and tactile checks every time you blanket:
- Withers & Shoulders: You should easily fit your flat hand sideways between the blanket and your horse’s withers. The shoulder darts should align with their shoulder blade for free movement.
- Chest & Front Closure: The front should close without gaping or pulling. There should be no tightness when the horse lowers its head to graze.
- Body Coverage: The blanket should cover from withers to tailhead, not hanging past the tail or stopping short at the loin.
- Leg Straps & Belly: Cross leg straps or connect a single strap loosely. You want about a hand’s width of space under the belly. Straps should not hang low enough to catch a hoof.
The most common error is a blanket that is too small through the chest, causing the whole rug to shift forward. You’ll see pressure marks and the hindquarters will look uncovered.
Waterproofing Care: Making Your Blanket Last Seasons
Routine Cleaning Without Washing Out Protection
Mud and sweat contain oils and salts that clog the microscopic pores of the waterproof membrane. The best stable hack I know is to let thick, dried mud fully dry, then give the blanket a vigorous brushing with a stiff dandy brush before you ever get it wet. This knocks off the abrasive particles before they grind into the fabric during a wash.
Never use fabric softener, bleach, or harsh detergents-they strip the waterproof coating and leave a residue that attracts dirt.
For regular maintenance, follow these steps:
- Spot Clean: Use a damp sponge and a mild soap like Ivory or a technical gear cleaner for fresh stains.
- Gentle Washing: Use a front-loading commercial washer or a large tub at home. A top-loader with an agitator can damage blankets.
- Proper Detergent: Use a small amount of tech wash designed for waterproof fabrics or a clear, dye-free liquid soap.
- Rinse Thoroughly: Run a second rinse cycle to ensure all soap residue is gone, as this residue will block breathability.
- Air Dry Completely: Always air dry, never machine dry unless the care label explicitly states it’s safe. Lay flat or hang in a well-ventilated area, out of direct sun if possible.
Re-Waterproofing Treatments and When to Apply Them
Waterproofing doesn’t last forever. You’ll know it’s failing when water stops beading up and rolls off the surface, and instead soaks into the fabric, darkening it. Your horse’s back will feel damp after a rain. Before treating, the blanket must be impeccably clean and bone dry.
Applying a waterproofing treatment to a dirty blanket is like sealing in grime; it will never work properly.
Choose an equine-safe waterproofing spray or wash-in product. For sprays, work in a well-ventilated area, apply an even coat, and let it dry fully. Wash-in products go in the final rinse cycle. Re-treat only the outer shell, not the lining. A good rule is to re-waterproof at the start of each wet season, or whenever you notice diminished performance.
Off-Season Storage for Horse Blanket Longevity
How you store your blankets in spring determines if they’ll be ready and functional next fall. Mice love to nest in stored horse blankets, and mildew thrives in damp, dark places.
Storing a damp blanket in a plastic bag for the summer is a guarantee you’ll open a moldy, ruined mess come autumn.
Follow this concise checklist for off-season storage:
- Clean Thoroughly: Wash, dry, and re-waterproof if needed before storing.
- Repair Any Damage: Fix torn straps, broken buckles, and small rips now so the blanket is ready-to-go.
- Fold Neatly: Avoid harsh creases. Store in a large, breathable cotton storage bag or an old pillowcase.
- Choose a Dry Place: A cool, dry closet or tack trunk is ideal. Avoid hot attics or damp basements.
- Protect from Pests: Consider adding cedar blocks or lavender sachets to deter moths and mice.
Proactive Barn Management for Wet Weather

Creating a Dry Refuge: Stall and Turnout Tips
Stop fighting the weather and start working with it. Good barn management means setting up your space so your horses can handle a shower on their own terms. Your first line of defense is a well-draining paddock that doesn’t turn into a bog after one rain. I learned this after Rusty, my puddle-phobic Quarter Horse, staged a peaceful protest at a muddy gate.
- Improve Drainage: Add gravel or sand to high-traffic zones like gates, feeders, and water points. A slight slope away from shelters helps water run off.
- Install Windbreaks: A three-sided run-in shed or a line of dense trees cuts the wind chill dramatically. The difference in your herd’s posture is visible; they’ll stand relaxed instead of braced.
- Maintain Dry Zones: In stalls, bank deep bedding against the walls. In turnout, ensure at least one covered, elevated spot stays dry. The creak of a horse lying down on dry shavings is a sure sign of comfort.
My core philosophy? Turnout is paramount. A horse walking, grazing, and socializing in the field generates body heat and allows its coat to loft properly, creating natural insulation. For a healthy, unclipped horse, this is almost always better than confinement. Luna’s high energy is better spent moving outdoors than pacing a stall.
When to Let Nature Be: The Case for No Blanket at All
Sometimes, the best blanket is no blanket at all. We can undermine a horse’s natural resilience by over-wrapping them. If your horse is dry, has a good coat, and access to shelter, skipping the blanket is often the kindest choice. This trusts their evolution and promotes equine welfare. For a more complete winter plan, our ultimate winter horse care guide covers blanket decisions, feeding, and safe exercise.
Look for these signs that a blanket might be unnecessary. Is the weather dry and above freezing? Is your horse maintaining weight easily? Can they get out of the wind? Over-blanketing a dry horse risks overheating and sweat-soaked fur, which then chills them more than a cold rain ever could. I check for dampness at the base of the mane and behind the elbows-if it’s dry there, the coat is working. Even if you are certain about the temperature, sometimes blankets can do more harm than good.
Take Pipin, my Shetland pony. That food-motivated escape artist has a coat like a woolly bear. Pipin proudly goes “naked” through most winters, using his shed when he pleases and coming in with a toasty, dry layer of fur. He’s a perfect example of a hardy type who needs our interference least. His natural defenses, coupled with smart shelter, are all he requires.
Observe more, intervene less. Your horse’s behavior is the best gauge: if he’s not shivering, huddled away from the herd, or losing condition, his own biology has the situation well in hoof. Save your waterproof blankets for truly harsh conditions, like driving sleet or for a body-clipped horse. Let a good hair coat do its job. Know when to blanket your horse.
FAQ: How to Blanket a Wet Horse Safely
How long should I wait to blanket a horse after it gets wet?
You should wait until the horse’s coat feels barely damp to the touch, not soaking wet. The required time depends on your drying method, ranging from 30 minutes of vigorous toweling to a few hours of stall drying. Always ensure no steam is rising from the skin and the hair is no longer matted down before putting on a blanket.
Can a slightly damp blanket make my horse sick?
Yes, putting a damp blanket on a dry horse can create a moist environment that chills the skin and promotes bacterial growth. A blanket that is wet on the outside from rain but has a dry, breathable lining is generally safe for turnout. However, a blanket that is damp or mildewed on the inside should never be used and must be cleaned and thoroughly dried first. Even when it comes to natural rain exposure, it’s important to take precautions.
I’ve heard about using beer to waterproof a blanket. Is this effective?
No, using beer or other home remedies is not an effective or recommended waterproofing method. Beer can leave a sticky residue that attracts dirt and may damage the blanket’s technical fabric. For reliable protection, always use a cleaner and reproofer specifically designed for technical, waterproof equestrian textiles.
Final Thoughts from the Stable
Your key tools are a sweat scraper, dry towels, and a waterproof turnout blanket that fits well. The most critical rule is to never put a blanket on a soaking wet horse; always towel or hand-walk them until their coat is just damp to the touch.
Every horse dries at their own pace, so patience here is a direct act of good horsemanship. Your best guide isn’t the clock, but watching your horse for signs of comfort or chill.
Further Reading & Sources
- How to Waterproof Horse Blankets – Blog
- Blanket Water proofing? | The Horse Forum
- The Importance of Waterproof Horse Blankets – Aloga Equestrian
- Amazon.com: Horse Blankets & Pet Apparel Waterproofing Spray 16 oz : Pet Supplies
At Horse and Hay, we are passionate about providing expert guidance on all aspects of horse care, from nutrition to wellness. Our team of equine specialists and veterinarians offer trusted advice on the best foods, supplements, and practices to keep your horse healthy and thriving. Whether you're a seasoned rider or new to equine care, we provide valuable insights into feeding, grooming, and overall well-being to ensure your horse lives its happiest, healthiest life.
Basic Grooming Techniques