
How to Repair Common Saddle and Bridle Damage: A Practical Guide for Horse Owners
Hello fellow equestrians! That sudden pang of dread when you spot a frayed stitch or a dry crack in your leather isn’t just about gear-it’s about safety for you and comfort for your horse. Ignoring small tears or stiff leather can lead to costly replacements or, worse, a dangerous equipment failure right when you need trust the most.
Let’s turn that worry into action. I’ll guide you through simple, barn-tested fixes for the issues you’re most likely to face. This article will walk you through repairing torn stitching with the right tools and technique, nourishing and sealing dry, cracked leather to prevent further damage, safely replacing broken buckles and worn billet straps, and cleaning and softening tack that’s gone stiff or moldy in the back of the tack room.
I’ve managed tack rooms and trained horses for years, mending everything from Luna’s delicate bridles to Rusty’s workhorse saddle, so you’re learning from hands-on, hay-dust experience.
Spotting Trouble: A Guide to Common Tack Damage
Your tack tells a story with every ride, and learning to read its signs keeps both you and your horse safe. That same vigilance carries into tacking up. Check the cinch, girth, and buckles as you go. Make a habit of running your hands over leather and listening for odd sounds—it’s a simple ritual that catches big problems before they become dangerous. I do this with all our school tack, and it saved Rusty from a nearly-failed billet just last week.
Here are the usual suspects you’ll encounter in the barn:
- Minor scuffs: These are surface abrasions from brushes with walls or trees. They look bad but are mostly cosmetic.
- Deep scratches: Gouges that penetrate the leather’s top layer. Feel for rough edges that can weaken the material over time.
- Torn straps: Look for splits, especially at high-stress areas like buckle holes or where the bit attaches. A small tear grows fast.
- Popped stitching: Watch for loose, broken, or missing threads. Listen for a new creak in your saddle-it’s often stitching giving way.
- Cracked leather: Dry, brittle areas that fold instead of bend. The leather loses its oily smell and feels stiff to the touch.
- Loose buckles: Buckles that wiggle or spin on their posts. They can snap under pressure during a ride.
- Worn billets: The leather thins and stretches from friction. Check where the billet folds over the buckle for a shiny, weak spot.
- Suspected tree damage: A serious but rare issue. If your saddle feels uneven or groans under weight, stop using it immediately.
Trust your fingertips and ears during checks. The stiff patch on a rein or the unusual groan from a tree are silent alarms you must heed for your horse’s comfort. Knowing how to interpret these signs is just as crucial as understanding their body language.
This table helps you decide what to fix first:
| Damage Type | Repair Urgency |
|---|---|
| Minor scuffs | Low: Condition at next cleaning. |
| Deep scratches | Medium: Fill to prevent further damage. |
| Torn straps | High: Do not ride. Repair or replace now. |
| Popped stitching | High: Stitching is structural. Fix immediately. |
| Cracked leather | Medium: Rehydrate carefully. May need patching. |
| Loose buckles | Medium: Tighten or replace before next use. |
| Worn billets | High: Replace if leather is thin. Failure risks a fall. |
| Suspected tree damage | Critical: Professional assessment required. Do not use. |
Building Your Barn-Side Repair Kit
A dedicated repair kit turns a panic moment into a quick fix. Quality matters here-skimp on supplies, and your repair might fail when Luna spooks or Pipin leans into his lead. I once used bargain glue on a bridle, and it peeled apart in the rain. Good contact cement saved the day later.
Stock your kit with these essentials:
- Leather conditioner: Maintains suppleness and prevents cracks. Use it regularly.
- Saddle soap: Cleans without stripping oils. The smell of fresh, clean leather is a barn luxury.
- Contact cement: Creates a strong, temporary bond for tears. It holds while you stitch.
- Heavy thread and needles: Waxed thread and blunt needles make saddle stitching durable and easier.
- Rivets and a setter: Reinforce high-stress points like buckle attachments securely.
- Replacement buckles: Keep assorted sizes. They’re cheap and vital for quick swaps.
- A sharp knife: Trims frayed edges cleanly. A dull blade damages good leather.
- Hole punches: Round or oval punches fix worn holes or adjust fit quickly.
Keep your supplies organized and portable. Use a clear, lidded box so you can see every item at a glance, and store it somewhere dry to protect thread from barn moisture. Mine lives on a shelf in the tack room, and it’s been a lifesaver more times than I can count, especially when I was just starting out.
Fixing Surface Flaws: Scratches, Scuffs, and Color Loss

That first deep scratch on a new saddle can feel like a heartbreak, but I promise it’s a story waiting to be fixed. Surface flaws are wear and tear from a life well-lived with your horse. Regular attention to these minor issues prevents the leather from drying out and cracking, which is crucial for your horse’s comfort and your safety. I’ve spent many quiet afternoons in the tack room with Pipin poking his head over the stall door, supervising my work. Sometimes the bigger question isn’t the scratch itself, but whether the saddle fits your horse. Are signs of a poorly fitting saddle something you should watch for?
Tools for the Job
You don’t need a professional workshop. These are the same items I reach for after a muddy trail ride with Rusty. Having a dedicated kit means you can address damage before grime works its way deeper into the leather.
- Clean cloths: I use soft, cotton rags. Old t-shirts are perfect for applying conditioner without leaving lint behind.
- Saddle soap: Choose a glycerin-based soap. It lifts dirt without harsh chemicals that strip natural oils.
- Leather conditioner: A good conditioner smells like beeswax and hay. It replaces moisture lost to sun and sweat.
- Matching dye: For color loss, a liquid dye works best. Test it on a hidden tab first-I learned this after turning a bridle patch an odd shade of purple.
- Edge burnishing tools: A wooden slicker or glass burner seals cut edges. This simple step makes tack look professional and lasts longer.
The Step-by-Step Process
Go slow and let the products work. Rushing leads to sticky residue or blotchy color. This process isn’t just about aesthetics; it’s preventative care that extends the life of your investment.
- Clean the area thoroughly with saddle soap. Use a damp cloth to work a rich lather into the leather in small circles. Wipe away all soap with a clean, damp cloth. Let it air dry completely. Never use heat.
- Condition the leather to restore suppleness. Apply a nickel-sized amount of conditioner to your fingers and massage it deep into the grain. Leather should feel like a well-worked baseball glove, not a stiff board. Let it absorb for several hours.
- Apply dye for deep scratches, using layers for color matching. Use a small, precise brush. Apply the first thin layer and let it dry for fifteen minutes. Add two or three more layers until the color blends. This builds depth and hides the flaw.
- Burnish edges for a finished look and durability. Dampen the edge slightly with water. Press hard with your burnishing tool, pulling it along the length. The friction heats and compacts the fibers, creating a smooth, sealed edge that resists fraying.
Repairing Structural Damage: Tears, Stitches, and Straps
Structural damage is the serious stuff-the tears and popped stitches that can fail when you least expect it. Your horse’s security depends on the integrity of every strap and seam, so never gamble with a compromised piece, especially when you’re tying your horse in potentially hazardous situations. I once had a stirrup leather snap on a steep incline; it was a vivid lesson in regular inspection.
Mending a Torn Leather Strap
First, assess the damage. Is the tear clean or frayed? How long is it? A tear over an inch long or one that cuts across a high-stress area, like a billet strap, usually means replacement, not repair.
- For a clean, short tear, contact cement and a backing patch can work. Sand the area lightly inside the tear. Apply a thin layer of leather contact cement to both sides, wait until tacky, then press together. Cut a small patch from an old belt, cement it over the tear on the flesh side, and clamp it overnight. This reinforcement spreads the load and can add years to a strap.
- Stitching is necessary for any repair that must bear weight or for complete strap replacement. If the leather is weak or the tear is at a buckle hole, replace the entire strap. Use a sharp awl to punch new holes in the replacement leather, mirroring the old strap’s measurements exactly.
Re-Stitching a Broken Seam
Broken stitches are a common ailment for well-used tack. Re-stitching is a satisfying skill that saves a piece from the trash bin and connects you to the craft of saddlery.
- Use a double needle and heavy thread for saddle and bridle repair. This creates a strong, locked stitch. Waxed linen or synthetic saddlery thread is best. Thread two harness needles, knot the ends together, and start from the middle of the broken section. The pull-and-tug rhythm is steady, like the creak of a barn door in the wind.
- Stress the importance of following the original stitch holes. Never make new holes next to old ones. Use your awl to carefully re-open the existing holes. This preserves the leather’s strength. Sewing through virgin leather weakens it and can cause the seam to tear along a new line of perforations.
Reviving Dry Leather and Securing Wobbly Hardware
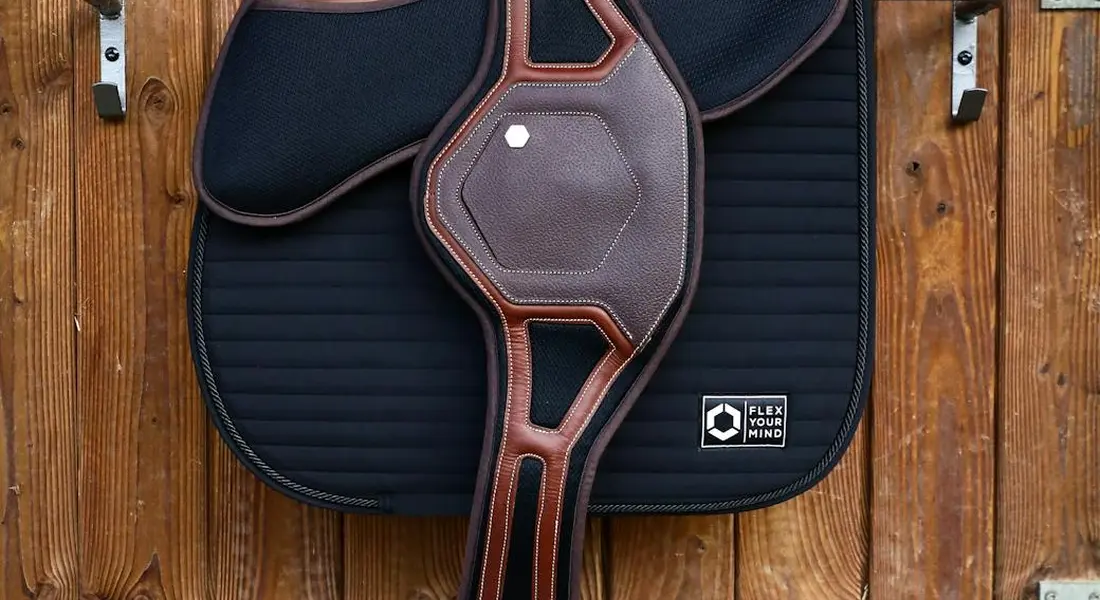
Addressing Cracked or Parched Leather
Finding leather that’s gone stiff and pale can make your heart sink, like the time I pulled Rusty’s old trail bridle from the back of the tack room. It felt more like a brittle leaf than supple gear. Restoring dry leather is a marathon, not a sprint, requiring patience and the right products to avoid further damage. You must commit to multiple deep-conditioning sessions, working the nourishment in slowly to rehydrate the fibers from the inside out.
- Start by cleaning with a damp cloth and saddle soap to remove surface dirt. Apply a generous amount of a high-quality, oil-based conditioner like neatsfoot or a lanolin blend, massaging it into every fold and crevice. Let the tack absorb it for 24 hours in a cool, dry place, then wipe off any excess. Repeat this process every few days until the leather becomes pliable and regains a healthy sheen.
- Avoid silicone-based sprays and quick-shine products. They create a superficial gloss that seals the surface, trapping dirt and masking underlying dryness that will eventually lead to catastrophic cracking. Your horse deserves better than tack that could snap under pressure.
Fixing Loose or Broken Buckles and Rivets
That faint jingle from a loose buckle isn’t just annoying; it’s a safety hazard waiting to happen. I’ve seen a cheek piece buckle fail on a green horse, and it’s a scenario you want to avoid. Replacing hardware is a straightforward repair that bolsters safety and extends your tack’s life dramatically. Gather a sharp awl, a rivet setter, a small hammer, and replacement buckles and rivets from a tack shop.
- To remove an old rivet, use the awl to pry up the backplate (the burred side) until you can push the rivet out. Clean the hole with the awl tip. Insert a new rivet from the front, place the backplate on, and use the rivet setter and hammer to crimp it securely. The thud of a well-set rivet is a sound of pure satisfaction.
- Always match the buckle size and style exactly. A wider tongue on a narrower strap or a differently shaped dee-ring can create uneven pressure points on your horse’s face or body, leading to discomfort and sores. Safety isn’t just about strength; it’s about perfect fit.
Assessing and Addressing Saddle Tree Concerns
The tree is the skeleton of your saddle, and a problem here is serious business. During a pre-ride check, run your hands along the panels and listen closely. A subtle creak or pop that wasn’t there before can be the first whisper of tree trouble, a sound that should make you stop everything. Look for asymmetrical wear on the panels or a visible twist in the saddle’s shape when it’s on a stand.
- Check for damage by firmly flexing the saddle from pommel to cantle near your ear; any cracking or snapping sounds are red flags. Press along the panels for inconsistencies-a soft spot or a lump can indicate a broken rail. These checks are as vital as checking your horse’s hooves before a ride.
- Major tree damage is a job for a professional saddler-never ride on a compromised tree. A broken tree can collapse during work, causing severe injury to both you and your horse. This is non-negotiable. If in doubt, take it to an expert.
- Minor cosmetic issues, like loose stitching on the gullet or superficial scuffs, are often fixable at home with a needle and thread. Structural faults, such as a cracked head or twisted bars, are not. When the integrity of the frame is in question, your only job is to seek professional repair.
Prevention and the Point of No Return: Maintenance & Judgment Calls
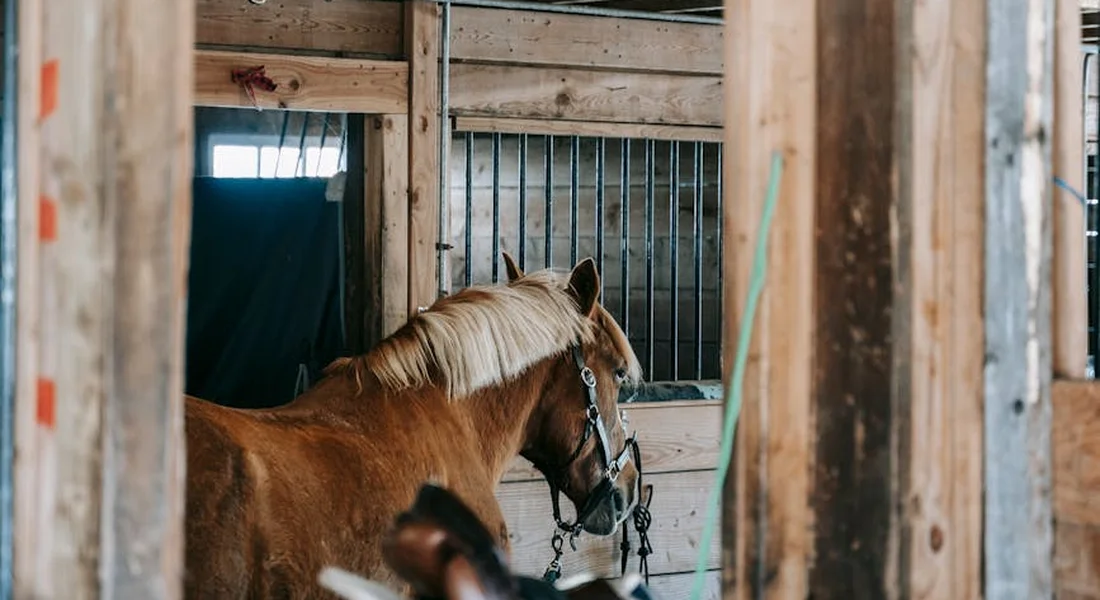
Think of leather care like feeding your horse: consistent, small efforts beat a single, frantic, yearly feast. A simple, regular routine keeps the leather fibers supple and strong, preventing most damage before it starts. It’s the difference between maintaining a healthy weight and dealing with a colic episode.
A Routine for Lasting Leather
My rule is clean first, condition after. Every week, or after a sweaty ride, I wipe down all leather with a damp sponge. I follow with a quality saddle soap, working it into a lather to lift dirt and sweat. Rinse the sponge, wipe off the soapy residue, and let the tack air dry completely-never by a heater, which bakes and cracks the leather. Once fully dry, a light application of a glycerin-based conditioner massaged into the leather will replenish its natural oils. I do this deep clean and condition weekly for high-use gear and monthly for lighter-use items. And while you’re at it, don’t forget to clean and maintain horse tack blankets as well. Regular washing and thorough drying help prevent odors and mildew and keep the whole kit in top shape.
For those inevitable soggy days, I have a stable hack. After a wet trail ride, I’ll quickly wipe down the tack with a 50/50 mix of white vinegar and water. It cuts through sweat and mud without harming the leather. Then, I hang bridles and girths over a stall door in a figure-eight shape to encourage even air drying, preventing damp, stiff bends that can weaken the hide. My Thoroughbred, Luna, has skin so sensitive she’ll protest with head tosses if her bridle feels stiff or grimy, so this ritual is non-negotiable. Clean tack and clean hooves share the same hygiene ethic. A quick hoof check after rides completes the routine.
When to Repair vs. Replace Your Tack
No amount of conditioner can fix a structural failure. Knowing the difference is a matter of safety, not sentiment. Here are the signs your gear has reached its point of no return.
- Deep, Dry Cracks: Surface cloudiness is one thing. Cracks you can catch a fingernail in, especially near stress points like the tree points or bit rings, mean the leather’s core integrity is gone.
- Rotten or Missing Stitching: Thread rot is sneaky. If you can snap stitching with a firm pull, or if it’s brittle and discolored, it’s failed. One broken stitch is a fix; a row of rotten ones is a replacement.
- Compromised Safety Points: This is the absolute line. Billet straps stretched thin, twisted, or showing wear grooves must be replaced. Check stirrup leathers where they wrap over the bar and latigo ties for similar stress.
- A Feeling of Compromise: Leather that feels spongy, overly stiff, or has stretched permanently out of shape is telling you it’s fatigued. Trust that feeling.
I keep a retired bridle in the tack room as a teaching tool. You can see where the leather over the poll is thin and wrinkled from years of use. It’s still soft, but it’s retired because its job is done. Properly fit and adjusted horse tack protects sensitive areas and reduces rubbing. Mastering how to fit and adjust tack is part of gentle horsemanship. Replacing critical tack is the ultimate act of gentle horsemanship-it’s prioritizing your safety and your horse’s comfort over nostalgia or budget. My old reliable, Rusty, deserves gear as sound as he is.
| Issue | Likely Repairable | Likely Needs Replacement |
|---|---|---|
| Loose Stitching | Yes, if the leather itself is sound. | No, if the surrounding leather is rotten. |
| Surface Scuff | Yes, with cleaning and conditioning. | No, this is purely cosmetic. |
| Deep Crack in a Billet | No. This is a critical safety component. | Yes, immediately. |
| Stiff, Dry Leather | Maybe, with gradual reconditioning. | Yes, if it remains brittle and cracks. |
Frequently Asked Questions: How to Repair Common Damage to Saddles and Bridles
How to identify common types of damage to saddles and bridles?
Conduct a regular hands-on inspection, feeling for stiffness, thin spots, and rough edges while listening for new creaks or pops. Visually check for broken or discolored stitching, cracks in the leather, and any wear or distortion at high-stress points like buckle holes and billet folds. Trust your senses; a change in texture or sound is often the first sign of a problem that needs attention.
What tools and materials are needed for basic leather repair?
A basic barn-side kit should include quality leather conditioner, saddle soap, contact cement, and waxed thread with blunt needles for stitching. You will also need a sharp knife for trimming, hole punches, and replacement buckles and rivets with a setter for hardware fixes. Keep these supplies organized in a dry, portable box so you can address repairs quickly and effectively to your horse tack and equipment.
What are the signs that a piece of tack is beyond repair and needs replacement?
Replace tack immediately if you find deep, structural cracks you can catch a fingernail in, especially on critical safety components like billet or stirrup leathers. Gear must also be retired if the leather has become permanently spongy, brittle, or misshapen, or if multiple stitches are rotten and snap easily. When the structural integrity is compromised, replacement is the only safe option for you and your horse.
Keep Your Tack Trustworthy
Make a habit of running your hands over your leather at every grooming session, feeling for dry spots, loose stitches, or cracked billets. Catching a frayed stitch or a dry spot today prevents a broken stirrup leather or a torn bridle tomorrow.
This careful maintenance is a quiet promise to your horse that their comfort and safety come first. A willing partner is built not just from miles ridden, but from the trust forged in the consistent, gentle care of the equipment that connects you. That daily trust helps you build a strong bond with your horse. It all starts with care you can feel in every interaction.
Further Reading & Sources
- Saddle & Bridle Repair – Ploughman’s Saddlery & Belts
- Saddle and Bridle Repair Kit | Martin Saddlery
- Saddlery Repair, Saddle Repair, Bridle Repair, Wool Reflocking | Hastilow Competition Saddles USA, LLC.
- Martin Saddlery Saddle & Bridle Repair Kit – Teskeys
At Horse and Hay, we are passionate about providing expert guidance on all aspects of horse care, from nutrition to wellness. Our team of equine specialists and veterinarians offer trusted advice on the best foods, supplements, and practices to keep your horse healthy and thriving. Whether you're a seasoned rider or new to equine care, we provide valuable insights into feeding, grooming, and overall well-being to ensure your horse lives its happiest, healthiest life.
Equipment